Setup Partner Gateway and Partner Web App (Optional)
Before we start this section, close all the browser tabs except for this Instructions tab and Dev Spaces tab. This will help you navigate this section more easily.
Since we’ve gone through the Design and Governance sections of the Mobile API, in this section we will skip the design section. We’ll also keep discussions to only essentials :)
1. Publish Partner API to Service Registry
-
If you don’t have a browser tab open with OpenShift Dev Spaces, click on {devspaces_dashboard}[Dev Spaces IDE^, window="devspaces"], choose your workspace. If needed login with your username and password ({user_name}/{user_password}).
-
In Dev Spaces, navigate to the folder workshop/module-apim/partner/activedoc, and open the file partner-activedoc-draft.json.
-
Or type [Ctrl+P] and type the file name as
partner-activedoc-draft.json
-
-
Scroll to the bottom of the page where you can see the securitySchemes section
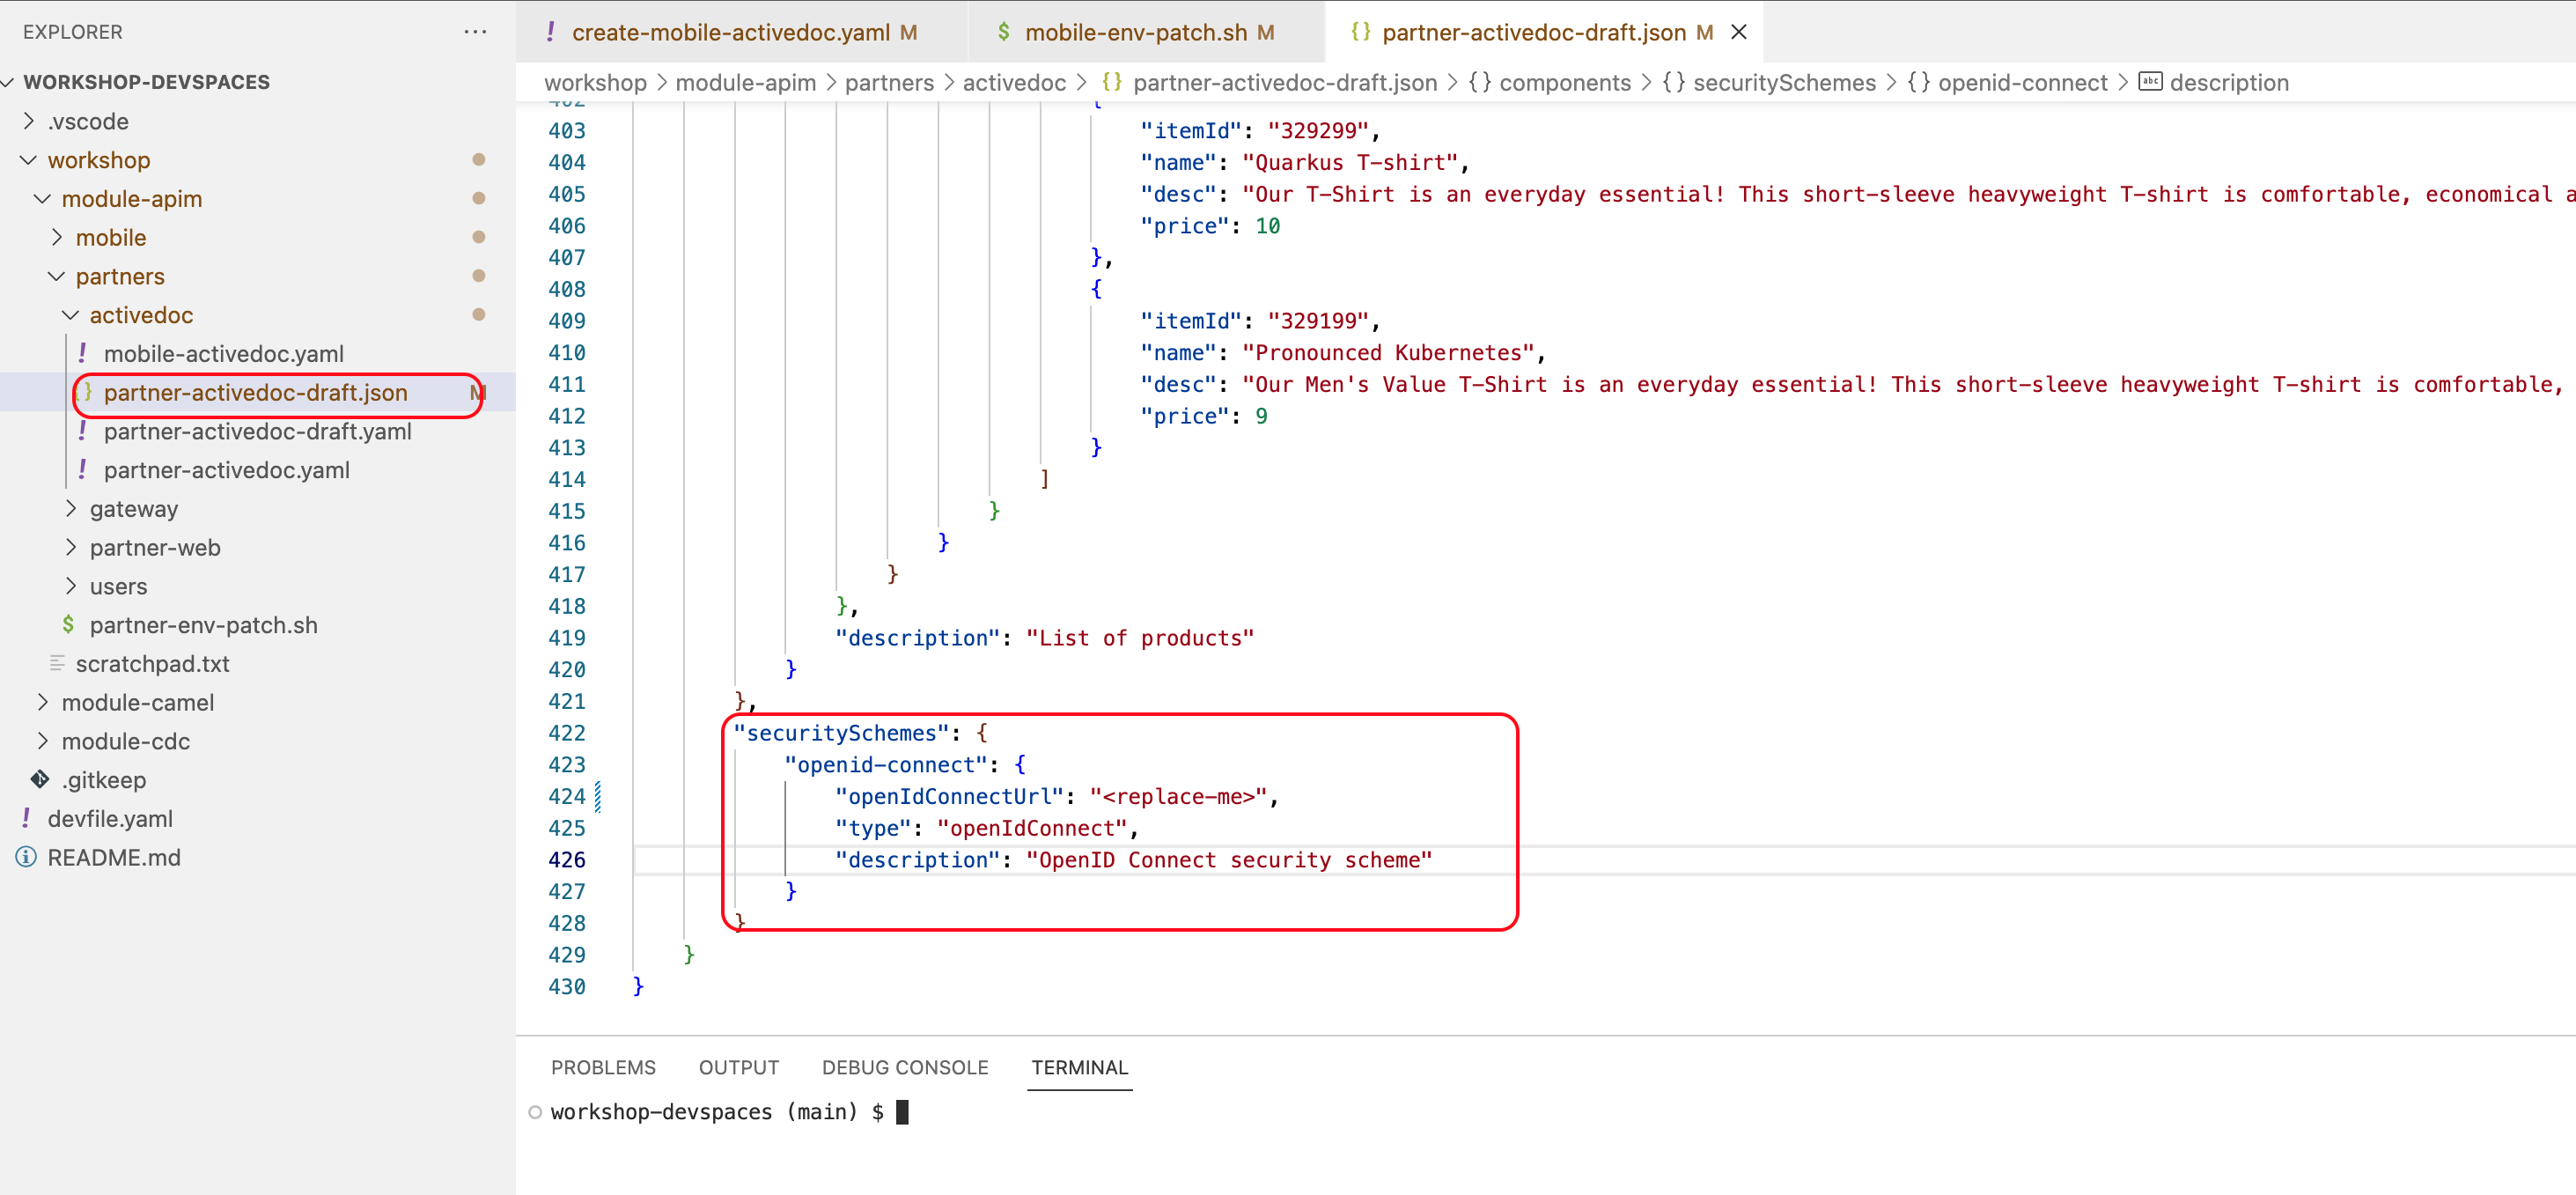 Figure 1. Partner OpenAPI Security Schemes section
 -
Substitute <replace-me> with the Keycloak’s OpenID Provider Configuration shown below
https://sso.{openshift_subdomain}/realms/globex-{user_name}/.well-known/openid-configuration Figure 2. Updated Security Scheme
 -
Execute the following command from the Dev Spaces’s Terminal.
-
This command makes a POST to the Service Registry API to create an OpenAPI schema for Partner Gateway API.
curl -X POST -H "Content-type: application/json; artifactType=OPENAPI" -H "X-Registry-ArtifactId: partnerapi" -d @/projects/workshop-devspaces/workshop/module-apim/partners/activedoc/partner-activedoc-draft.json {service_registry_app_url}/apis/registry/v2/groups/globex/artifacts
-
-
The following JSON is returned back by Service Registry confirming creation
Output response from Service Registry{"name":"Globex Partners API Gateway","description":"Globex APIs made accessible to global partners to view Globex's catalog and products","createdBy":"","createdOn":"2023-05-05T22:51:01+0000","modifiedBy":"","modifiedOn":"2023-05-05T22:51:01+0000","id":"partnerapi","version":"1","type":"OPENAPI","globalId":2,"state":"ENABLED","groupId":"globex","contentId":2,"references":[]}workshop-devspaces (main) -
You can view the newly created OpenAPI specification {service_registry_ui_url}/explore/globex/partnerapi[here^, window="serviceregistry"]
-
You can close the Service Registry browser tab.
-
2. Create Backend, Products, ActiveDoc and Users for Partner Gateway
2.1. Create Backend
-
In Dev Spaces , under the folder workshop/module-apim/partners/gateway, open the file partner-gateway-backend.yaml
-
Substitute "<replace-me>" with the Service endpoint of the Globex Partner gateway service appended with the port as
:8080. This URL is given belowhttp://globex-partner-gateway.globex-apim-{user_name}.svc.cluster.local:8080 -
After substitution the partner-gateway-backend.yaml file should looks like
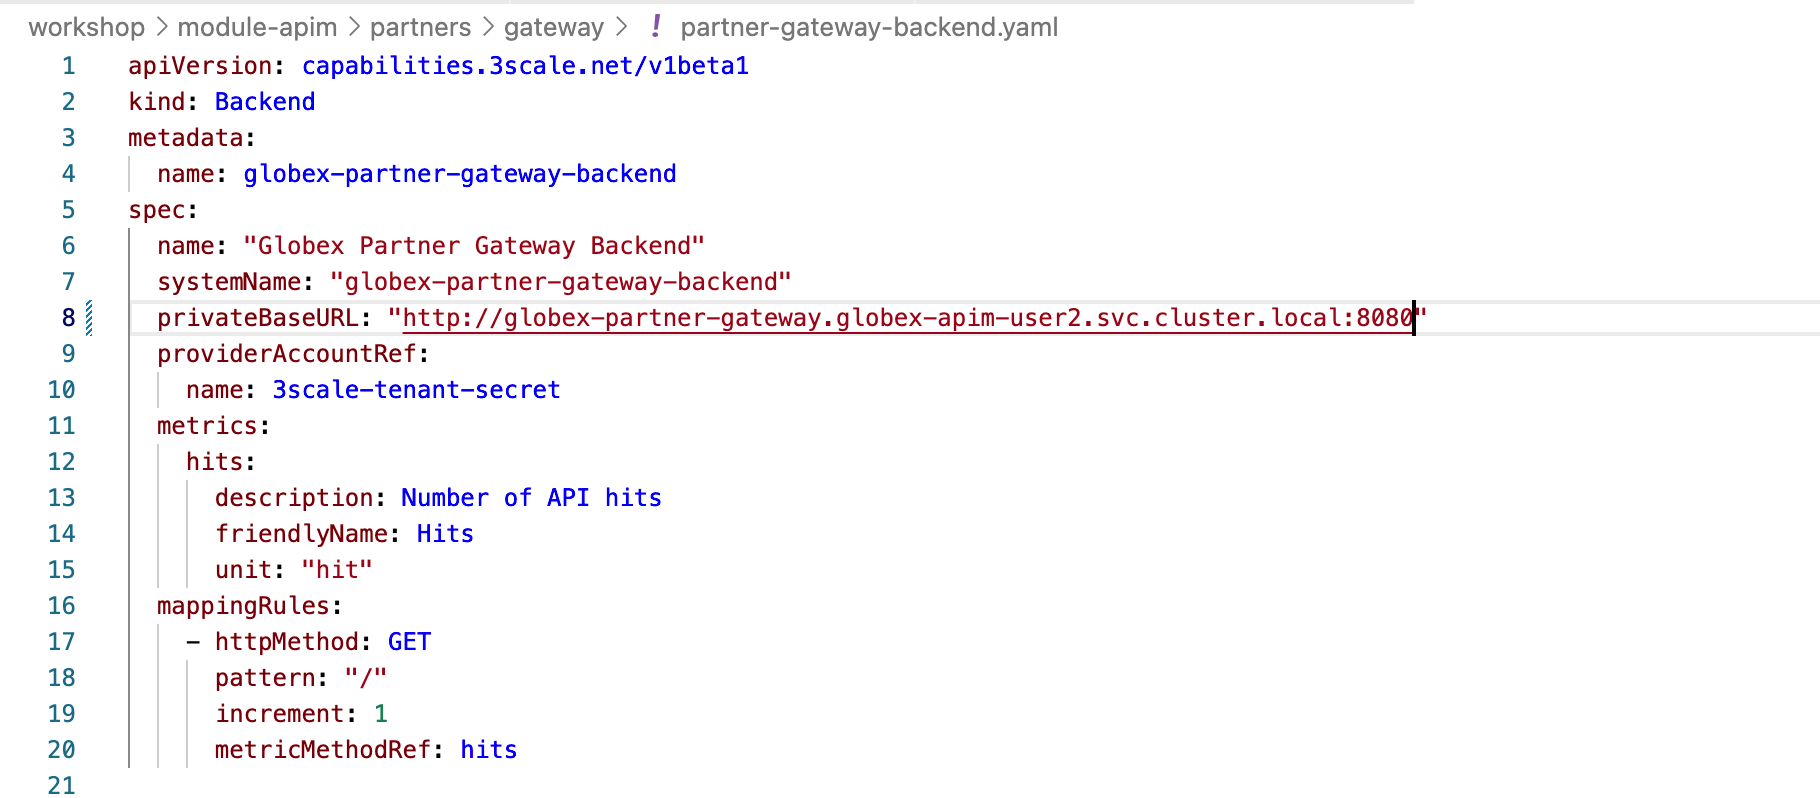 Figure 3. partner-gateway-backend file
 -
Run the following command which will create a Partner Gateway Backend in 3scale.
oc apply -f /projects/workshop-devspaces/workshop/module-apim/partners/gateway/partner-gateway-backend.yaml -n globex-apim-{user_name}Outputbackend.capabilities.3scale.net/globex-partner-gateway-backend created
2.2. Create Products
-
In Dev Spaces , under the folder workshop/module-apim/partners/gateway, open the file partner-gateway-product.yaml
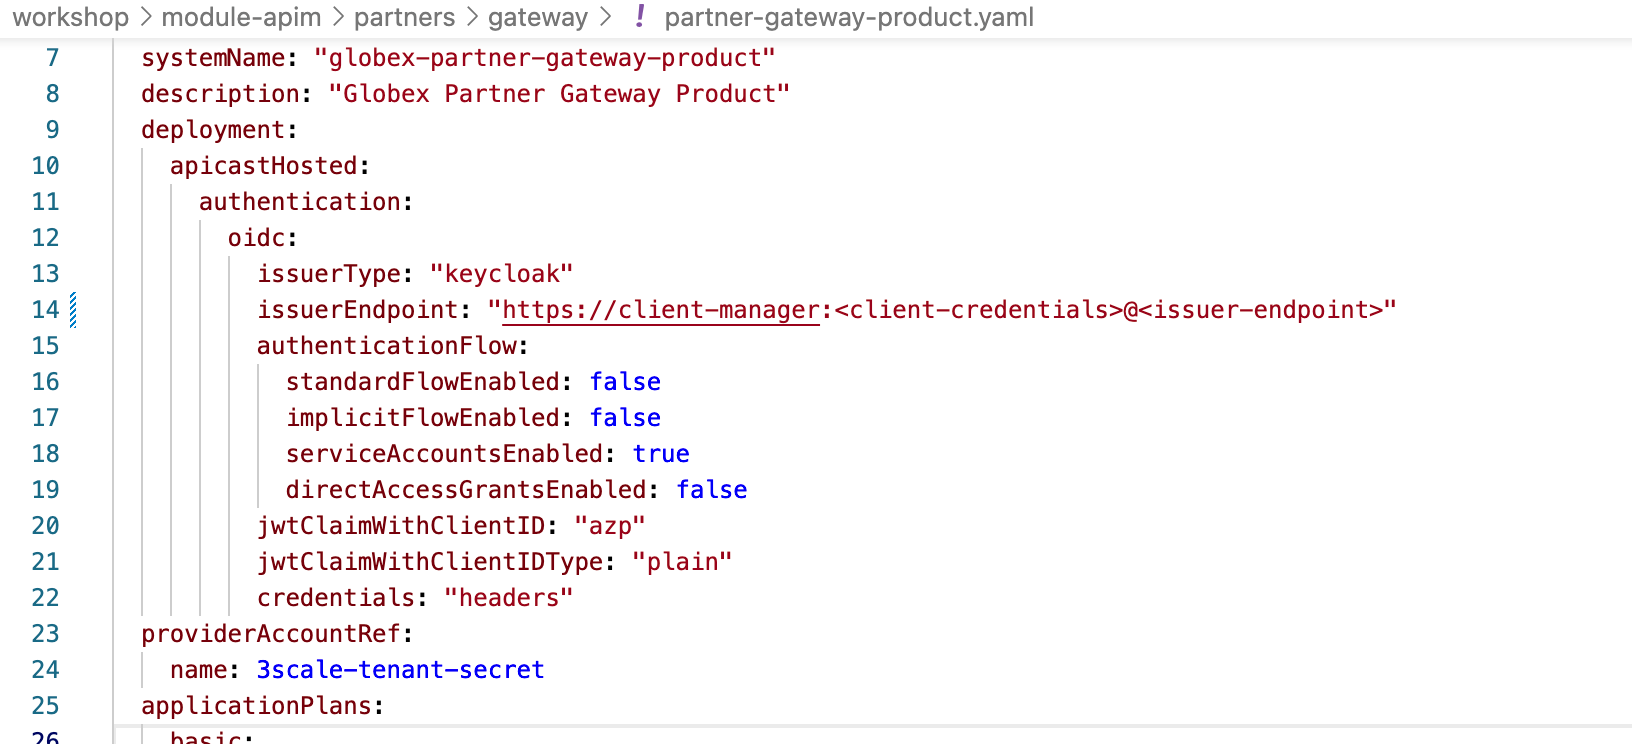 Figure 4. partner-gateway-product.yaml file
 -
Get the value for <client-credentials> placeholder as described below. Or if you have copied this into Scratchpad you can use that instead.
-
Open the {sso_tenant_console}/#/globex-{user_name}/clients[Keycloak Clients List^, window="sso"] from Keycloak.
-
Login if needed with ({user_name}/{user_password}).
In case you see an error stating You don’t have access to the requested resource or Network response was not OK or any other access error, you may notice that you are logged in as a user other than {user_name}. You will need to signOut, close the browser tab, and login again
-
Click on user name found on top right, choose signOut option, and close the browser
-
Reopen the {sso_tenant_console}/#/globex-{user_name}/clients[Red Hat Keycloak Clients List^, window="sso"].
-
Login as ({user_name}/{user_password}).
 Figure 5. Keycloak Login error
 -
-
-
Click on the Client ID client-manager. You can copy the credentials from the Credentials tab
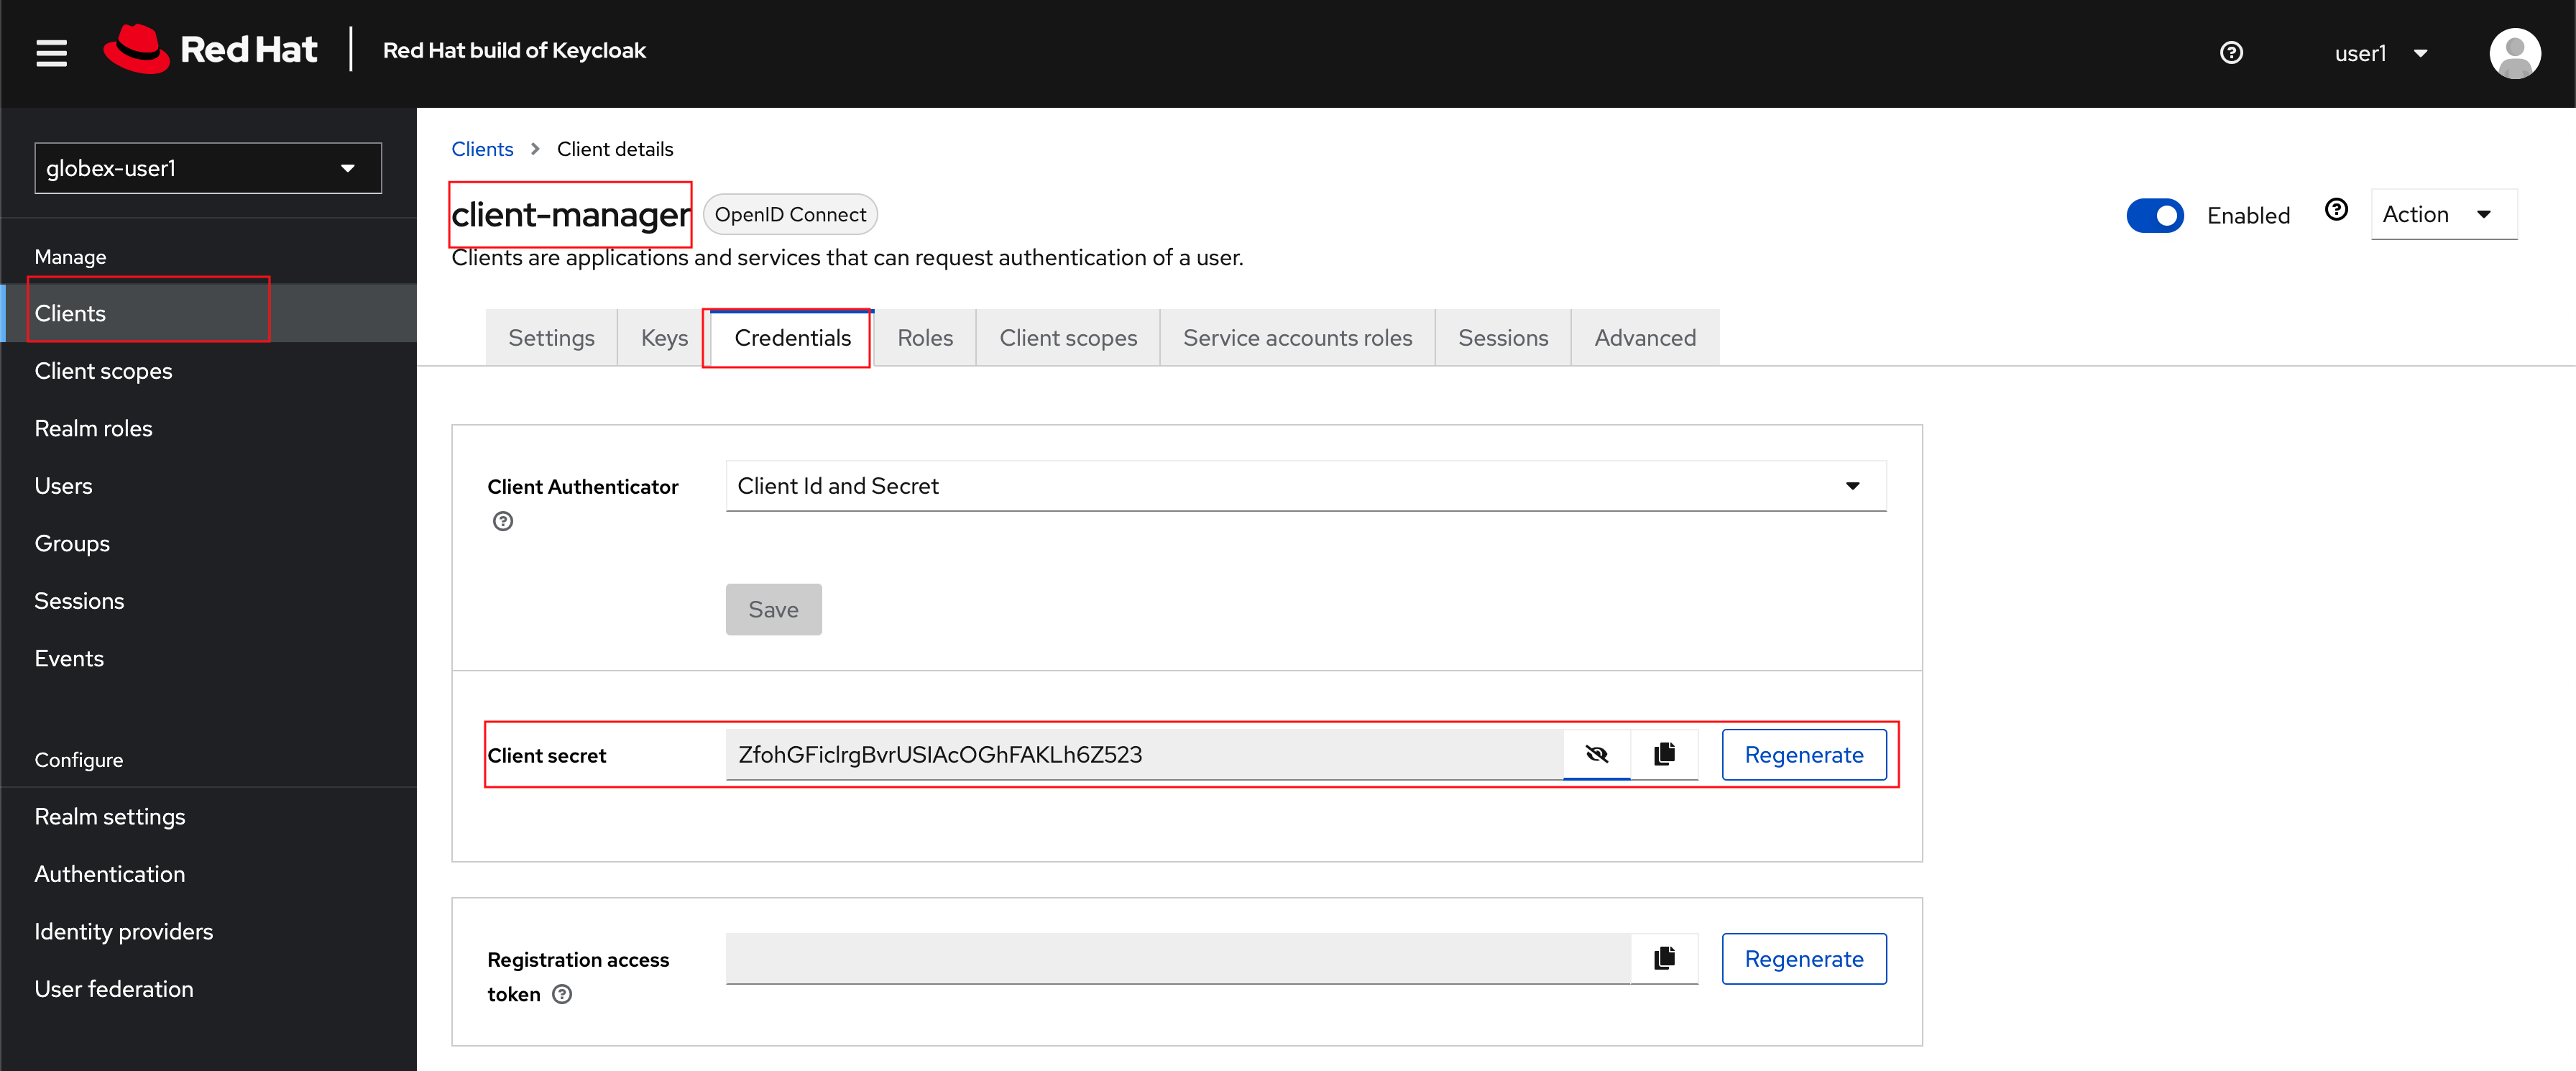 Figure 6. client_manager credentials
 -
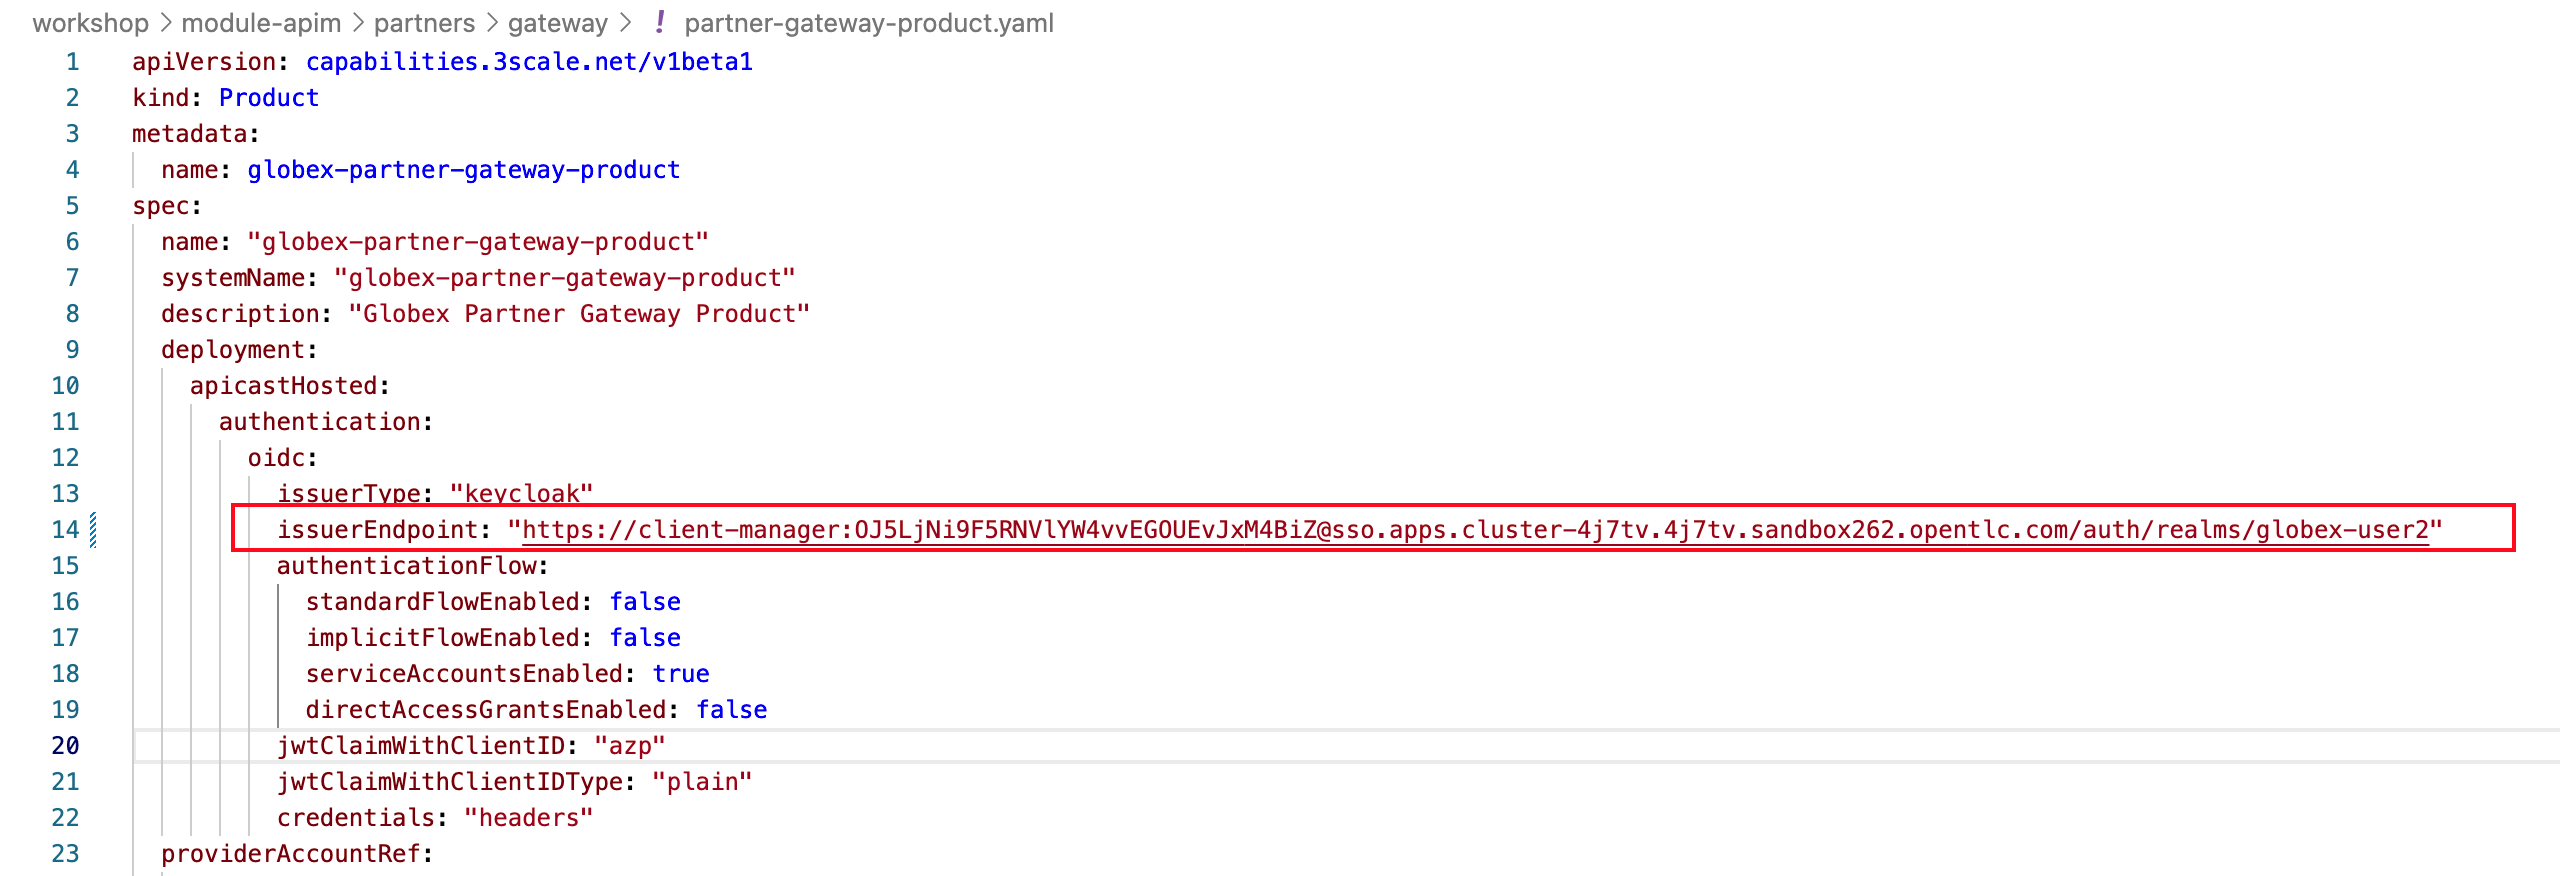
In the partner-gateway-product.yaml file, in Dev Spaces, substitute the following values
-
Substitute <client-credentials> with the Secret from the Client ID client-manager from the previous step
-
Substitute <issuerEndpoint> with the following value
sso.{openshift_subdomain}/realms/globex-{user_name}
-
-
The file partner-gateway-product.yaml looks like this now.
-
Run the following command in the Dev Spaces Terminal to create the product
oc apply -f /projects/workshop-devspaces/workshop/module-apim/partners/gateway/partner-gateway-product.yaml -n globex-apim-{user_name}Outputproduct.capabilities.3scale.net/globex-partner-gateway-product created
3. Create Active Doc for Partner Gateway
-
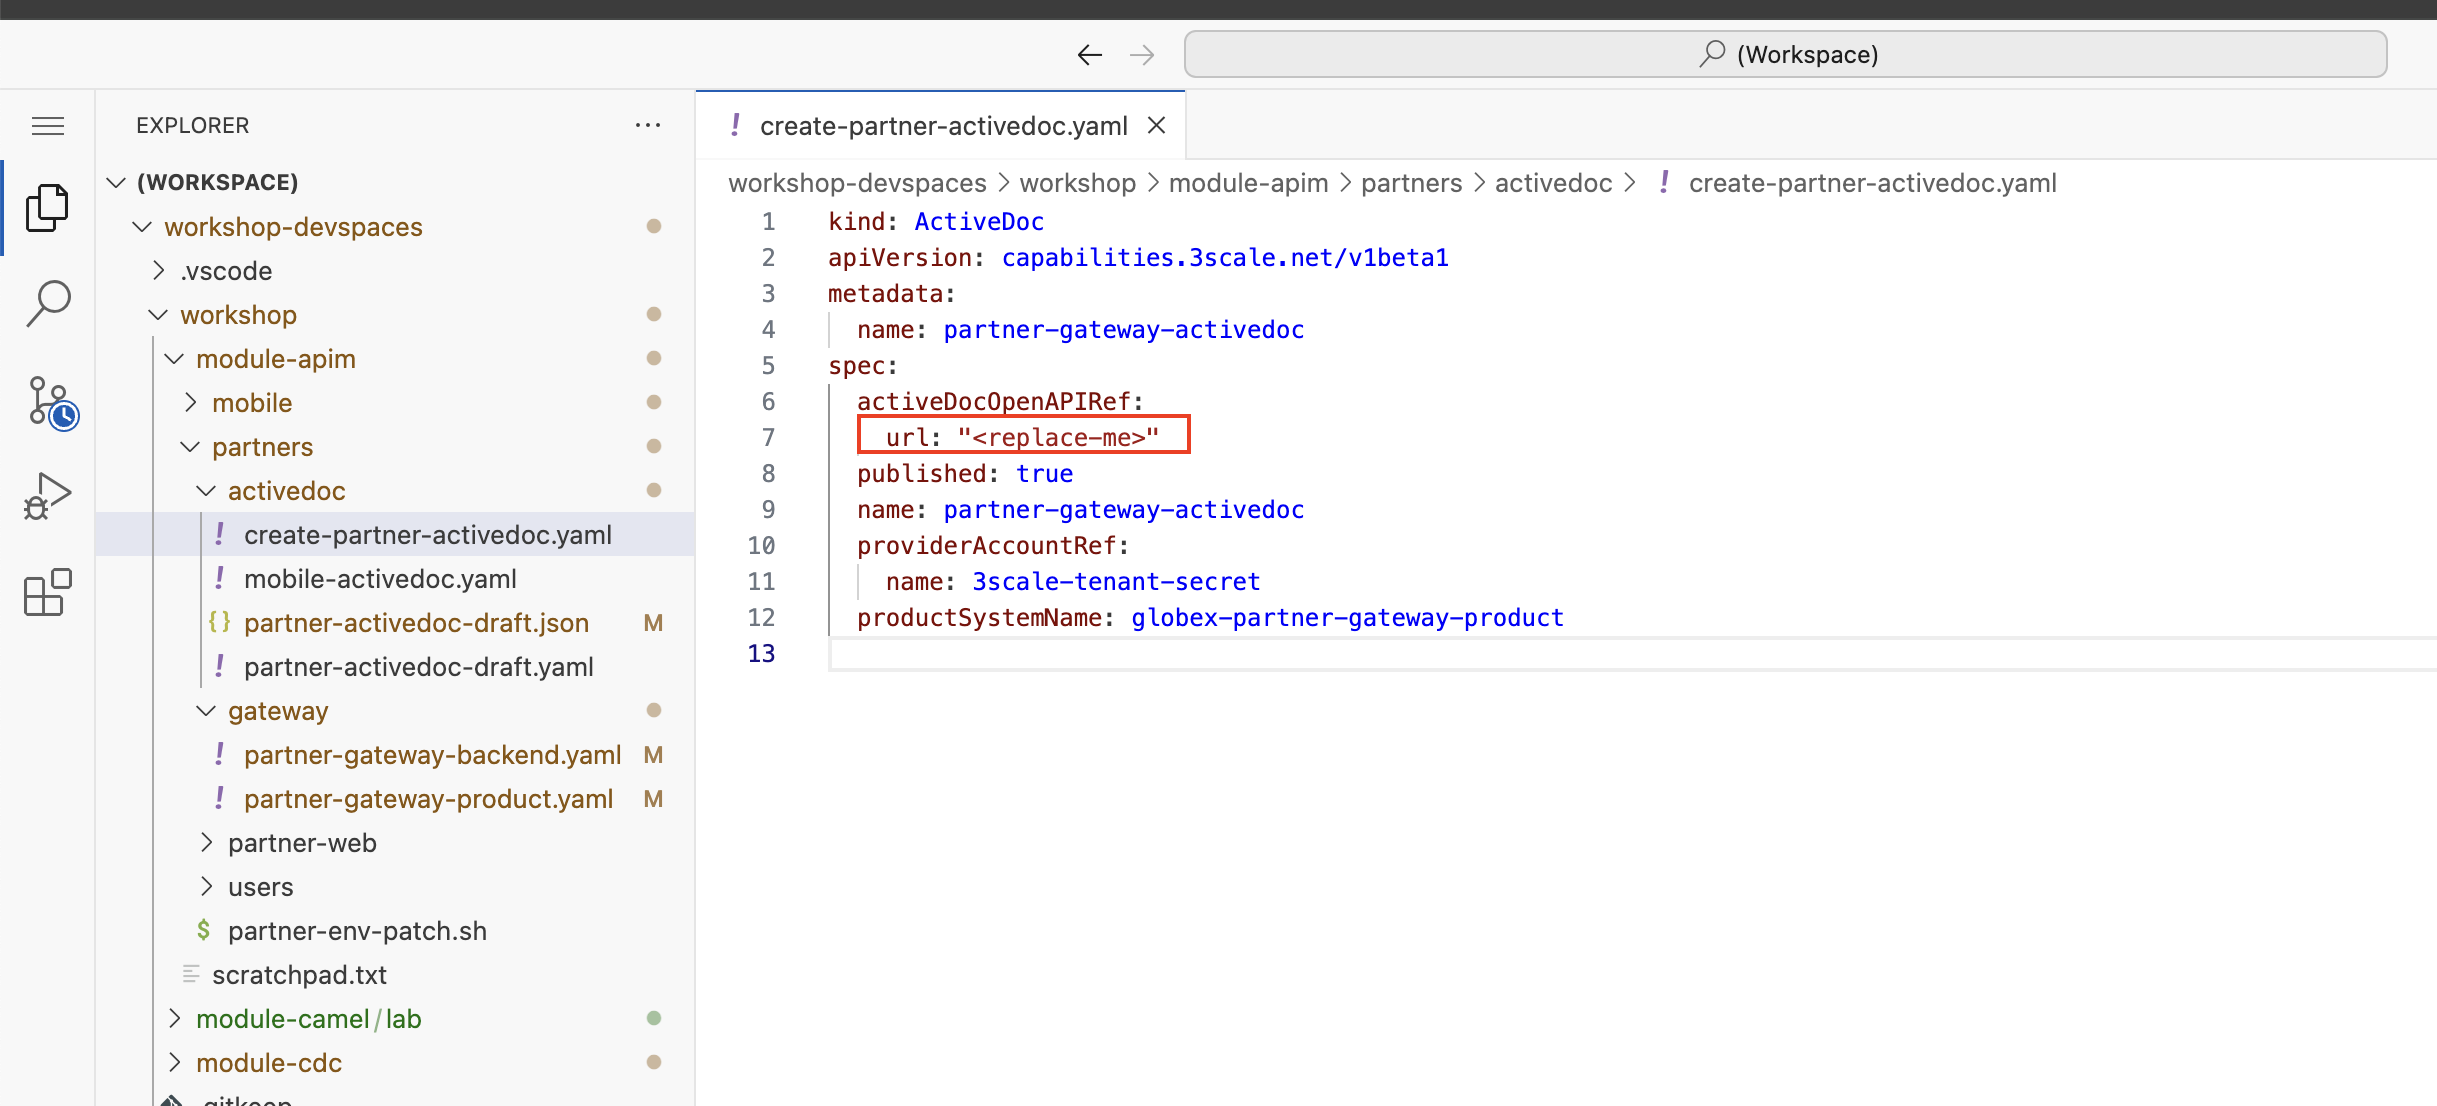
In Dev Spaces, navigate to the folder workshop/module-apim/partners/activedoc, open the file create-partner-activedoc.yaml
-
Replace the
<replace-me>placeholder with the Service Registry OpenAPI endpoint for Partner API show below{service_registry_app_url}/apis/registry/v2/groups/globex/artifacts/partnerapi -
Create this Active Doc by running the following command in the Dev Spaces Terminal
oc apply -f /projects/workshop-devspaces/workshop/module-apim/partners/activedoc/create-partner-activedoc.yaml -n globex-apim-{user_name}Outputactivedoc.capabilities.3scale.net/partner-gateway-activedoc created
4. Setup Partner users
The Partner app developers will also need access to the Developer Portal to signup for the APIs exposed to them. For the purpose of this workshop we will use the inbuilt developer user John.
5. Configurations on 3scale admin console
-
Navigate to the {3scale_tenant}[3scale admin portal^, window="3scale"] and login using your username and password ({user_name}/{user_password}).
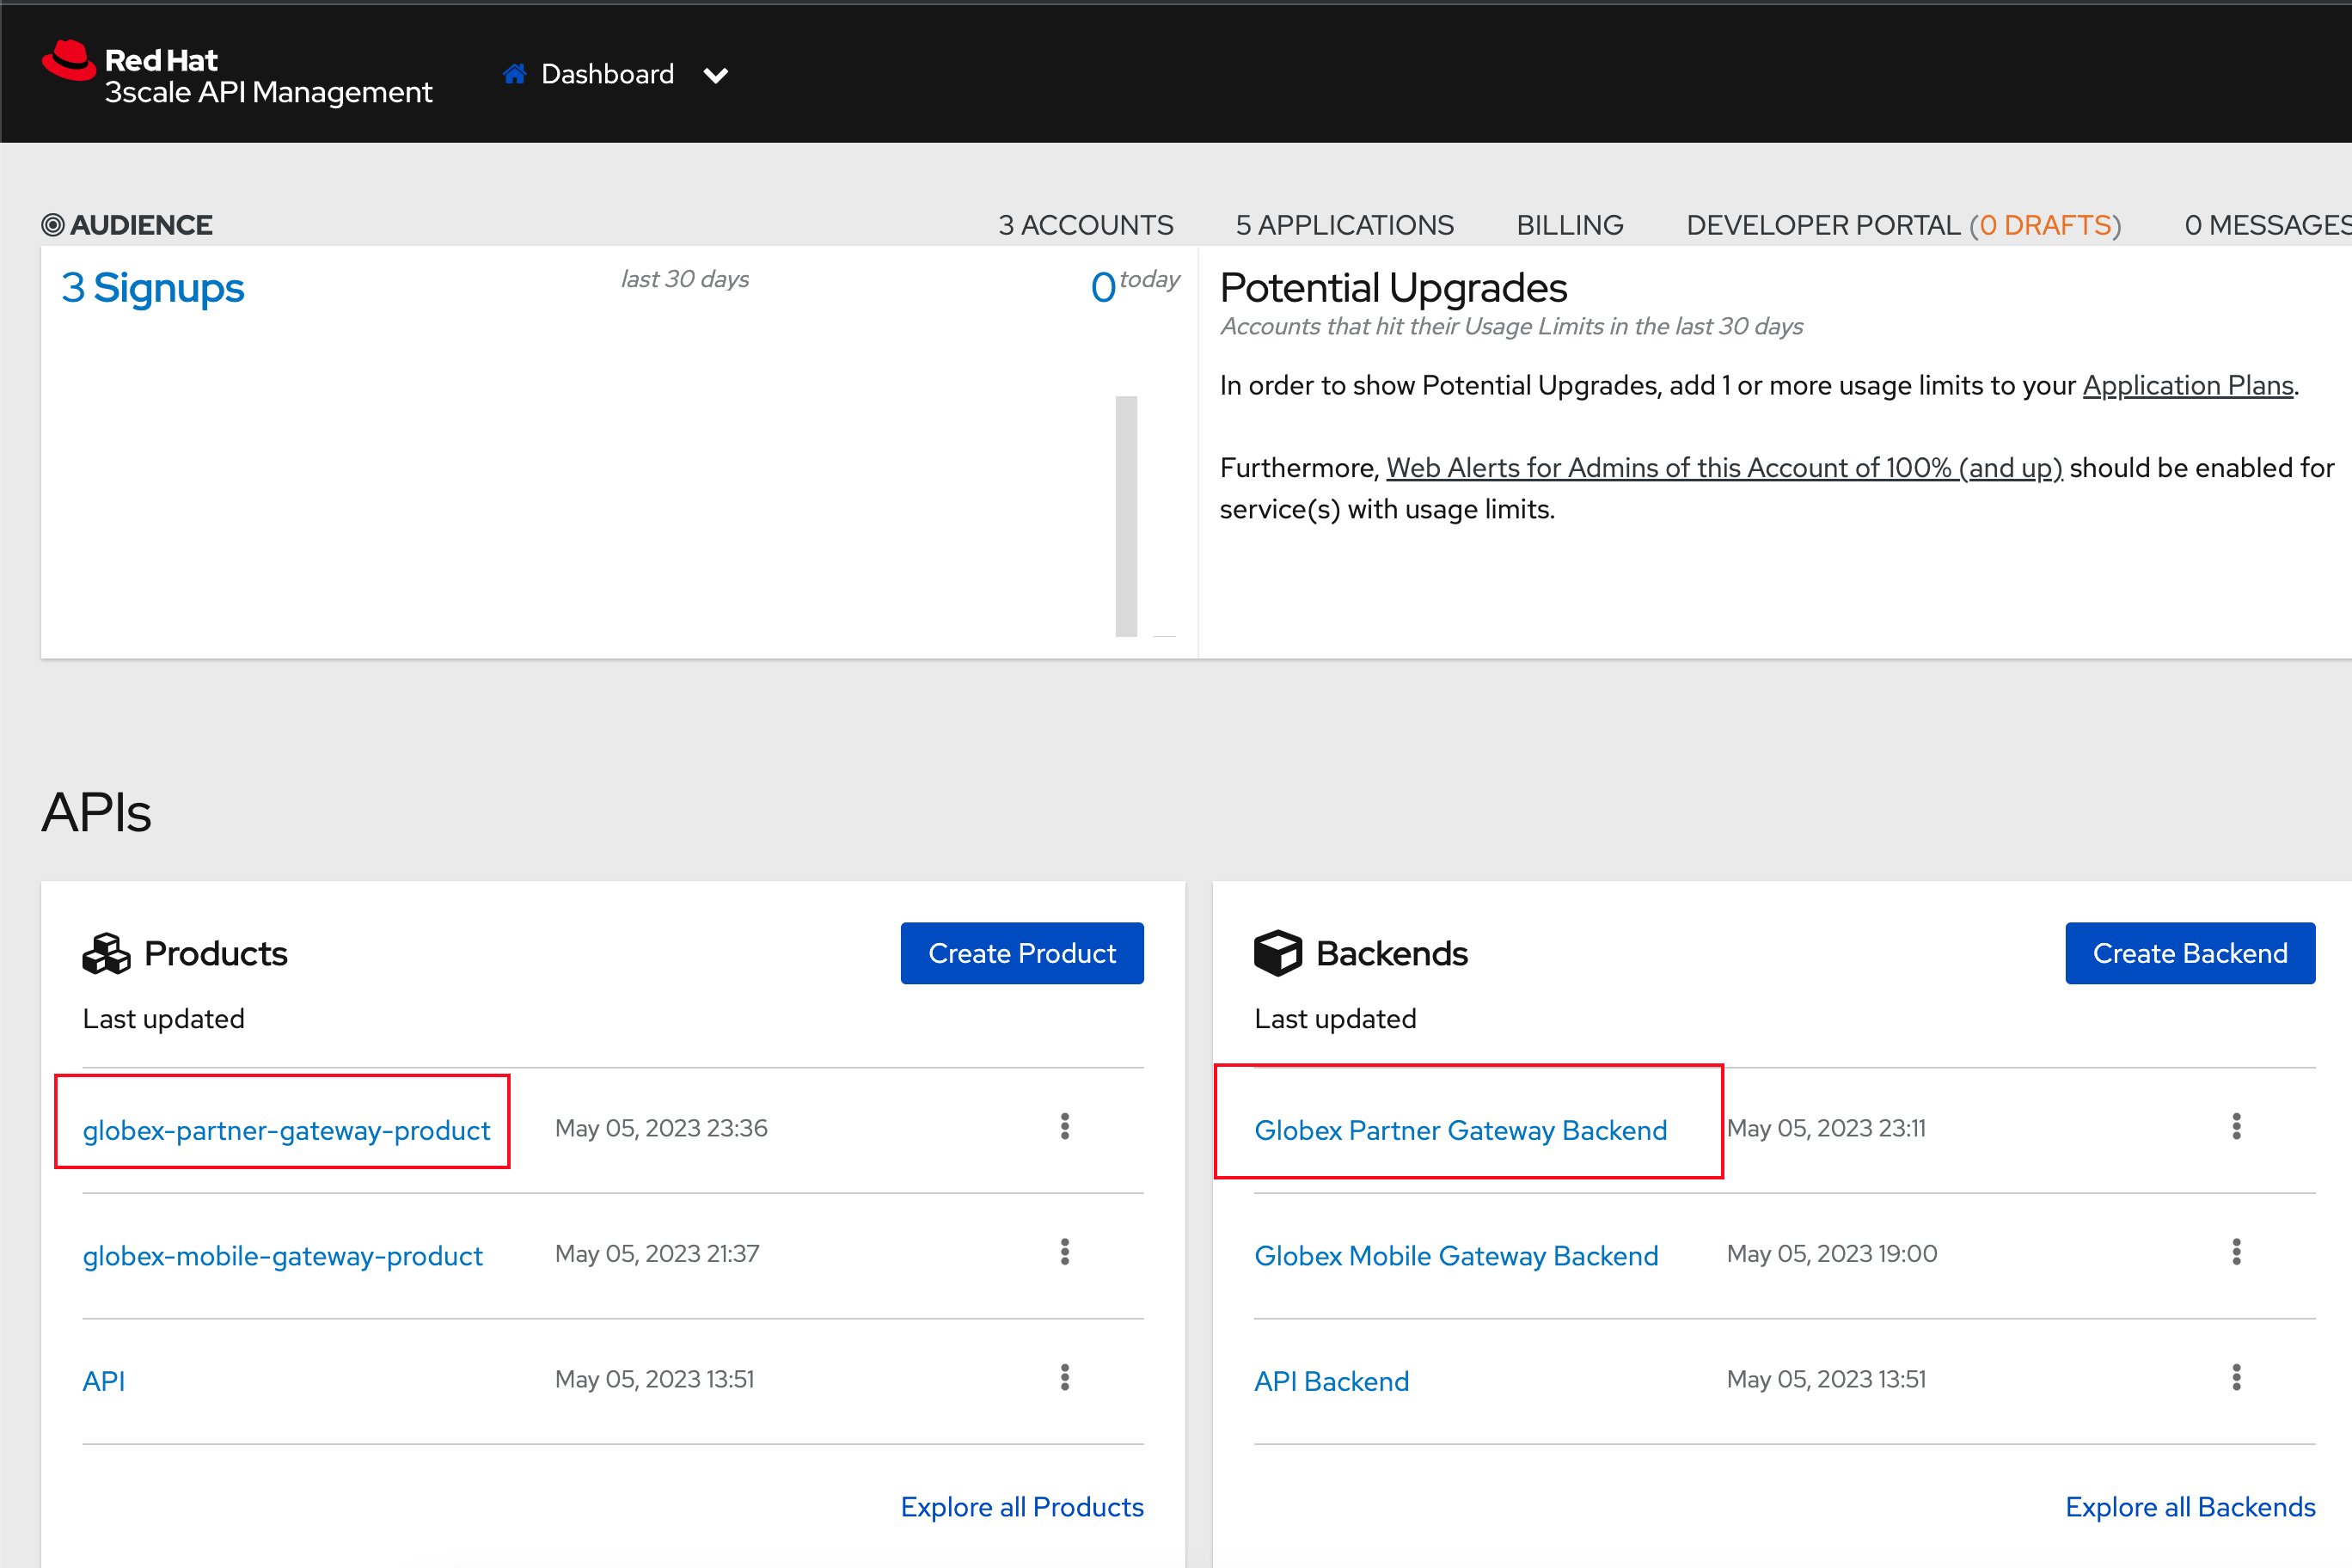 Figure 7. Launch 3scale
 -
You will notice that the Partner Product and Backend have been created.
-
Click on globex-partner-gateway-product under APIs → Products section.
-
You are presented with the Product overview page for the Partner API Product you created.
-
Navigate to Integration → Configuration and click on the Promote to v.x Staging APIcast and then Promote to v.x Production APIcast to promote all the config changes
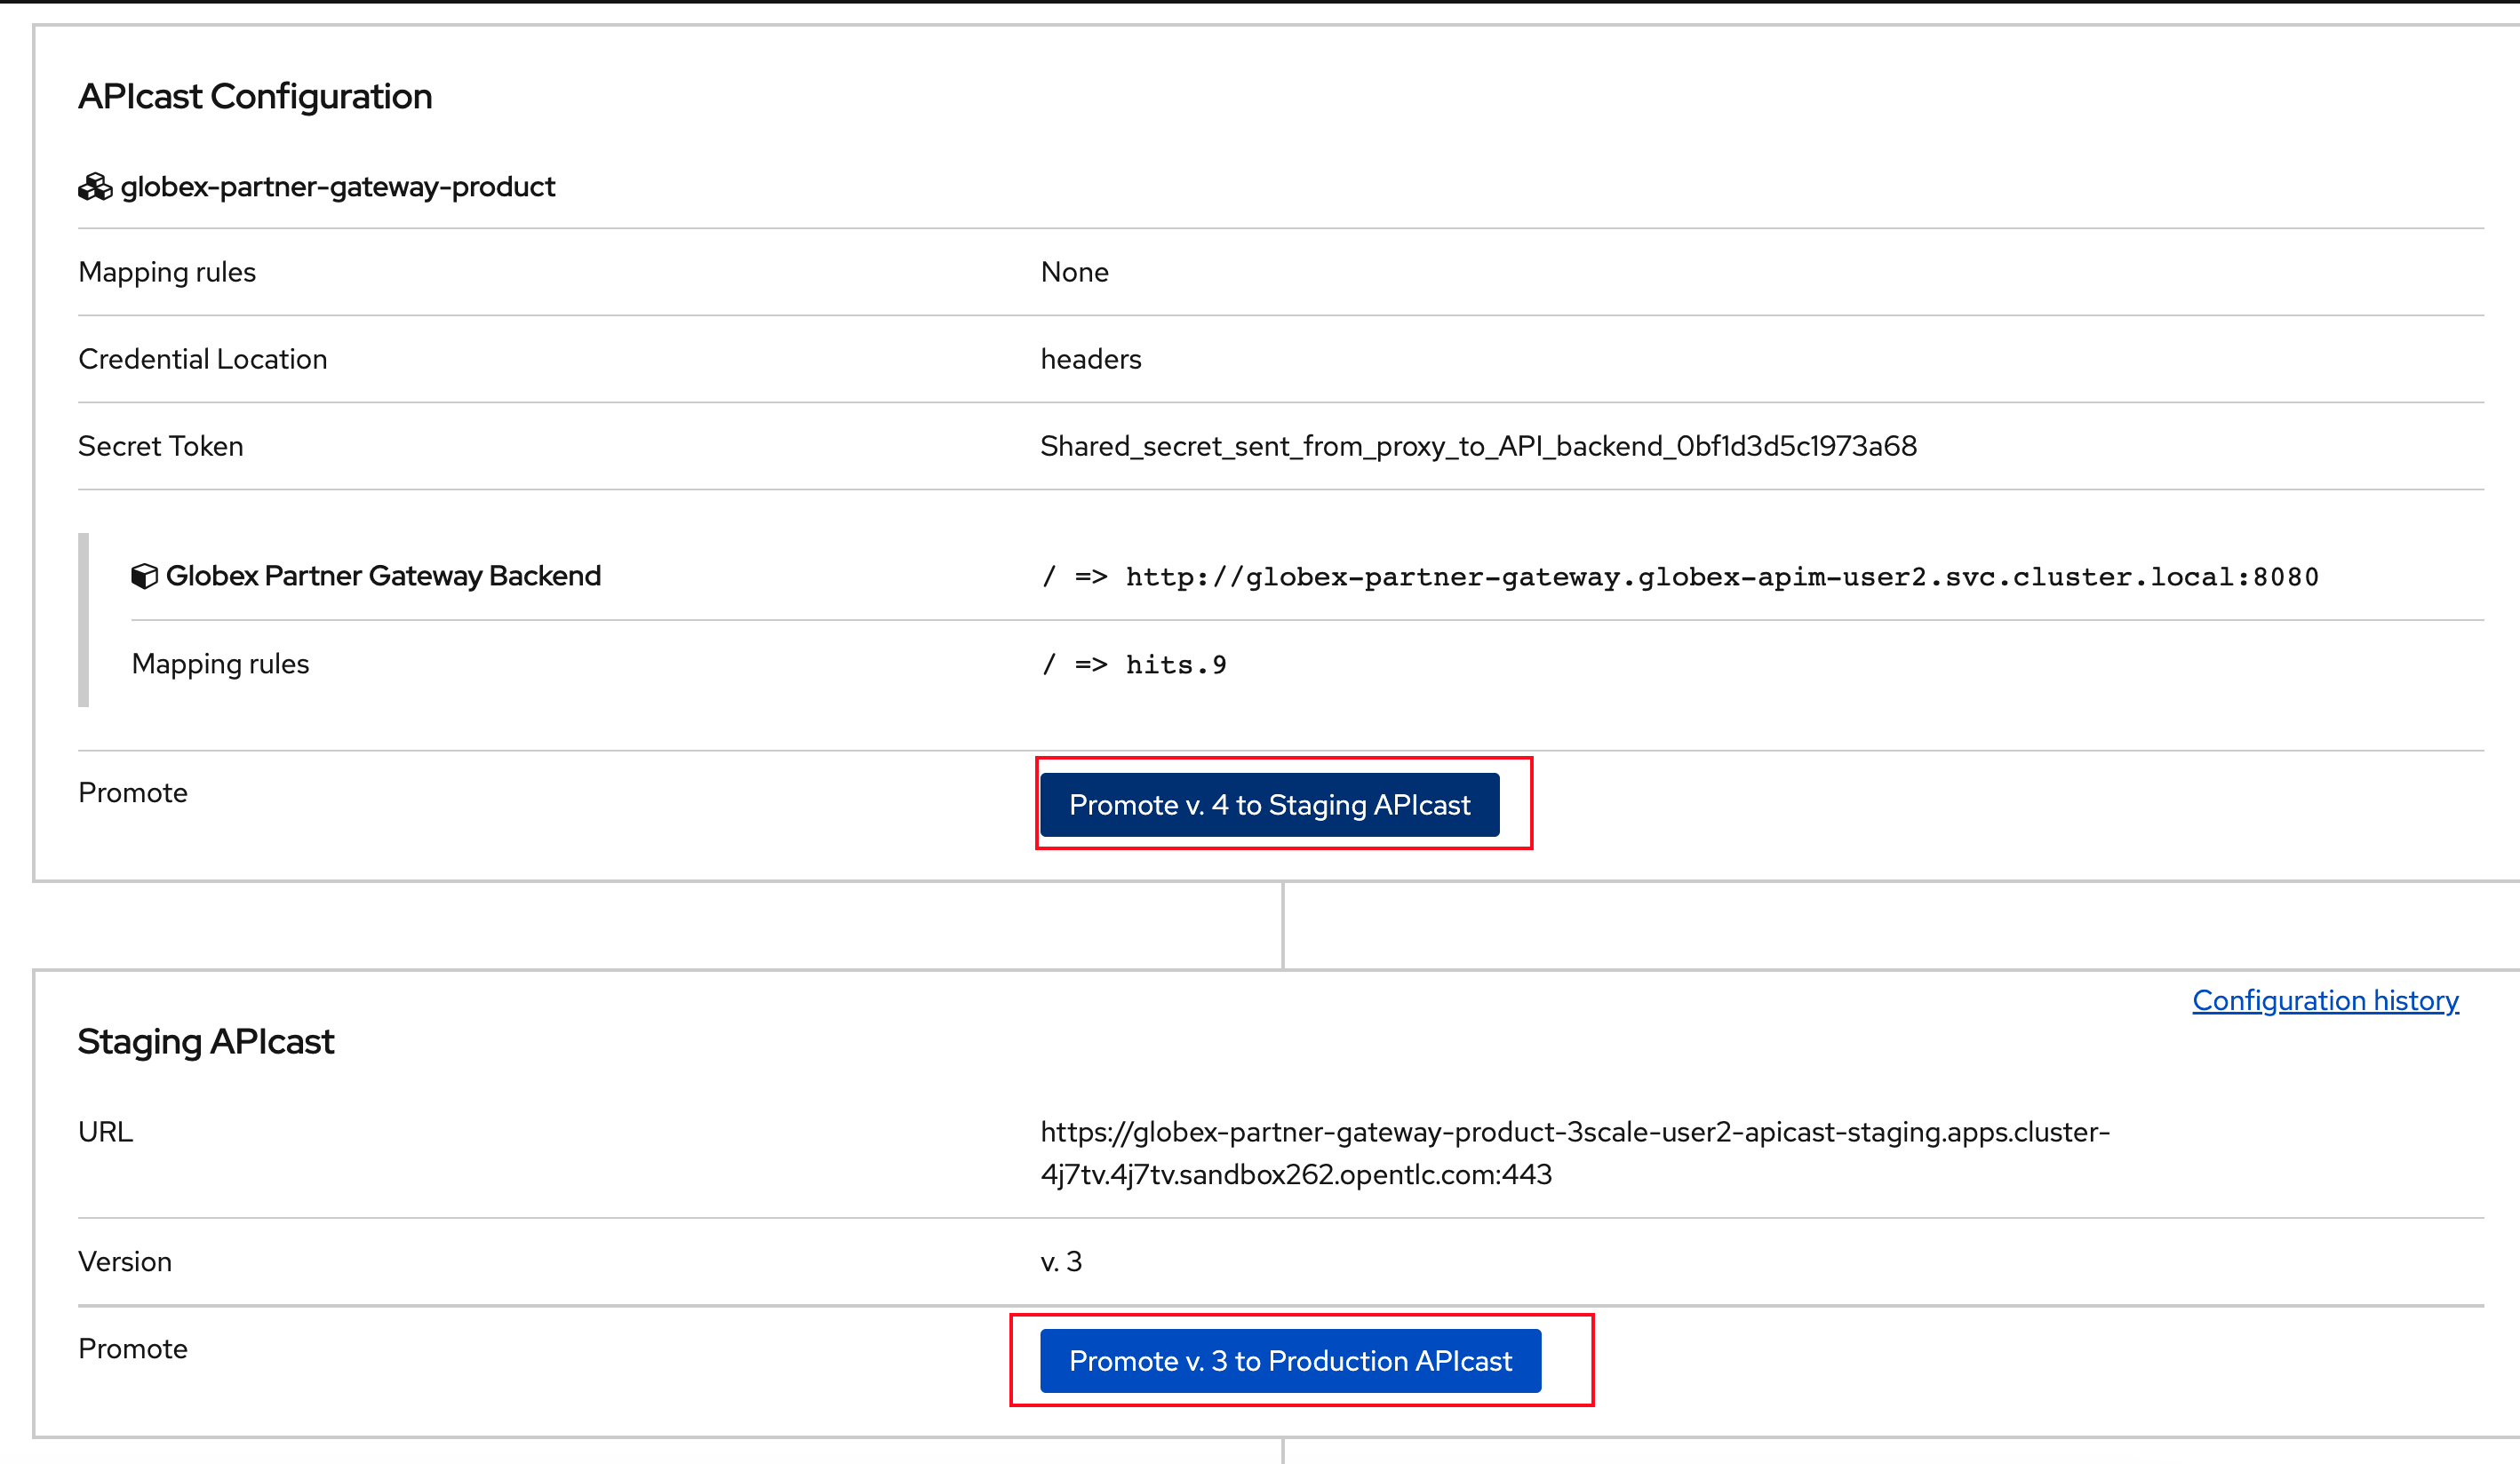 Figure 8. Promote Staging and Production APIcast
6. Signup for an application as a Partner
-
Navigate to the Developer Portal {globex_developer_portal}[Globex Developer Portal^, window="devportal"]
-
If you are not already signed in, login using username and password as (john/123456)
-
Navigate to Applications Listing by choosing the APPLICATIONS menu on the top of the page.
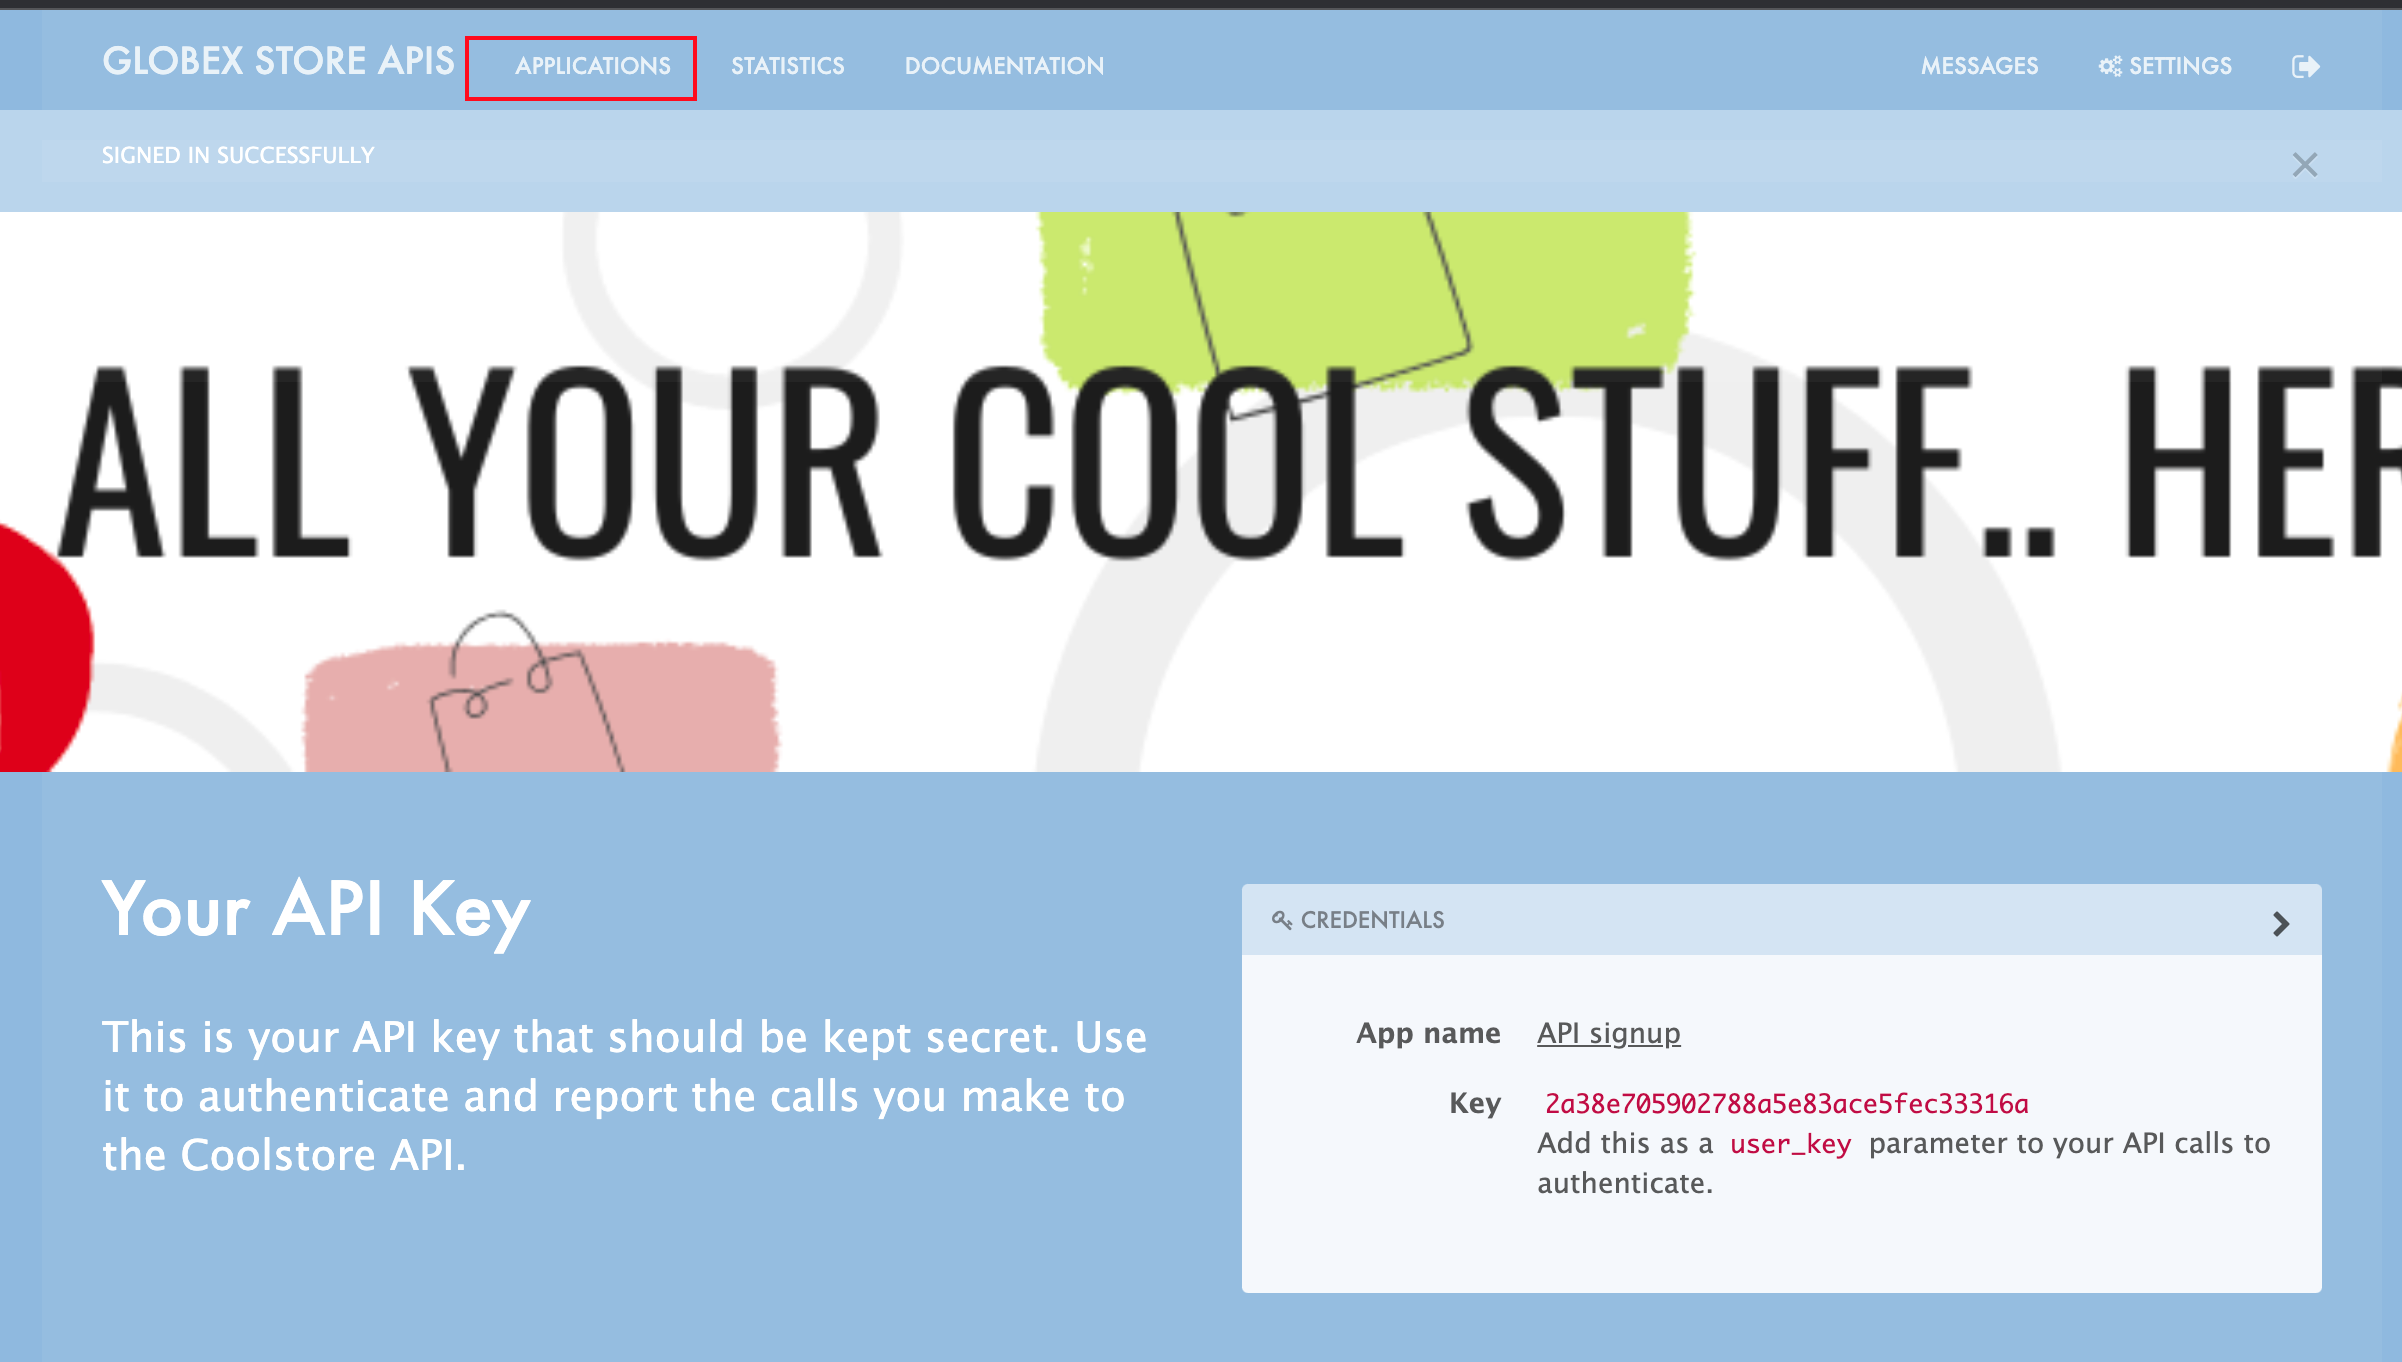 Figure 9. Developer Portal Landing Page
 -
In the Applications page you are invited to Create Application. Click on the Create new application button seen against
globex-partner-gateway-product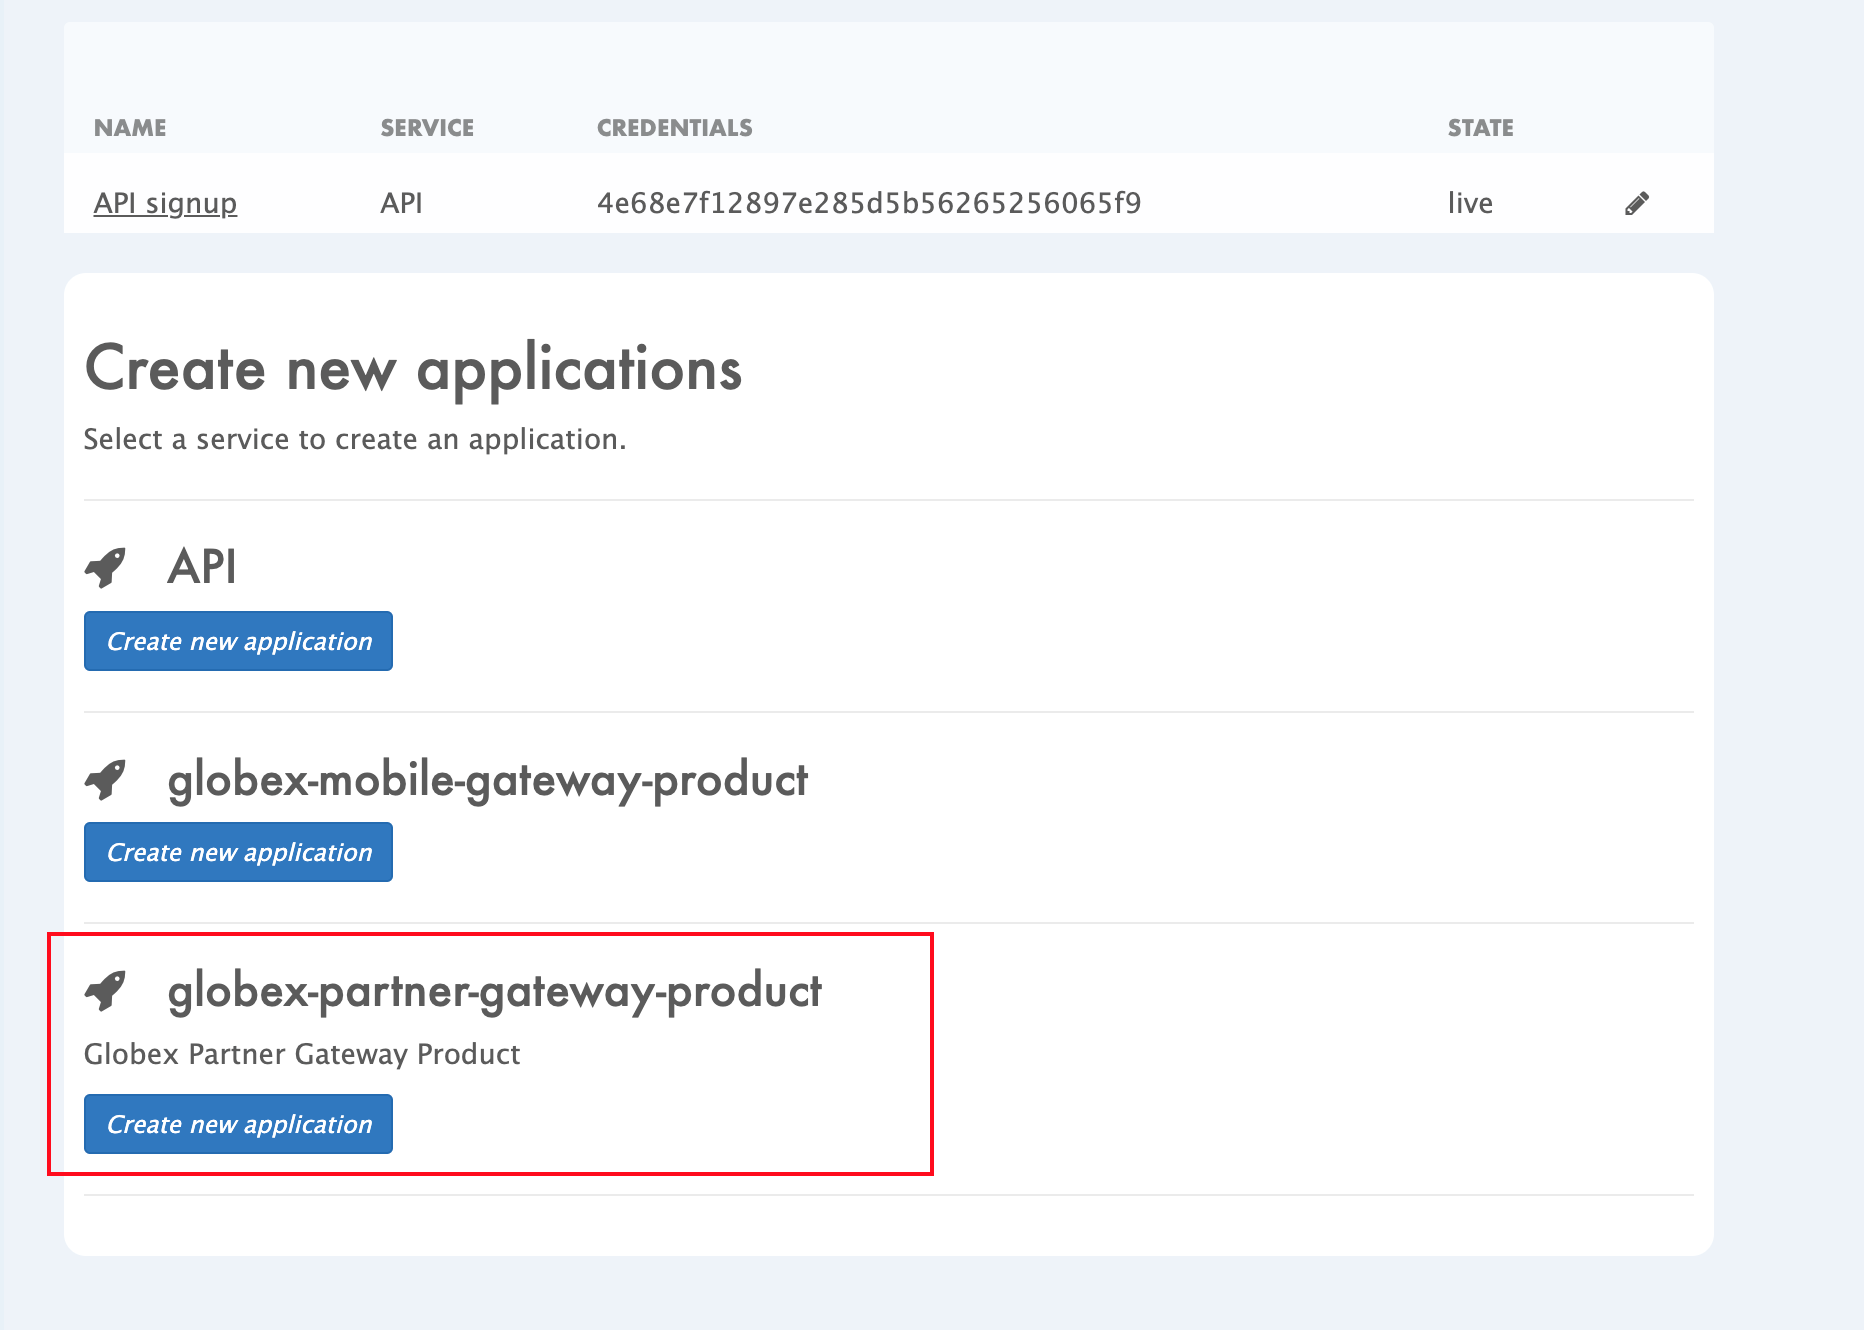 Figure 10. Developer Portal: Create new application
 -
Click on Subscribe to globex-partner-gateway-product link
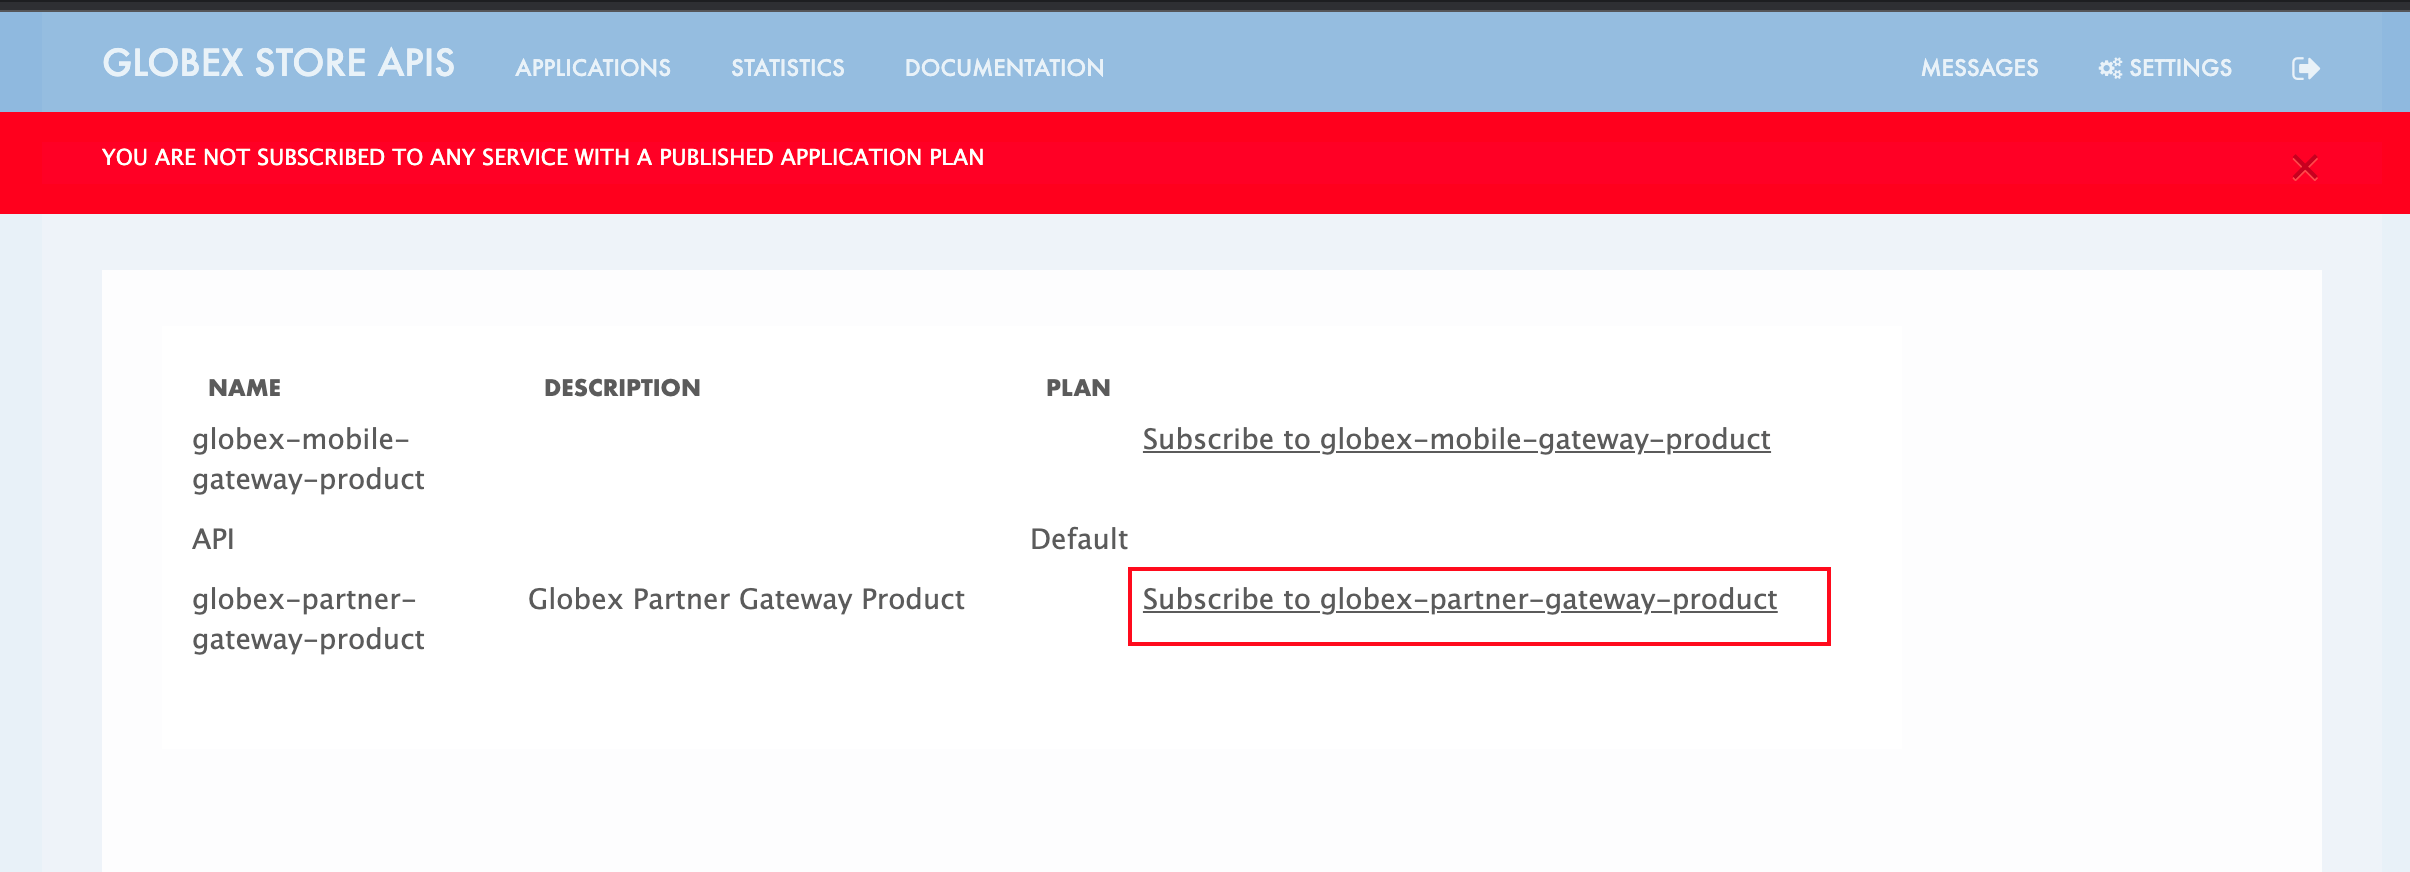 Figure 11. Subscribe to globex-mobile-gateway-product
 -
You are successfully subscribed to the service
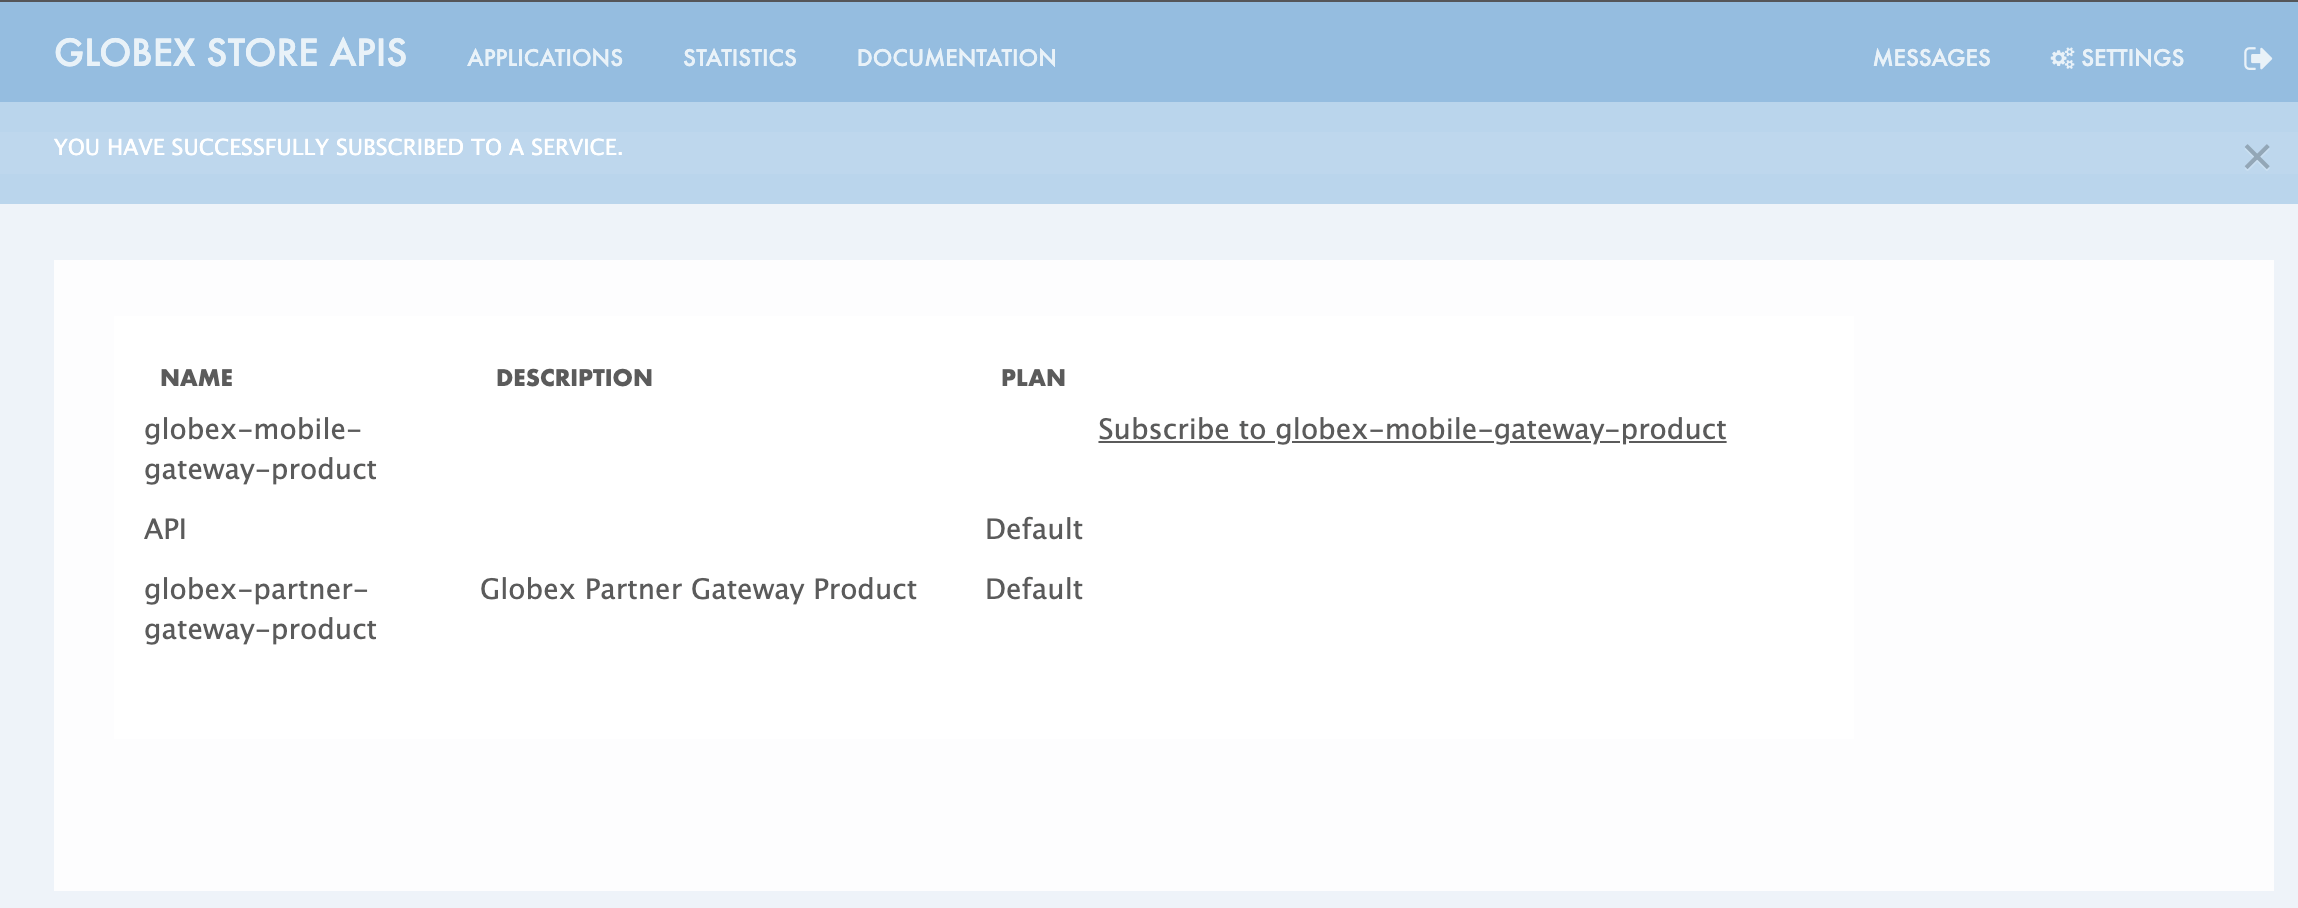 Figure 12. Successfully subscribed to the service
 -
Navigate back to the APPLICATIONS tab via the top menu.
-
Under globex-partner-gateway-product’s, click on the Create new application button
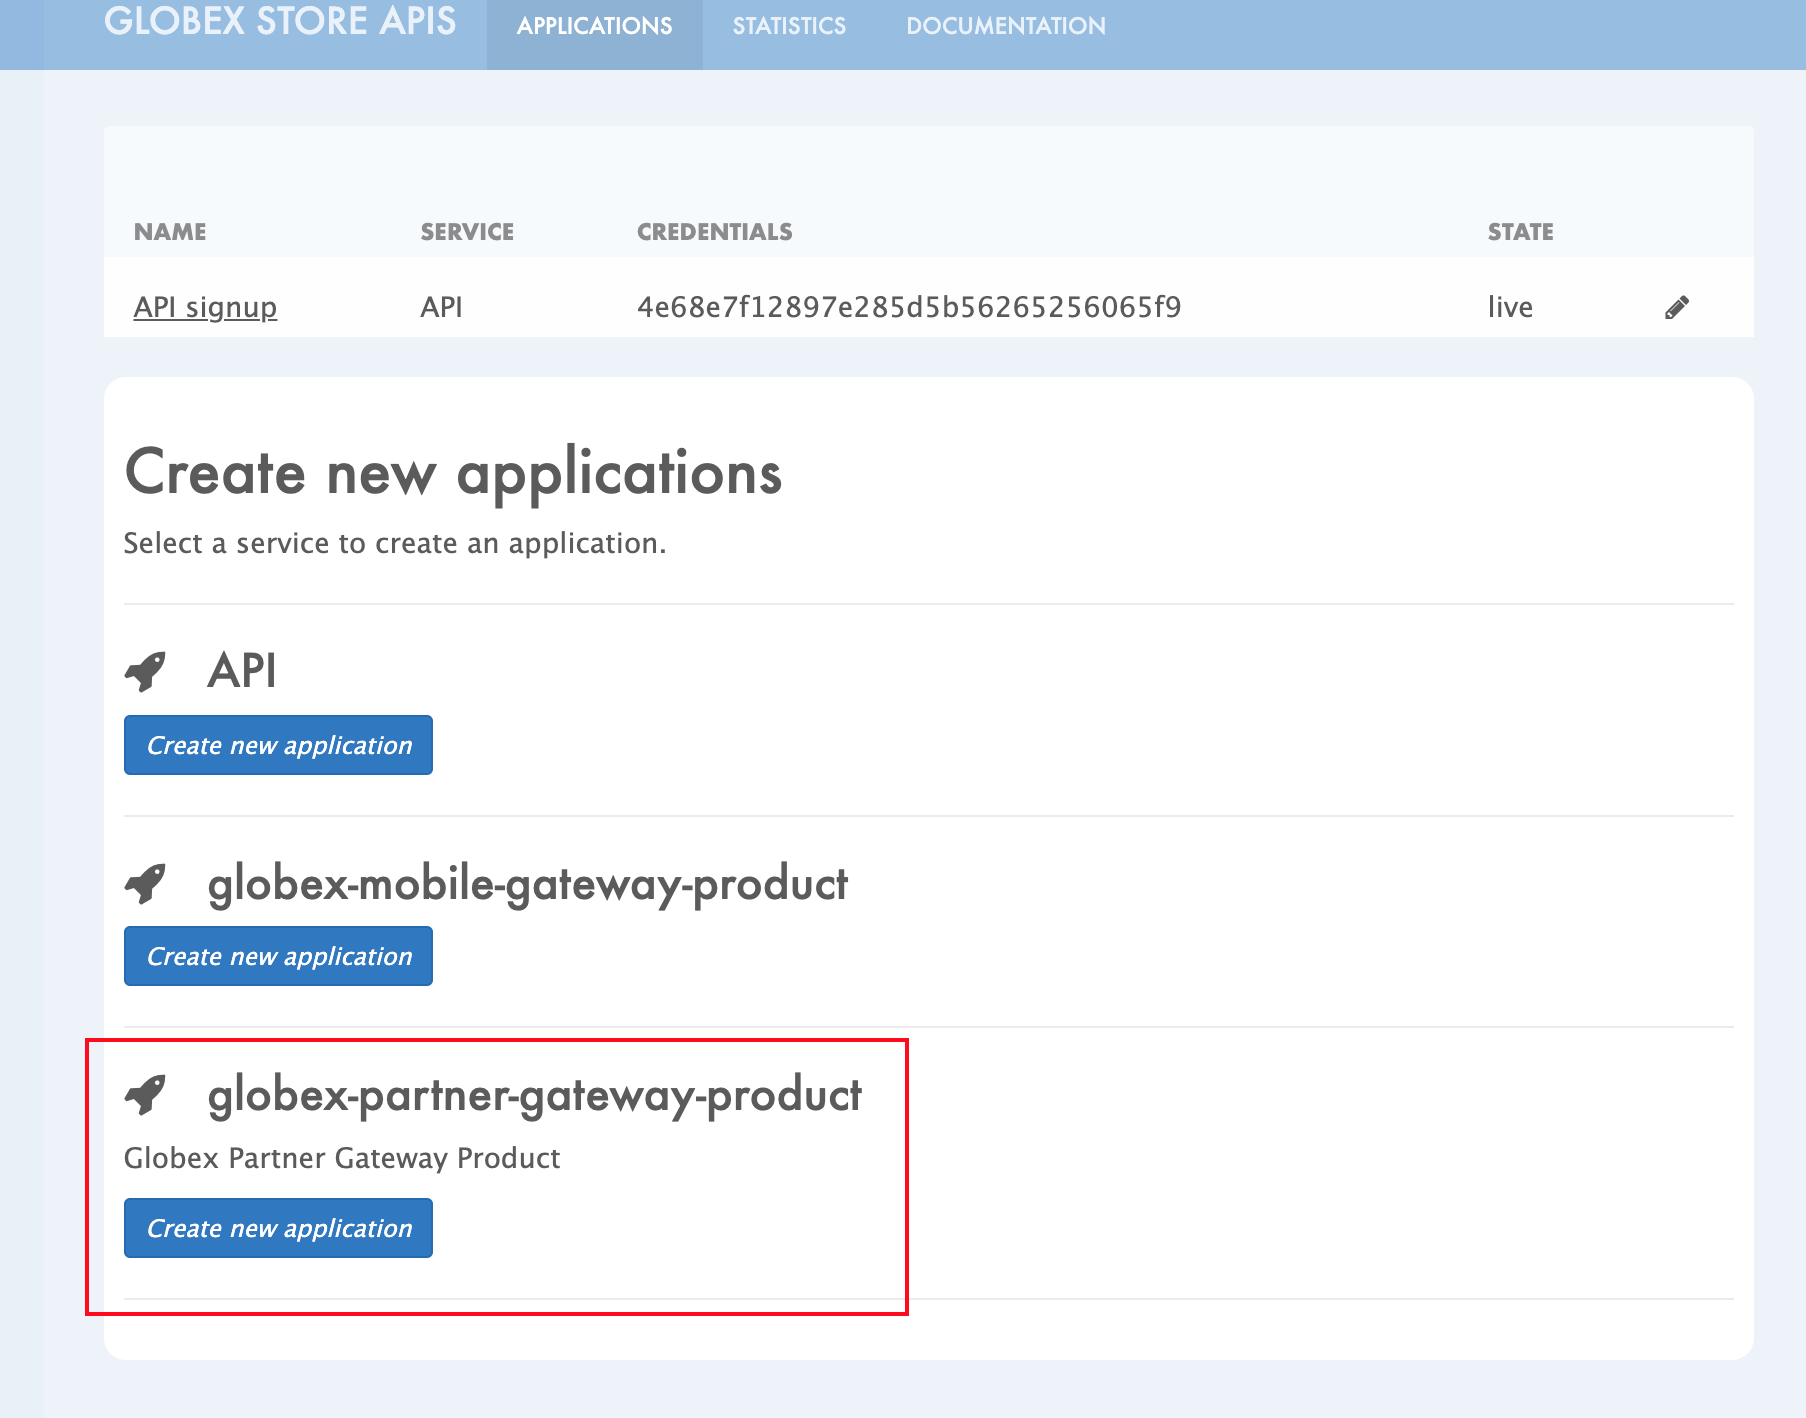 Figure 13. Developer Portal: Create new application (again)
 -
In the NEW APPLICATION page, give the plan a Name and a Description and click on Create Application.
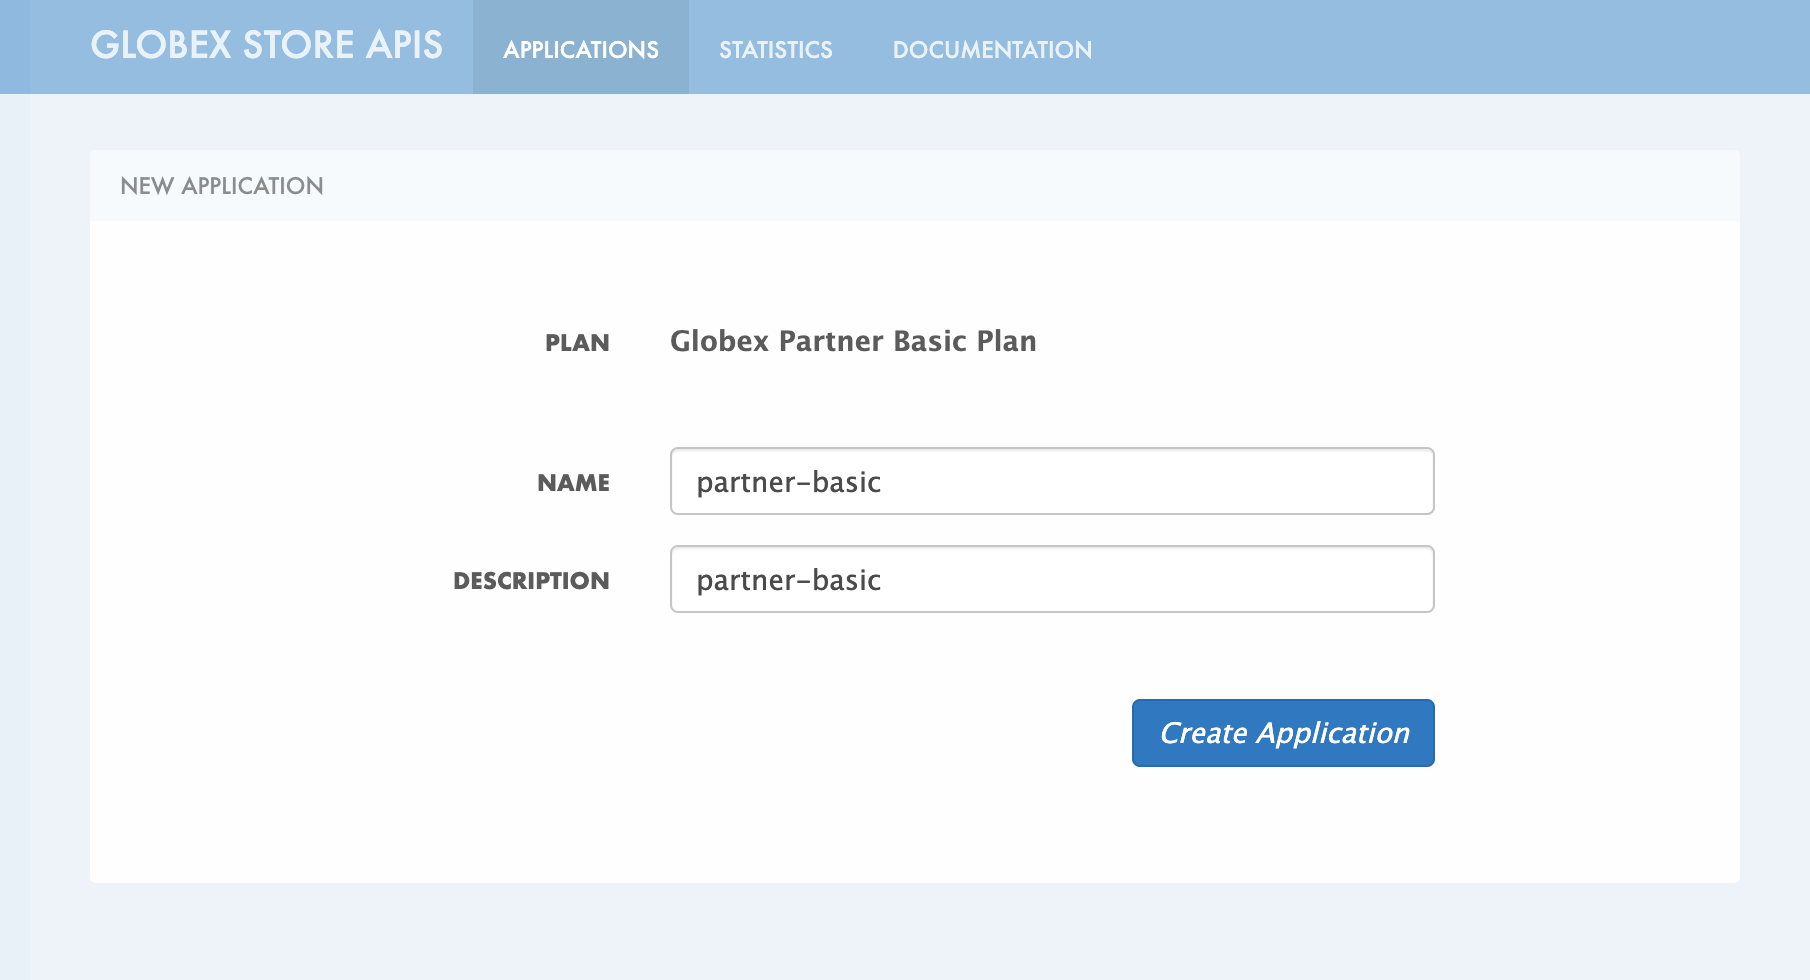 Figure 14. Developer Portal: New application
 -
An application is created successfully. Make a note of the Client ID and Client Secret. You will be using this in the Partner Web Portal setup.
-
Enter the value asterisk (*) in the REDIRECT URL field and click on the Submit button. This is to setup the right Redirect URL for OAuth using Keycloak
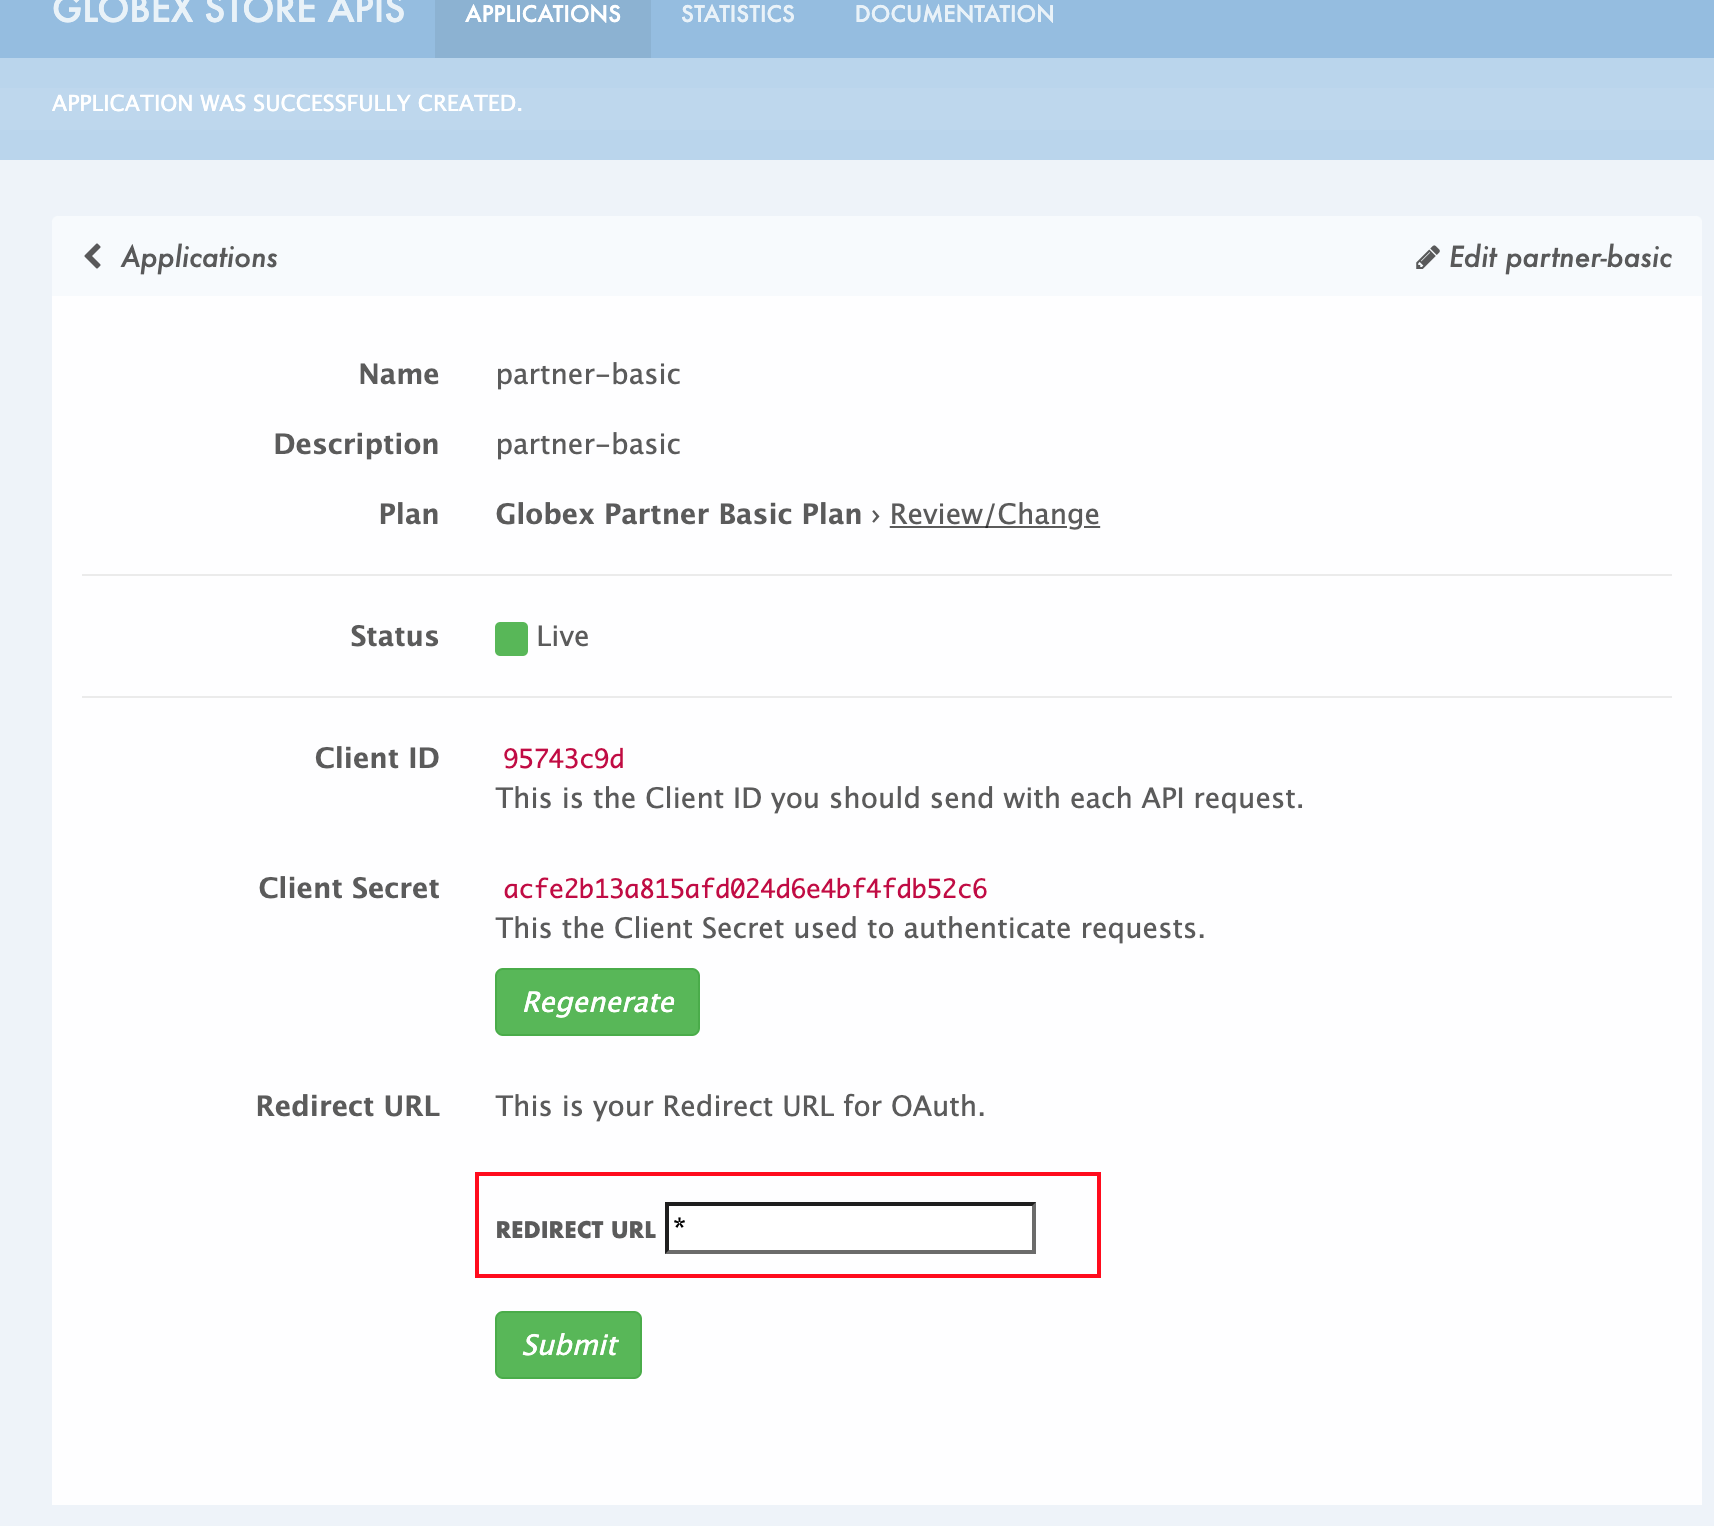 Figure 15. Update REDIRECT URL in the Application
7. Setup Partner Web Portal
-
In the previous section, you signed up for access as a Partner Developer and gained credentials to access the APIs Globex exposes.
-
To update the Partner Web application you need these values
-
Client ID & Client Secret - Needs to be fetched from Keycloak
-
Token URL - From Keycloak - But available here in the instructions
-
Globex API Endpoint - From Red Hat 3scale - But available here in the instructions
-
-
These values are part of {openshift_cluster_console}/k8s/ns/globex-apim-{user_name}/deployments/globex-partner-web/environment[globex-partner-web deployment, window="console"] and are highlighted in the screenshot below
 Figure 16. globex-partner-web Deployment
 -
The Client ID (api-client-id) and Client Secret (api-client-secret) with values as placeholders are predeployed as a Kubernetes Secret called secret.yaml.
-
In the Dev workspace, under the folder /projects/workshop-devspaces/workshop/module-apim/partners/partner-web open the file secret.yaml
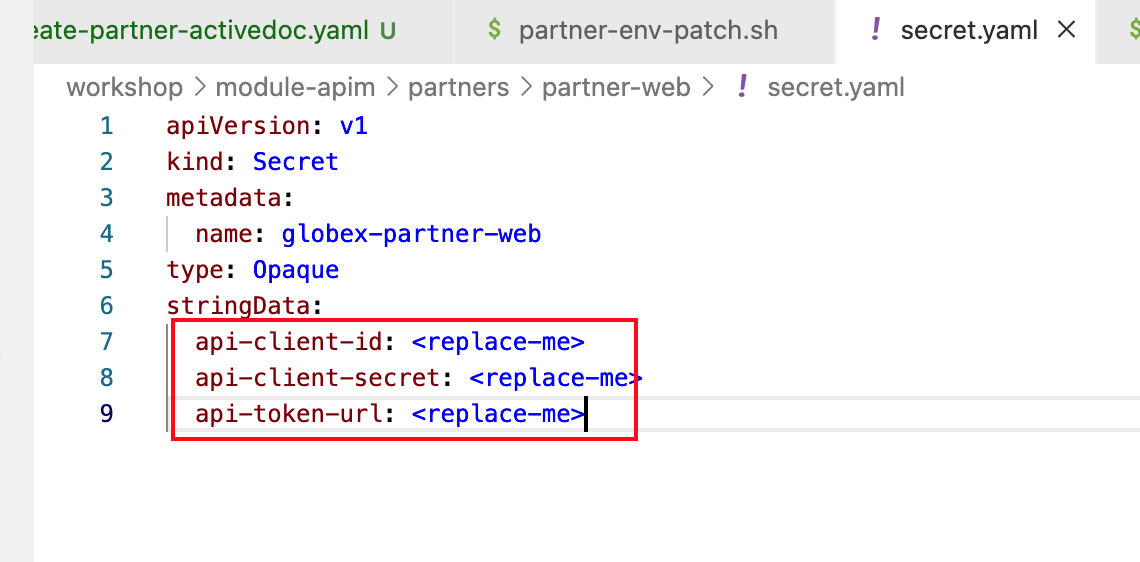 Figure 17. secret.yaml
 -
Update the Client ID and Client Secret from the previous step on 3scale Developer Portal
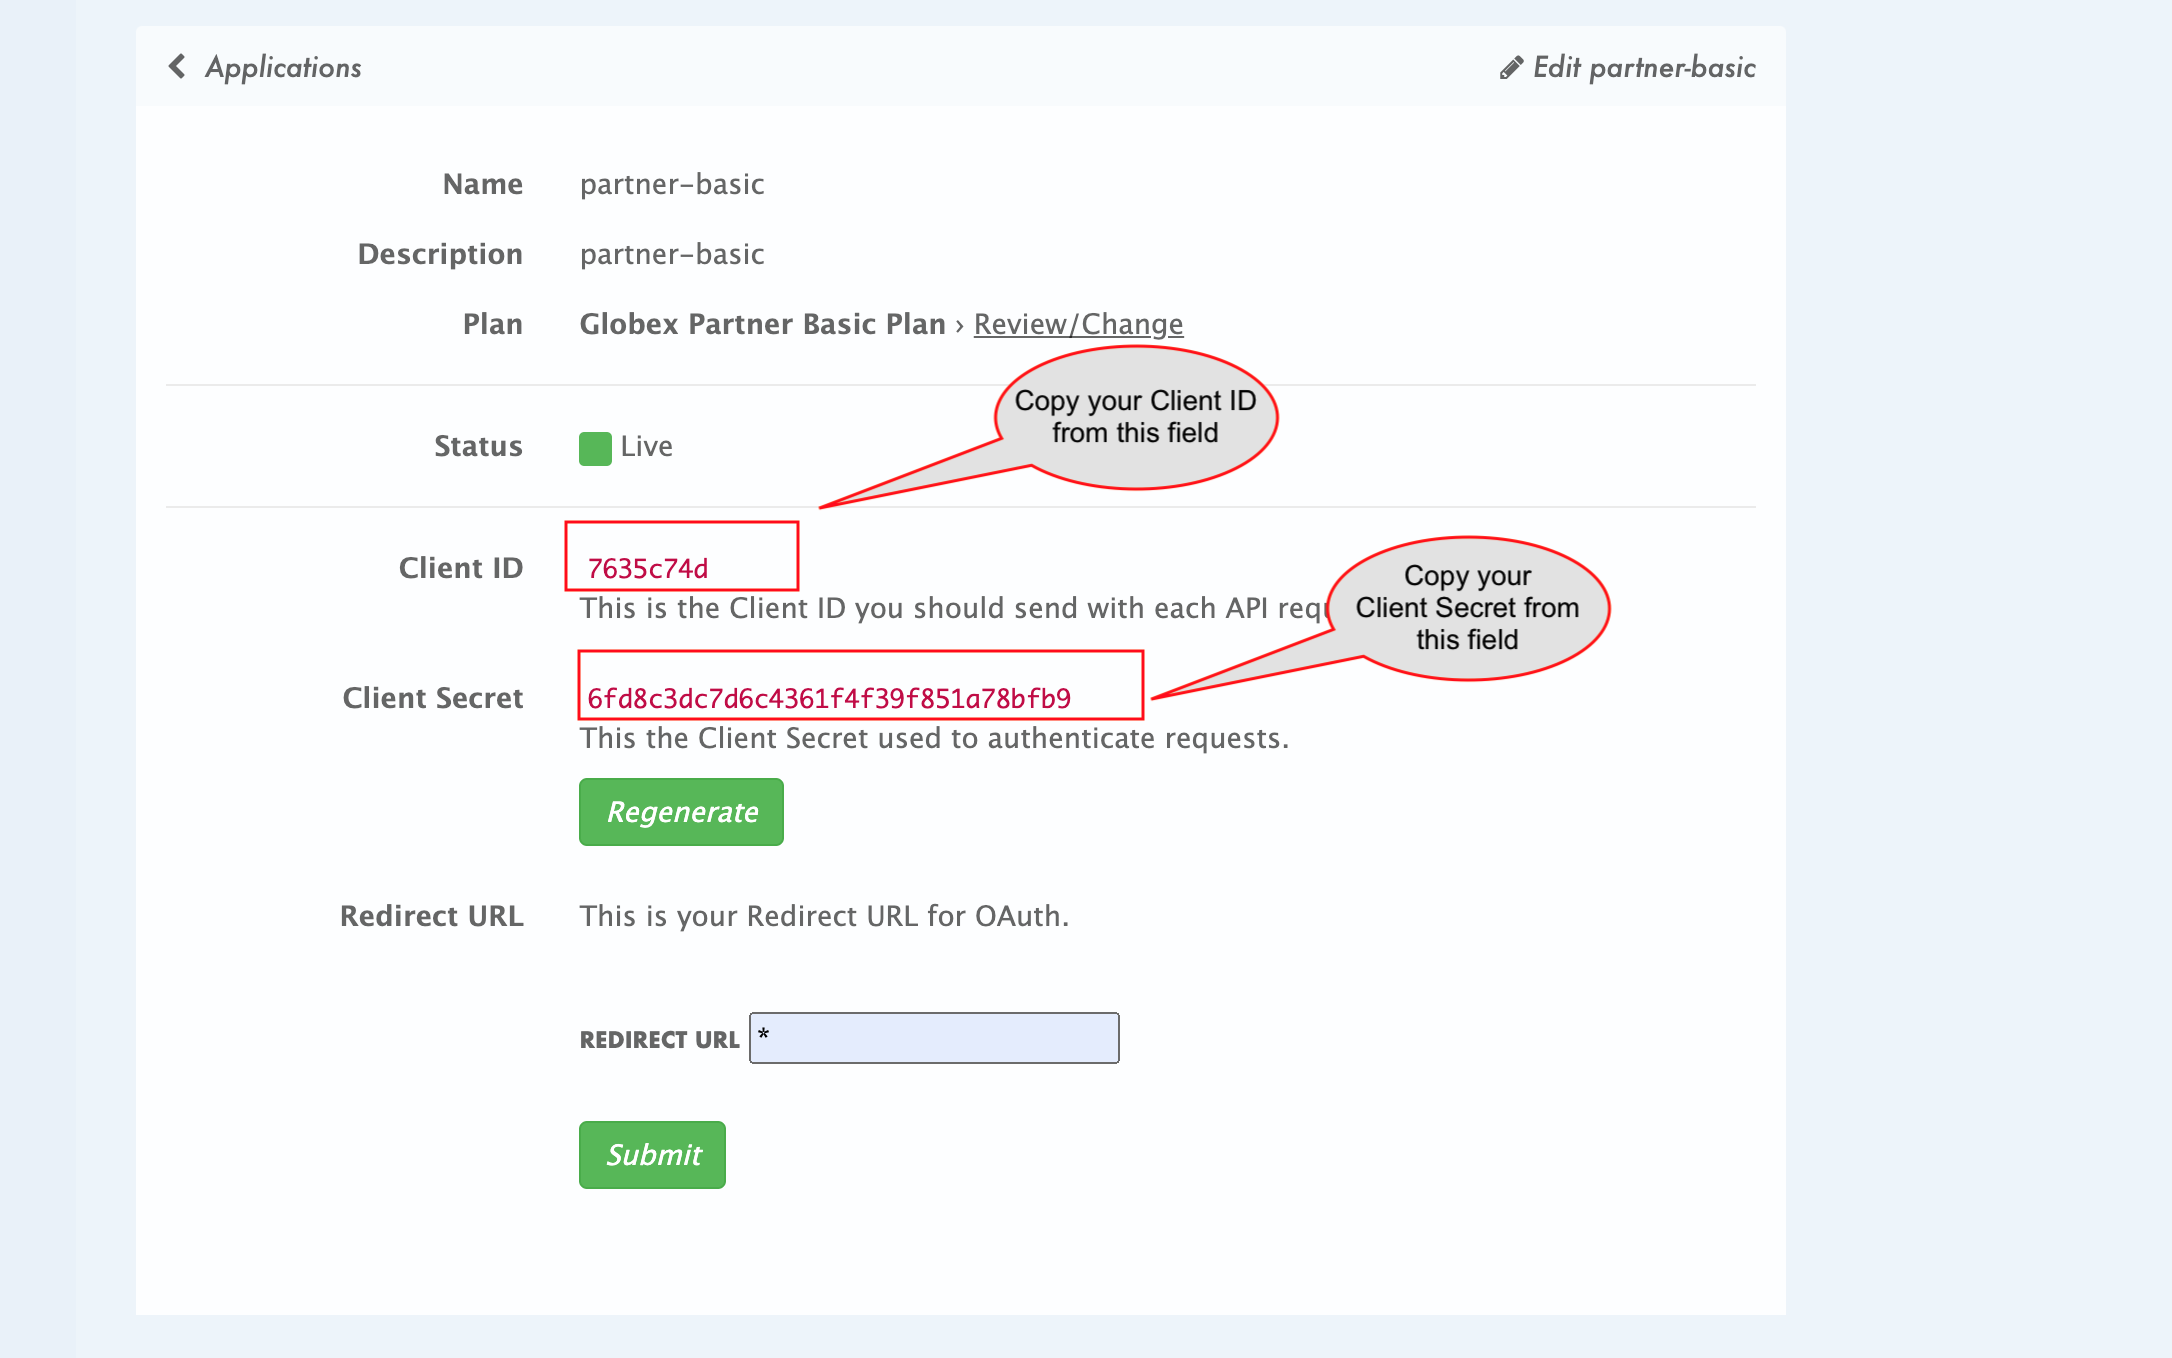 Figure 18. Client ID and Client Secret from 3scale Developer Portal
-
-
Update Token URL (api-token-url) with the following value
https://sso.{openshift_subdomain}/realms/globex-{user_name}/protocol/openid-connect/token Figure 19. Updated secret.yaml
 -
In the Dev Spaces Terminal apply changes made to the secret.yaml by running the following command
oc apply -f /projects/workshop-devspaces/workshop/module-apim/partners/partner-web/secret.yaml -n globex-apim-{user_name}Outputsecret/globex-partner-web configured
-
The final step is to patch the Partner Web portal with the Partner Gateway API’s endpoint.
-
You would ideally get this from 3scale. But since you have learnt how to do this with Mobile API, we will skip navigating to 3scale to save some time.
-
Execute this script in the Dev Spaces Terminal
oc set env deployments/globex-partner-web --overwrite GLOBEX_PARTNER_GATEWAY=https://globex-partner-gateway-product-3scale-{user_name}-apicast-production.{openshift_subdomain} -n globex-apim-{user_name}Outputdeployment.apps/globex-partner-web updated[Click to know] How do I verify what I just did?
-
Ensure the {openshift_cluster_console}/k8s/ns/globex-apim-{user_name}/deployments/globex-partner-web/environment[globex-partner-web deployment, window="console"] looks like this now
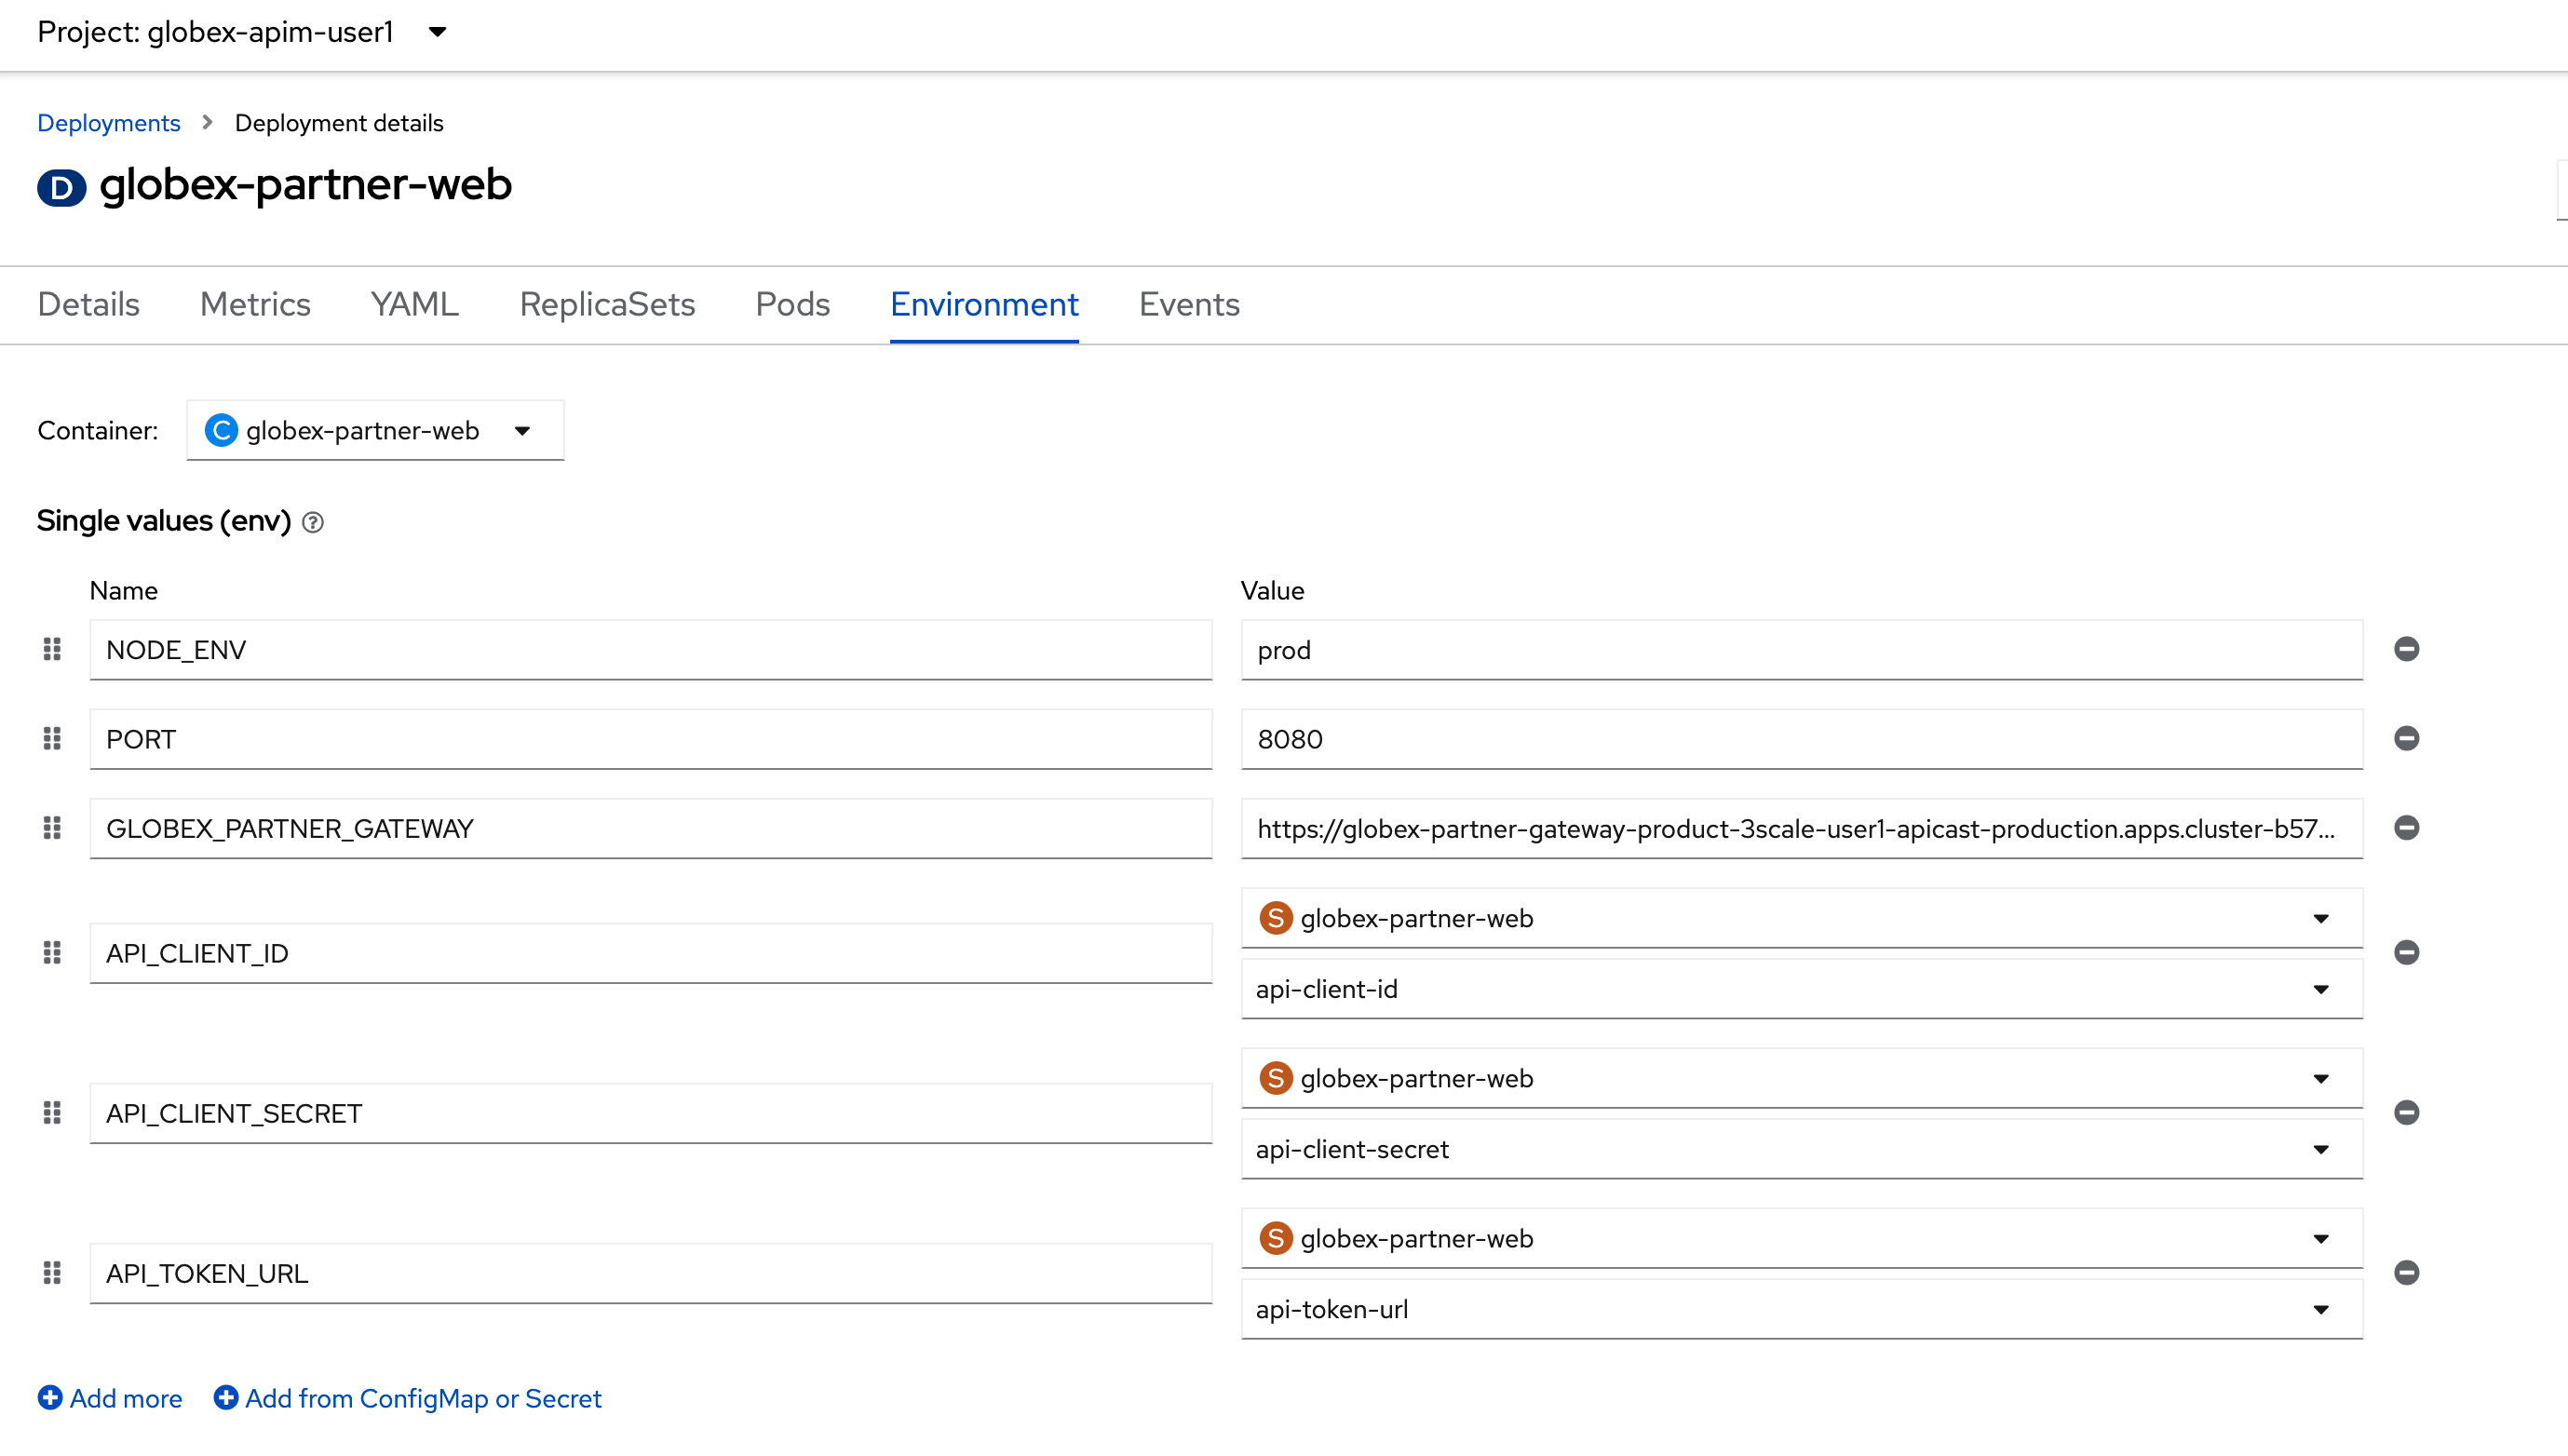 Figure 20. Partner Web Portal Deployment Values
 -
To check the Secret that you updated, you can navigate to {openshift_cluster_console}/k8s/ns/globex-apim-{user_name}/secrets/globex-partner-web[globex-partner-web secret^, window="console"]. Scroll down to the Data section, and click on Reveal values
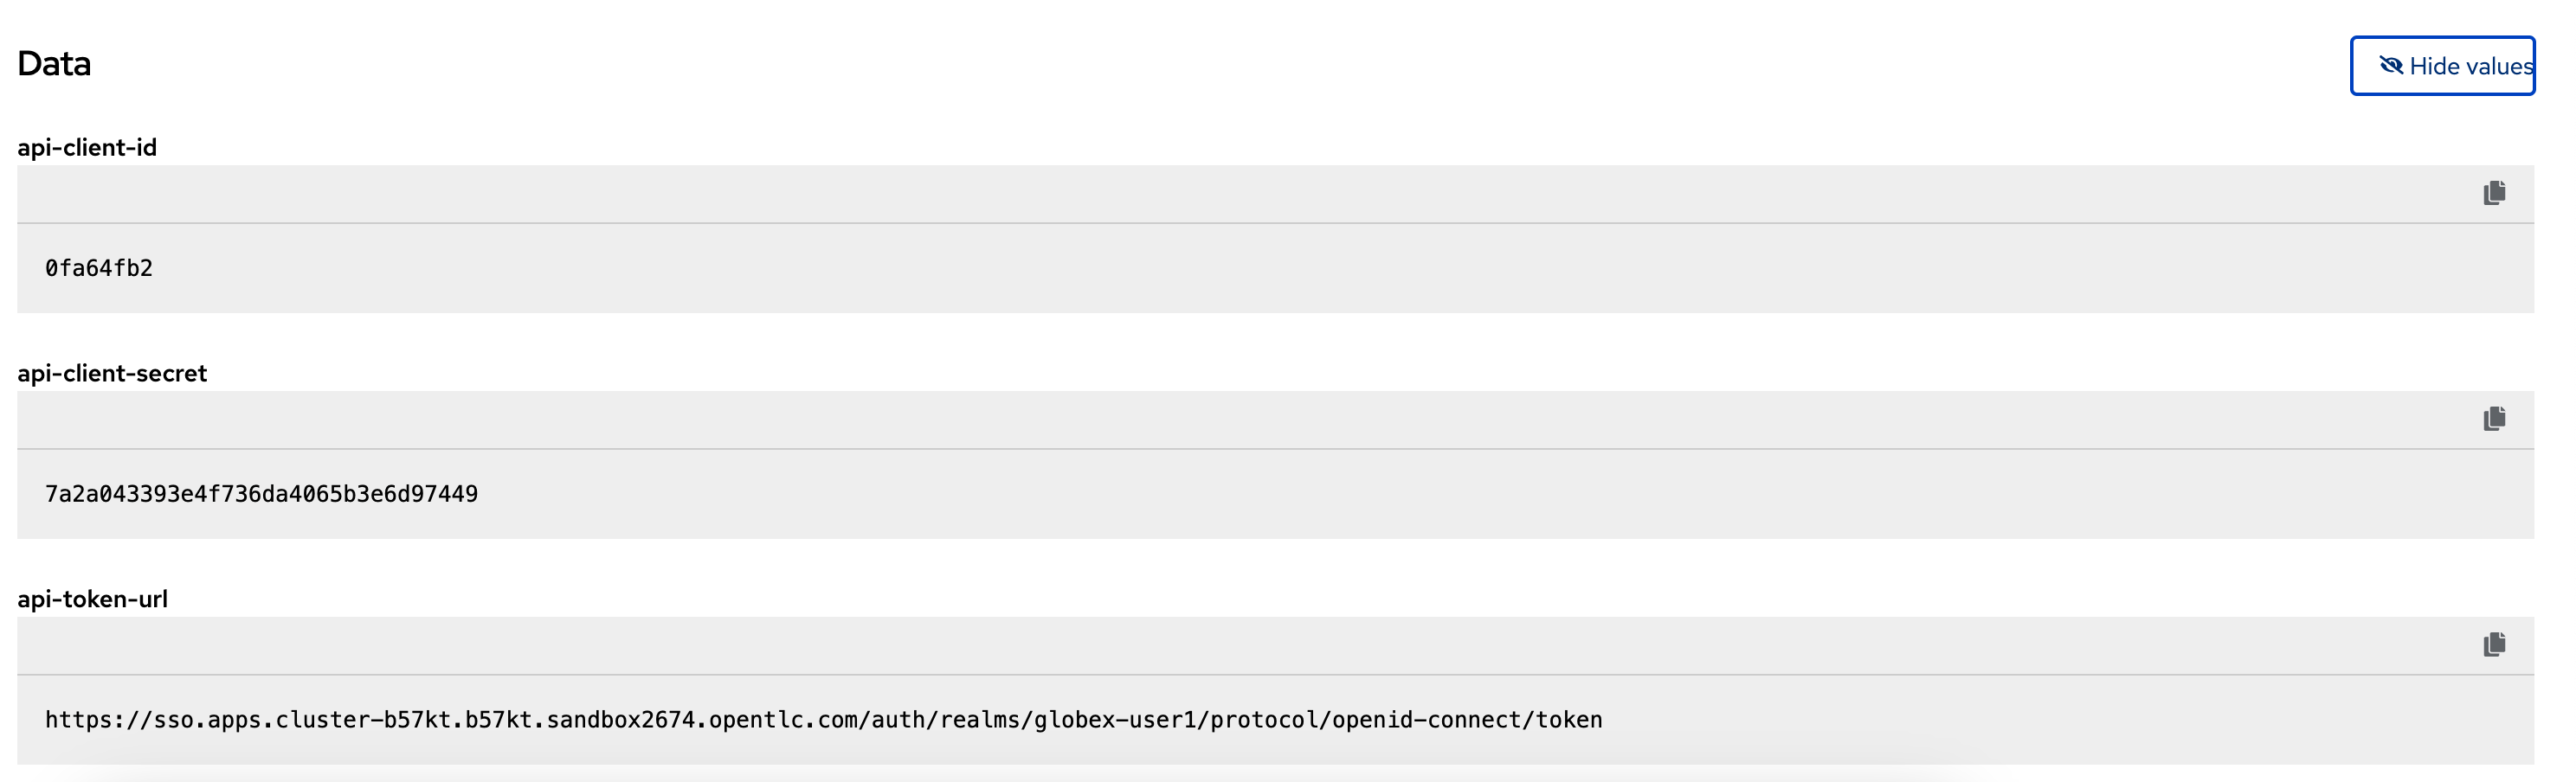 Figure 21. Partner Web Portal Secret with Keycloak details
-
-