Deploy the Debezium Connector
Let’s start with deploying the Debezium Connector. With streams for Apache Kafka, a Kafka Connect connector can be deployed as a Kubernetes Custom Resource, which is picked up and processed by the streams for Apache Kafka operator.
To deploy the connector, you are going to use OpenShift Dev Spaces. OpenShift Dev Spaces uses Kubernetes and containers to provide a consistent, secure, and zero-configuration development environment, accessible from a browser window.
-
In a browser window, navigate to the browser tab pointing to the Developer perspective of the OpenShift cluster. If you don’t have a browser tab open on the console, navigate to {openshift_cluster_console}[OpenShift Console, window="console"] to launch the console. If needed login with your username and password ({user_name}/{user_password}).
-
On the top menu of the console, click on the
 icon, and in the drop-down box, select Red Hat OpenShift Dev Spaces.
-
Login in with your OpenShift credentials ({user_name}/{user_password}). If this is the first time you access Dev Spaces, you have to authorize Dev Spaces to access your account. In the Authorize Access window click on Allow selected permissions.
-
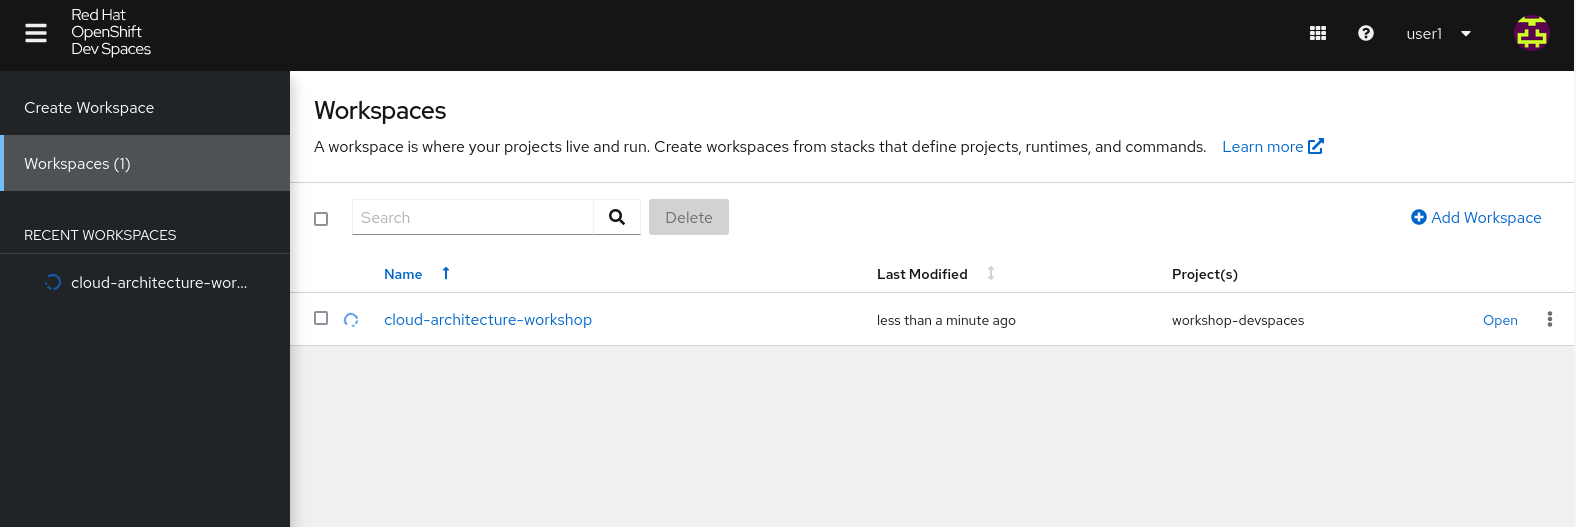
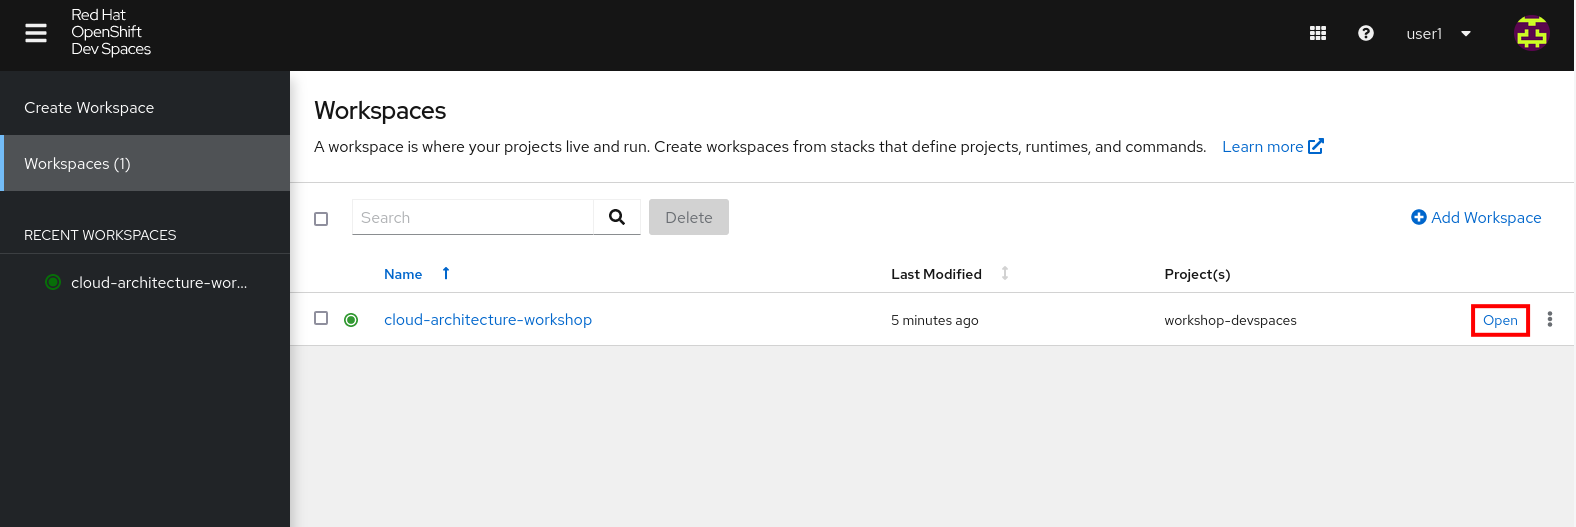
You are directed to the Dev Spaces overview page, which shows the workspaces you have access to. You should see a single workspace, called cloud-architecture-workshop. The workspace needs a couple of seconds to start up.
-
Click on the Open link of the workspace.
-
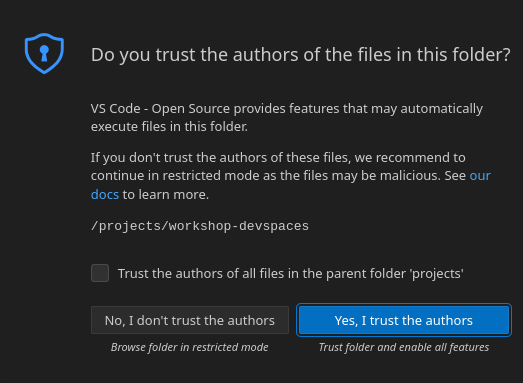
This opens the workspace, which will look pretty familiar if you are used to work with VS Code. Before opening the workspace, a pop-up might appear asking if you trust the contents of the workspace. Click Yes, I trust the authors to continue.
-
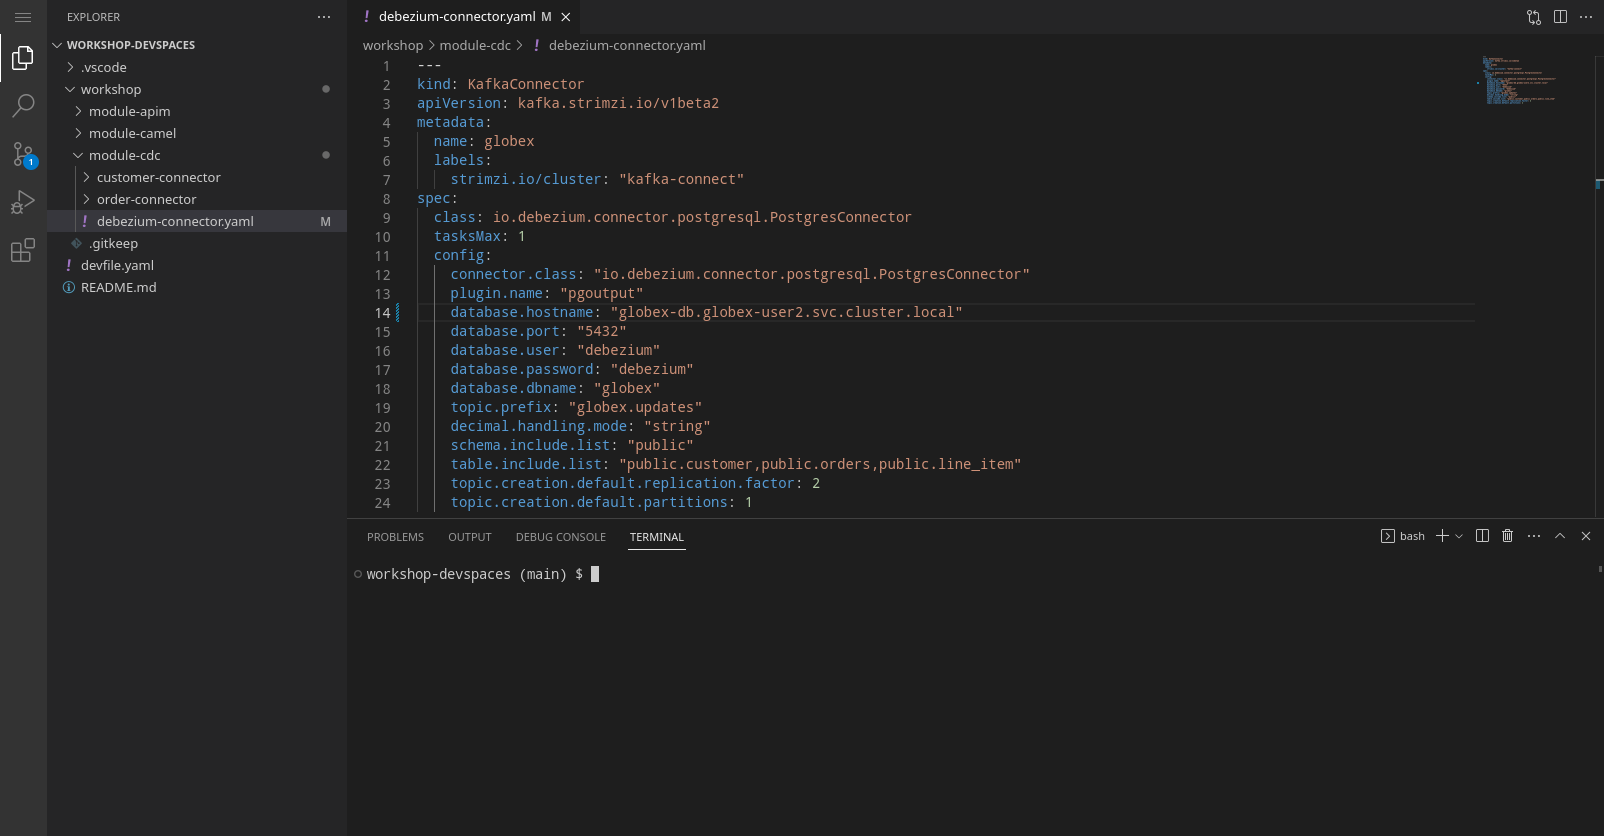
The workspace contains all the resources you are going to use during the workshop, including the Debezium connector. In the project explorer on the left of the workspace, navigate to the workshop/module-cdc folder and open the debezium-connector.yaml file.

-
The debezium-connector.yaml file describes the Debezium Connector. It contains all the details the connector needs to know in order to start capturing changes in the target database tables. Some important configuration details:
-
class: the Debezium connector implementation class. We’re using PostgreSQL as source database, so the approriate connector is io.debezium.connector.postgresql.PostgresConnector.
-
plugin.name: The Debezium connector supports different mechanisms to read from the PostgreSQL transaction logs. pgoutput is the standard logical decoding output plug-in since PostgreSQL 10.
-
database.*: the connection details for the database. Note that PostgreSQL is setup with a specific user (debezium) which has the required privileges to read from the transaction logs.
-
topic.prefix: the prefix of the Kafka topics which will receive the Debezium change events. The full name of the topics is <prefix>.<schema>.<table>.
-
schema.include.list: the schema’s to include in the change data capture process.
-
table.include.list: the name of the tables to include. For our use case we are interested in the customer, orders and line_item tables.
-
-
Before deploying the connector, you need to substitute the placeholder for the database hostname with the actual value. On line 14, replace
<REPLACE WITH DATABASE HOSTNAME>
with
globex-db.globex-{user_name}.svc.cluster.localwhich is the internal DNS name of the Globex retail application database.
-
You can deploy the connector to the OpenShift cluster directly from Dev Spaces. To do so, click on the
 icon on the top of the left menu, and select Terminal/New Terminal from the drop-down menu.
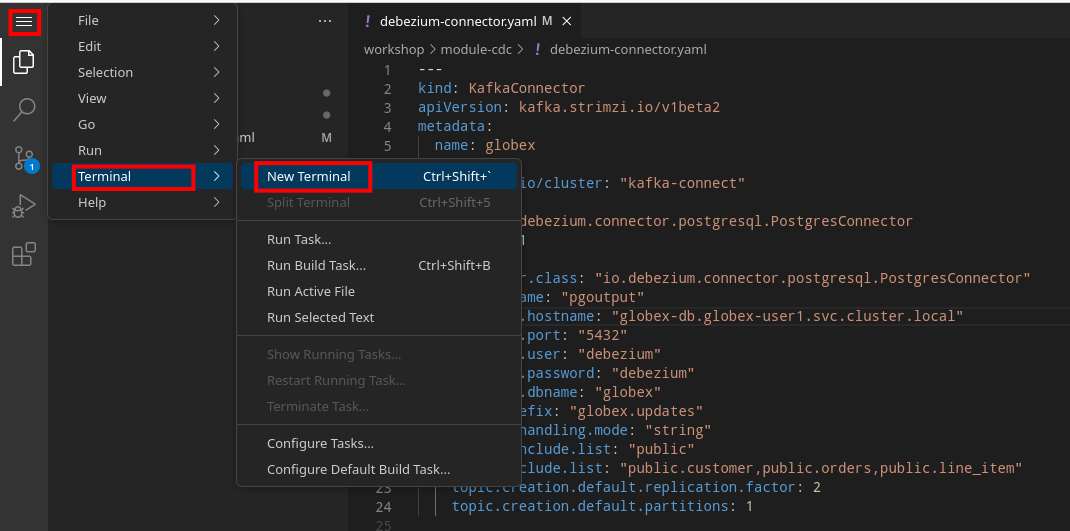
-
This opens a terminal in the bottom half of the workspace.
-
The OpenShift Dev Spaces environment has access to a plethora of command line tools, including oc, the OpenShift command line interface. Through OpenShift Dev Spaces you are automatically logged in into the OpenShift cluster. You can verify this with the command oc whoami.
oc whoamiOutput{user_name}If the output of the
oc whoamicommand does not correspond to your username ({user_name}), you need to logout and login again with the correct username.oc logout oc login -u {user_name} -p {user_password} {openshift_api_internal} -
Deploy the Debezium connector by copying the following command to the terminal:
oc apply -f workshop/module-cdc/debezium-connector.yaml -n globex-cdc-{user_name}Outputkafkaconnector.kafka.strimzi.io/globex created
-
After a few seconds, the Debezium connector will start monitoring the PostgreSQL database for changes in the customer, orders and line_item tables, and will produce a change event to the corresponding Kafka topic for each change detected.
-
One way to verify that the connector is working as expected is to check the Kafka topics that receive the change events.
If you still have a browser tab pointing to streams for Apache Kafka Console, open the tab. If not, navigate to streams for Apache Kafka console.-
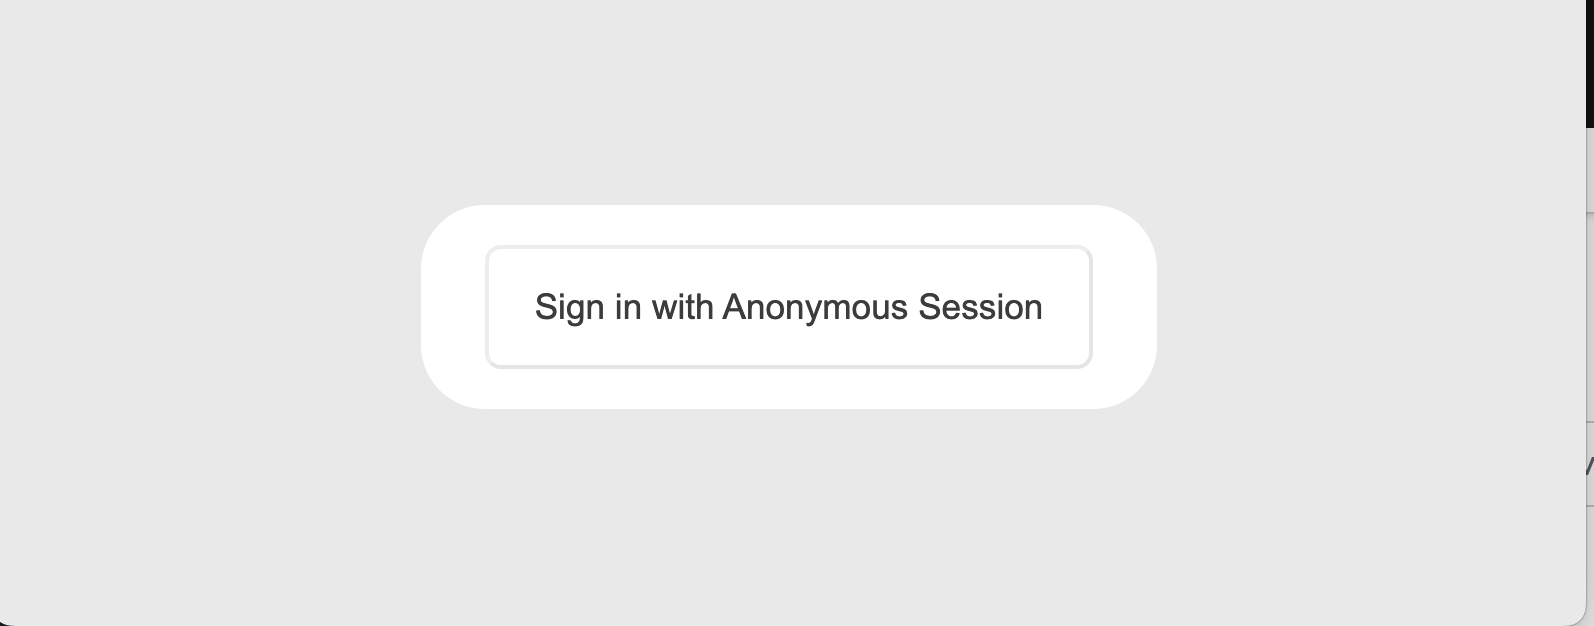
This redirects you to the streams for Apache Kafka console login page.
-
For the purpose of this workshop, choose Click to login anonymously to access the console if you are not already signed in.
-
-
Navigate to Topics menu on the left hand side.
Filter the topics by Name by the term
globex.updates. You will see the three topics that will receive the change events.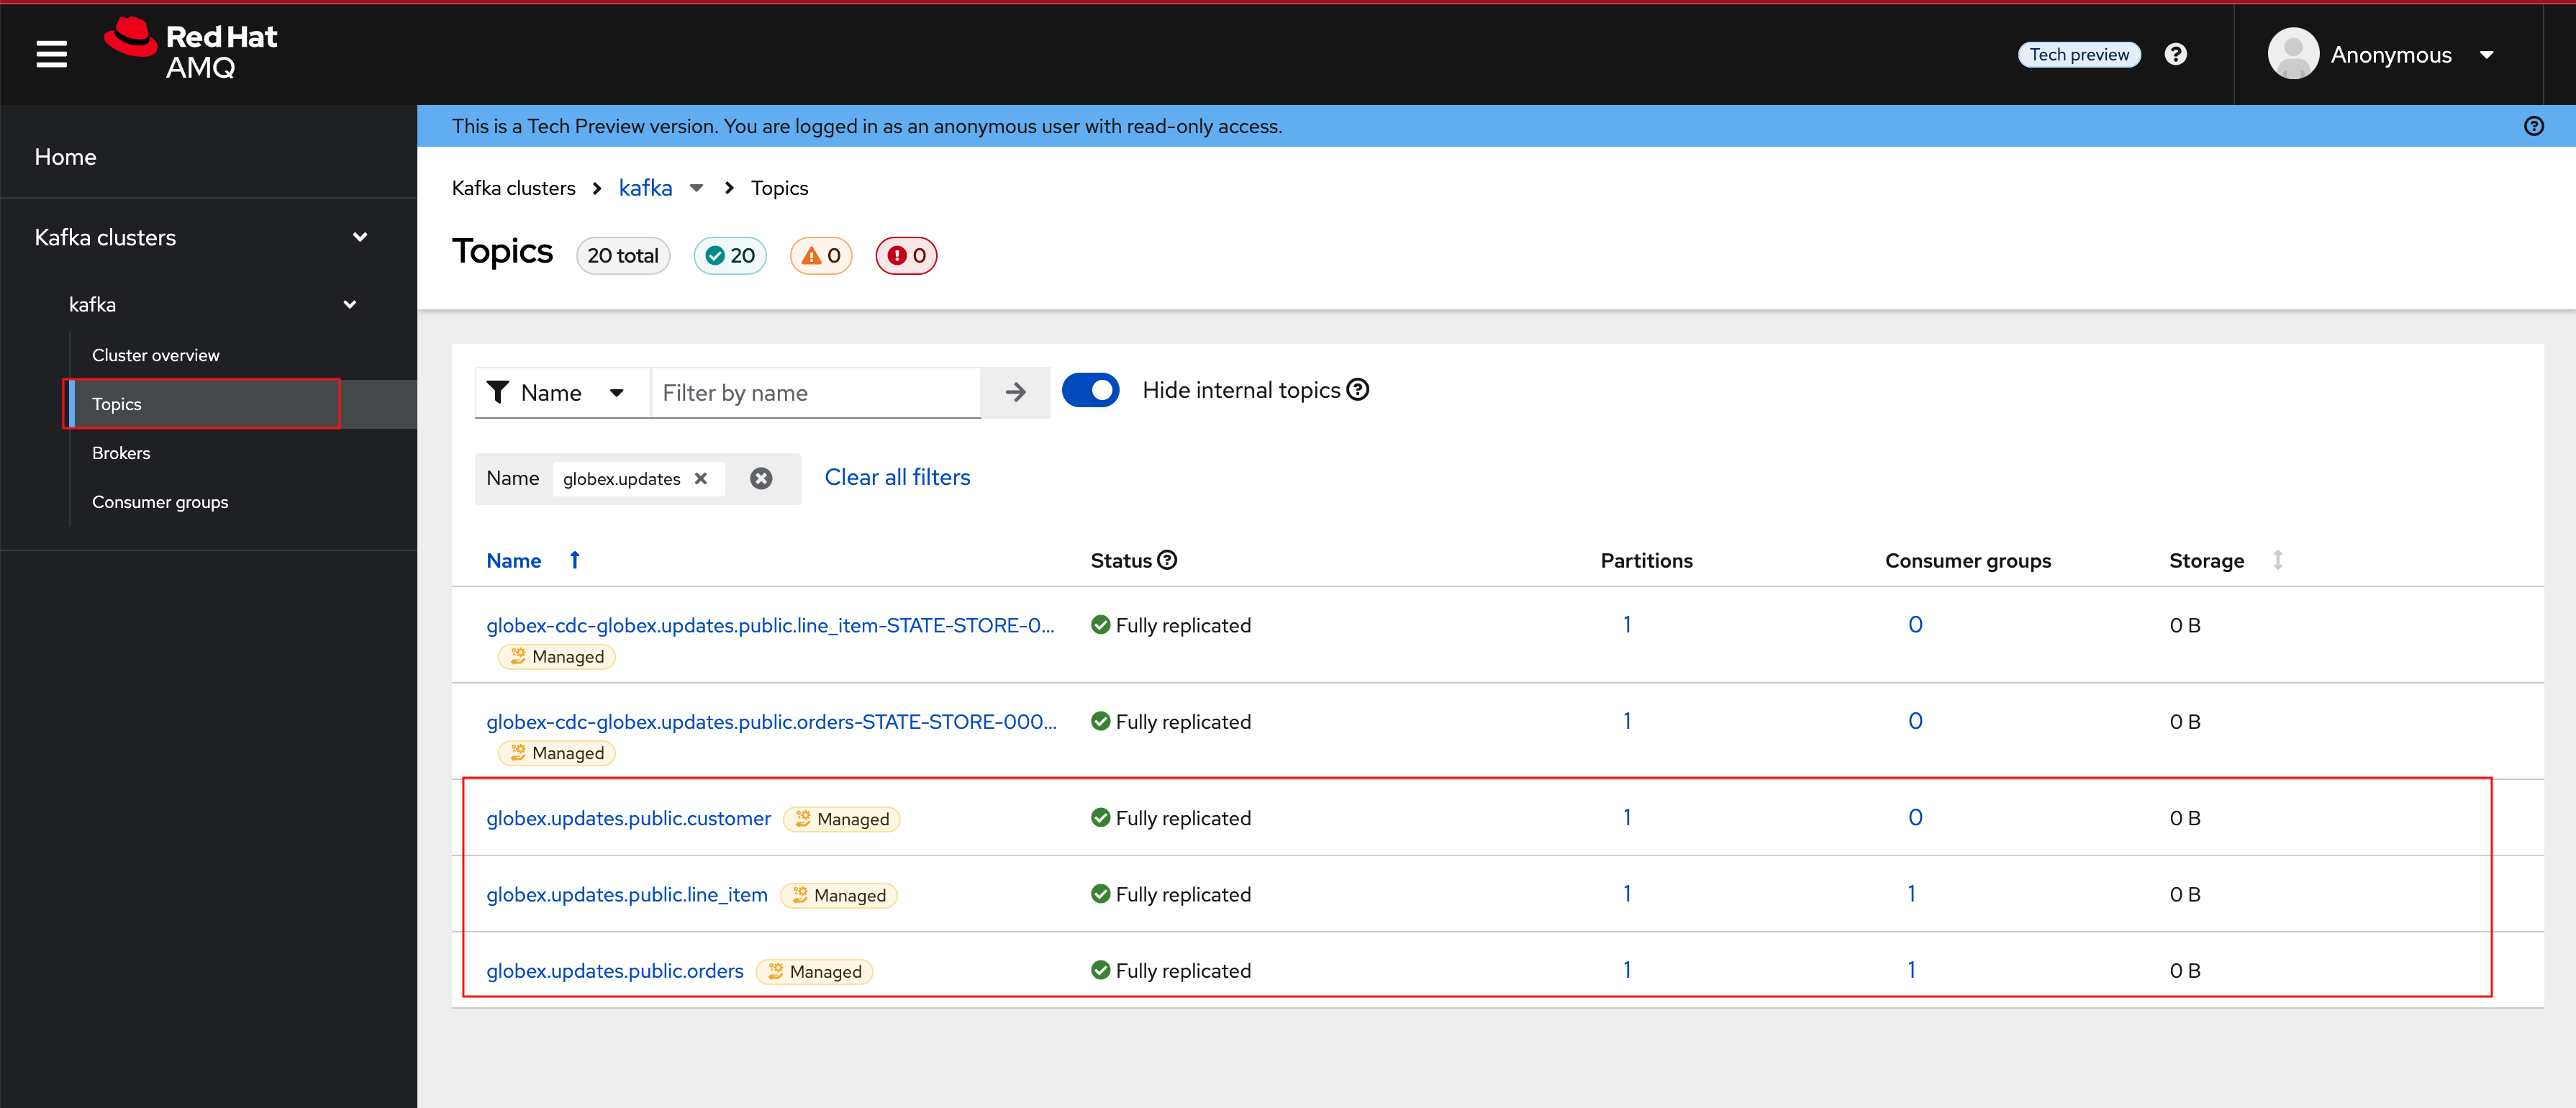
-
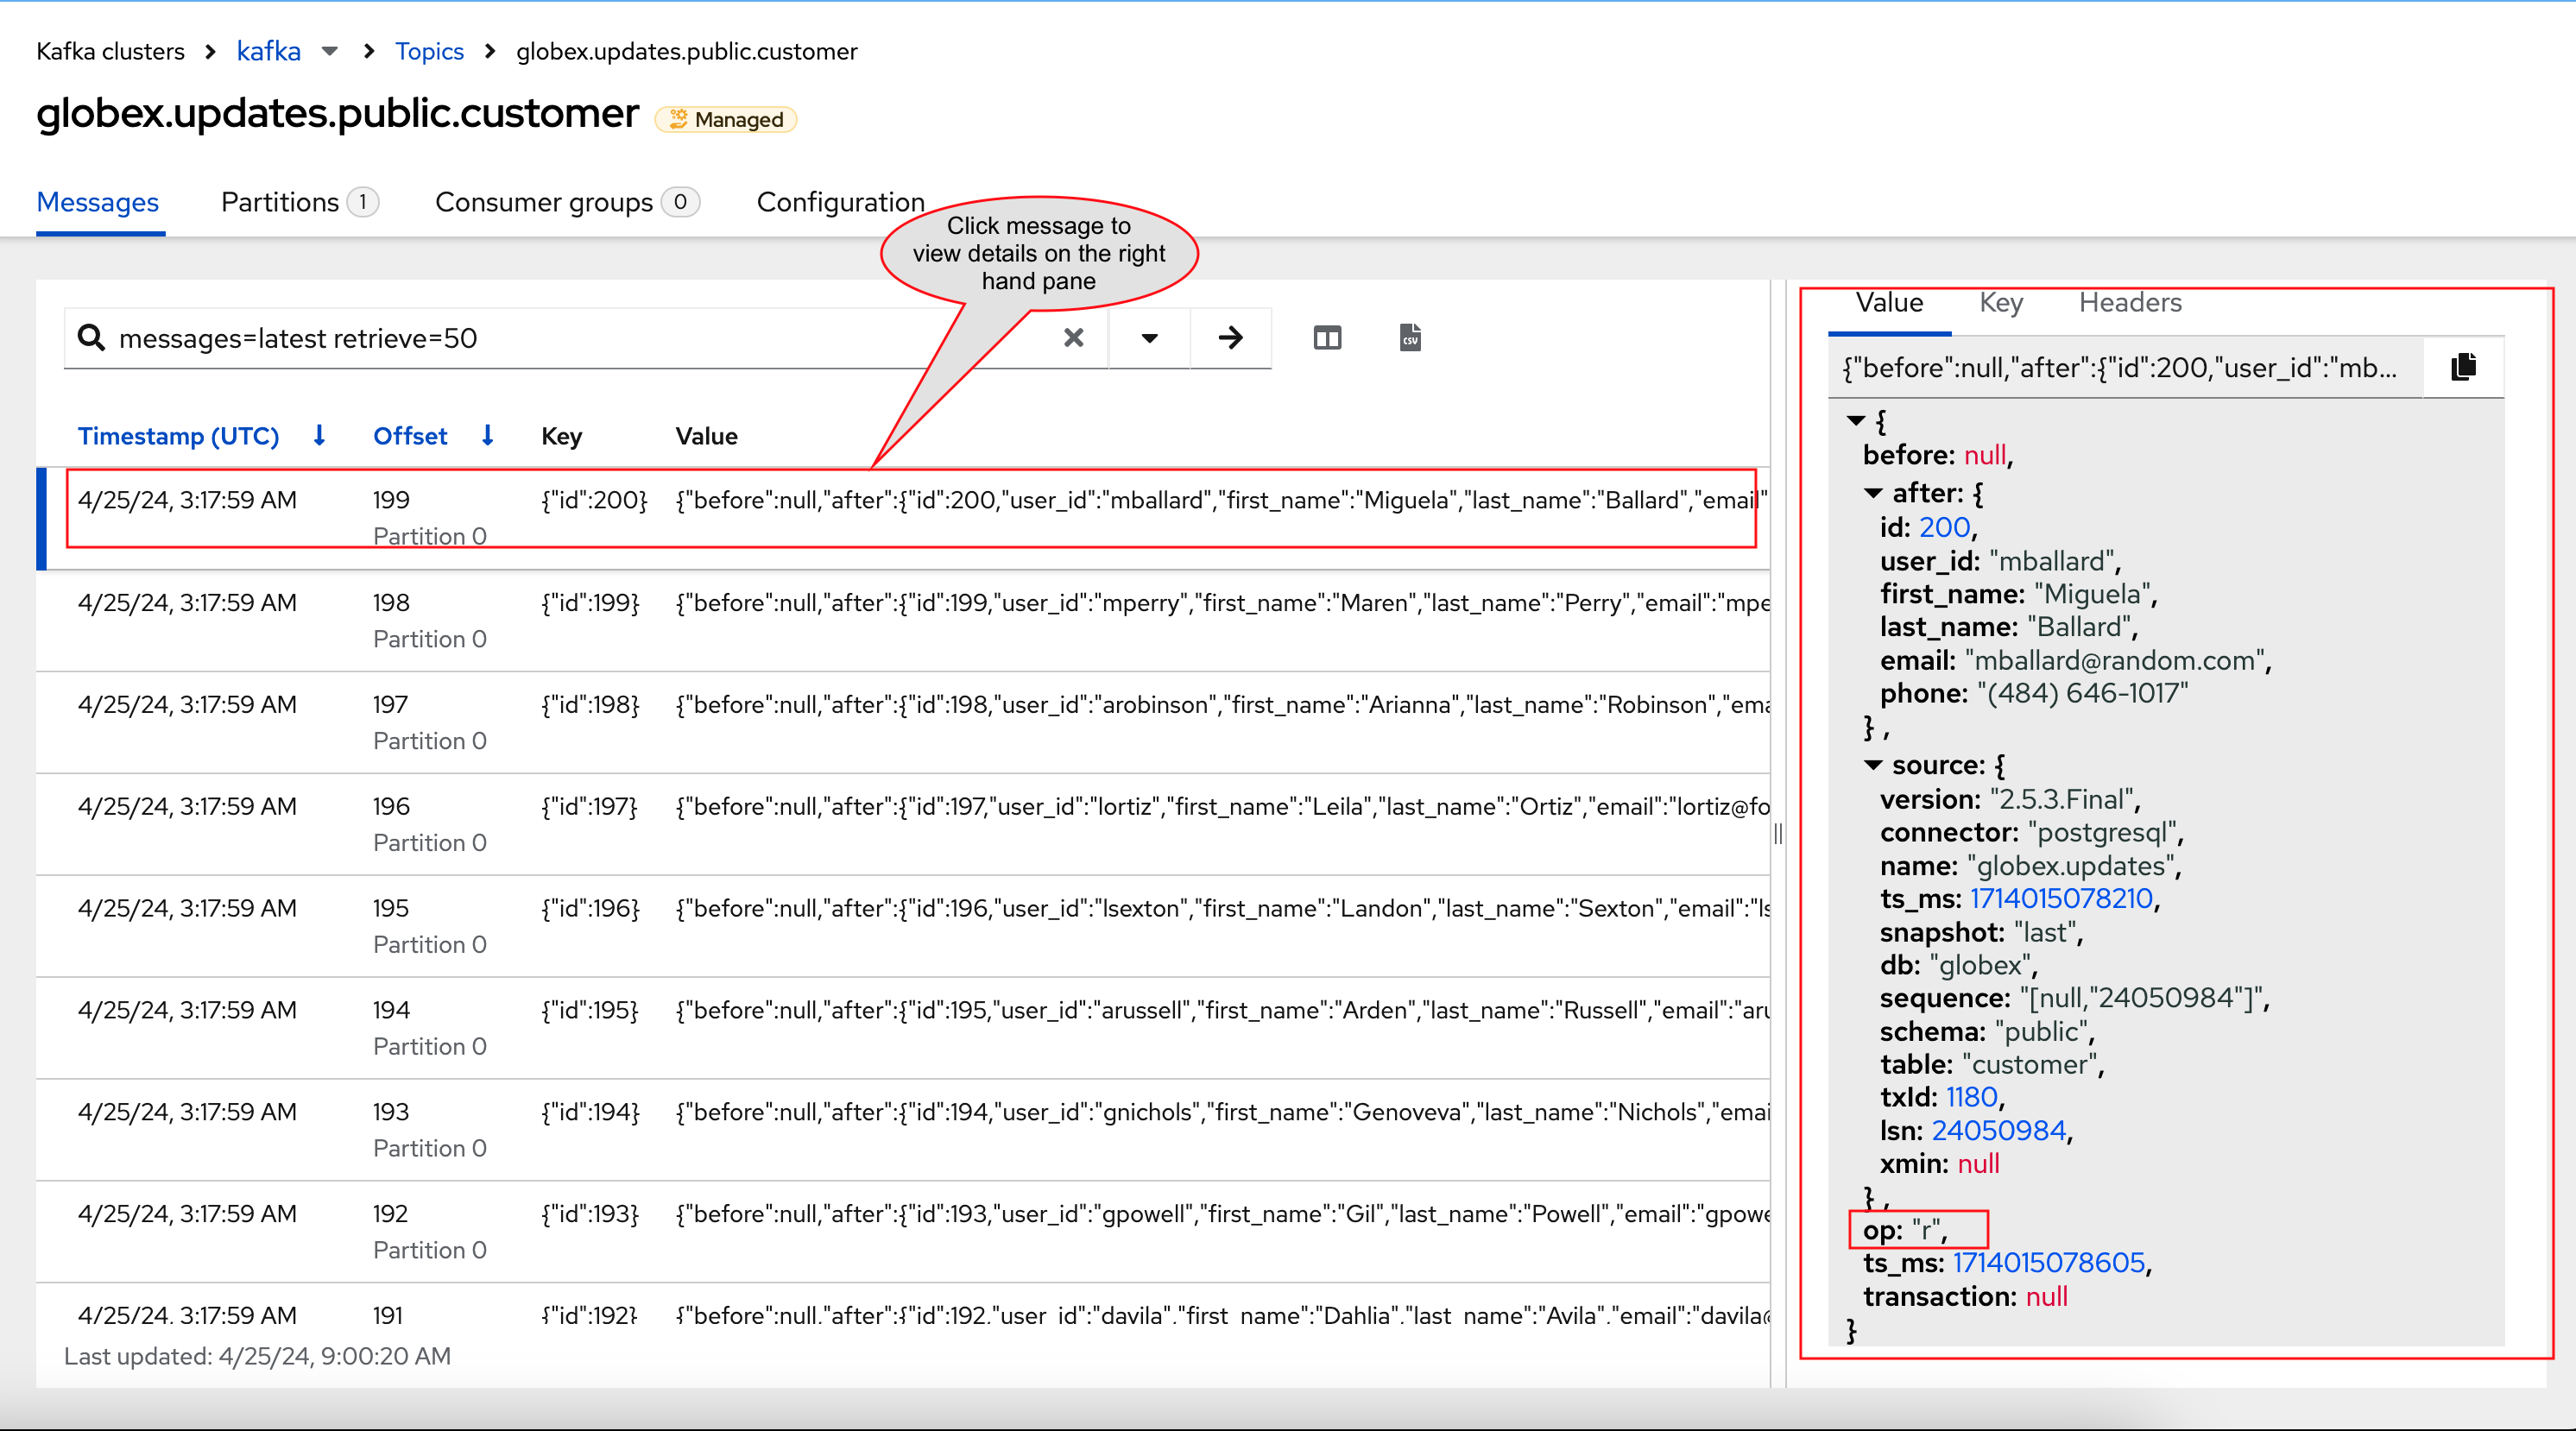
The Globex application database contains records for a couple of hundred customers in the customer table, so we can expect a change event for each of these records. In the streams for Apache Kafka console’s topics page, click on the globex.updates.public.customer topic. This opens a view with details on the topic. Notice that the Offset of the topmost (latest) message is 199, which corresponds to the number of records in the customer table.
Note: that Offsets start at 0. An Offset of 199 means that there are 200 messages in the topic.
-
You can expand every message to inspect its content. In this case, the body of each message consists of a Debezium change event in JSON format. Click on the topmost message to expand it.
-
A Debezium change event has a well-defined structure. Take particular note of the following elements:
-
before: the state of the record before the transaction. As the change events correspond to newly read records, there is no previous state.
-
after: the state of the record after the transaction. This is a JSON representation of the current state of the record in the database (every column in the table becomes a JSON field).
-
op: The operation that leads to the change event. Possible values are 'c' for create, 'u' for update, 'd' for delete and 'r' for read. As the records in the customer already existed when the Debezium connector was deployed, the operation is 'r'.
-
-
The Globex application database does not contain any order information at the moment, so the globex.updates.public.orders and globex.updates.public.line_item topics are empty. You can verify this through the streams for Apache Kafka console.
In the next section of the workshop, you will create some orders, and verify that the corresponding change events are picked up by Debezium.