Create a link between the two namespaces
1. Redeem Access Token from database namespace
-
In the terminal, run the following command to redeem the Access Token created in the previous exercise.
skupper token redeem globex -n globex-skupper-db-{user_name}OutputWaiting for token status ... Token "globex-skupper-user2-xxxx-xxx-xxx-xxx-xxxx" has been redeemed -
If you want to have a look at the token that was created:
cat globexOutputapiVersion: skupper.io/v2alpha1 kind: AccessToken metadata: name: globex-skupper-user-xxx-xxx-xxx-xxx-xxx spec: ca: | -----BEGIN CERTIFICATE----- MIIDNjCCAh6gAwIBAgIQQQirq37EFa4gtXHFbEOboDANBgkqhkiG9w0BAQsFADAf MR0wGwYDVQQDExRTa3VwcGVyR3JhbnRTZXJ2ZXJDQTAeFw0yNTA5MTcxNDQ1NDha ... 5rvogsGrm2go1/z21Updj8S/hR08IIZDBjIo7Rl62aPLvfz7x+phLBE3qj6I5MGs y2+Bscmh6cP83A== -----END CERTIFICATE----- code: xxxxxxxxxxxxxxxxxx linkCost: 1 url: https://skupper-grant-server-https-openshift-operators.apps.cluster-xxx.xxx.sandboxxxx.opentlc.com:443/xxx-xxx-xxx-8f2b-xxxThis is actually an OpenShift secret which contains a certificate. This certificate will be used to setup a mTLS (mutual TLS) secured link between the two namespaces.
-
Since the token is now redeemed, let us check the status of the link. The Status should show Ready.
It may take a few seconds for the link to be established and show as Ready. skupper -n globex-skupper-db-{user_name} link statusOutputNAME STATUS COST MESSAGE globex-skupper-user-xxx-xxx-xxx-xxx-xxx Ready 1 OK
2. Verify the link setup
You have established a secure link between the two namespaces, and exposed the globex-db service in the isolated namespace as a proxy service in the globex-skupper-{user_name} namespace.
There a couple of ways to verify this:
-
In the OpenShift terminal, use
octo get the services deployed in theglobex-skupper-{user_name}namespace:oc get service -n globex-skupper-{user_name}OutputNAME TYPE CLUSTER-IP EXTERNAL-IP PORT(S) AGE globex-db ClusterIP 172.30.7.2015432/TCP 7m59s globex-store-app ClusterIP 172.30.7.222 8080/TCP 139m globex-web ClusterIP 172.30.211.175 8080/TCP 139m skupper-network-observer ClusterIP 172.30.221.175 443/TCP 82m skupper-router ClusterIP 172.30.194.178 55671/TCP,45671/TCP 14m skupper-router-local ClusterIP 172.30.113.170 5671/TCP 14m workspaceab32f4ac6d734ae6-service ClusterIP 172.30.18.191 4444/TCP 133m The
globex-dbservice is the proxy service created by exposing theglobex-dbdeployment in the isolated namespace over the service network. -
You can also check out the
globex-dbservice through the OpenShift console. Navigate to the browser tab pointing to the Developer perspective of the OpenShift console. Make sure to select the globex-skupper-{user_name} namespace from the drop-down box at the top.
On the left menu, select Project, and in the Inventory list click on Services.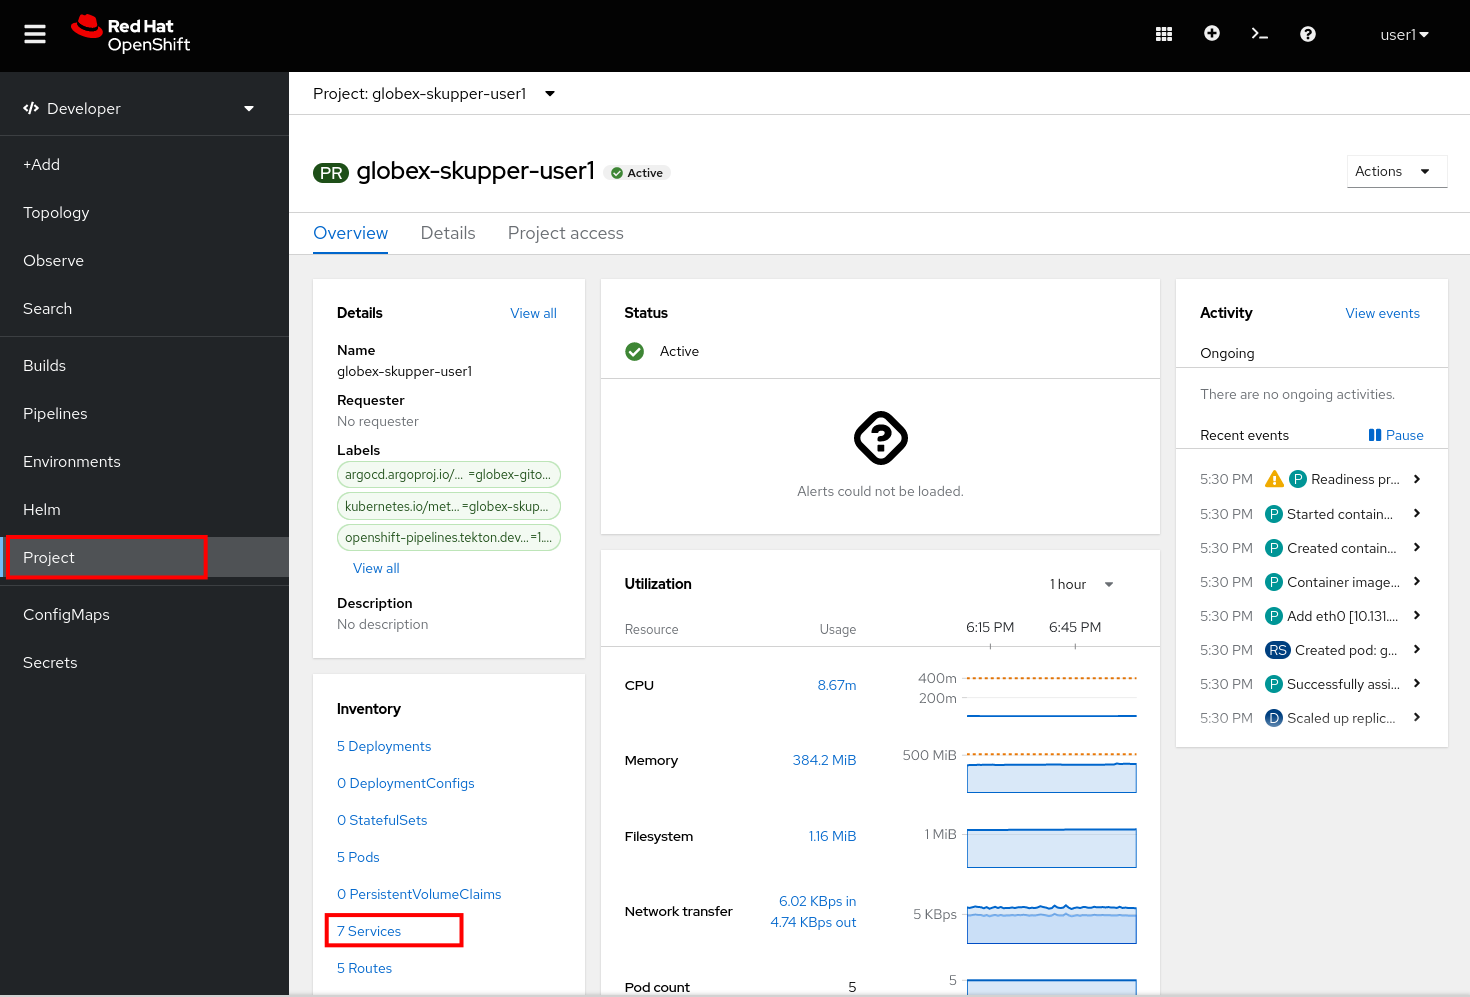
-
This opens the list of Service resources in the namespace. Notice the globex-db service.
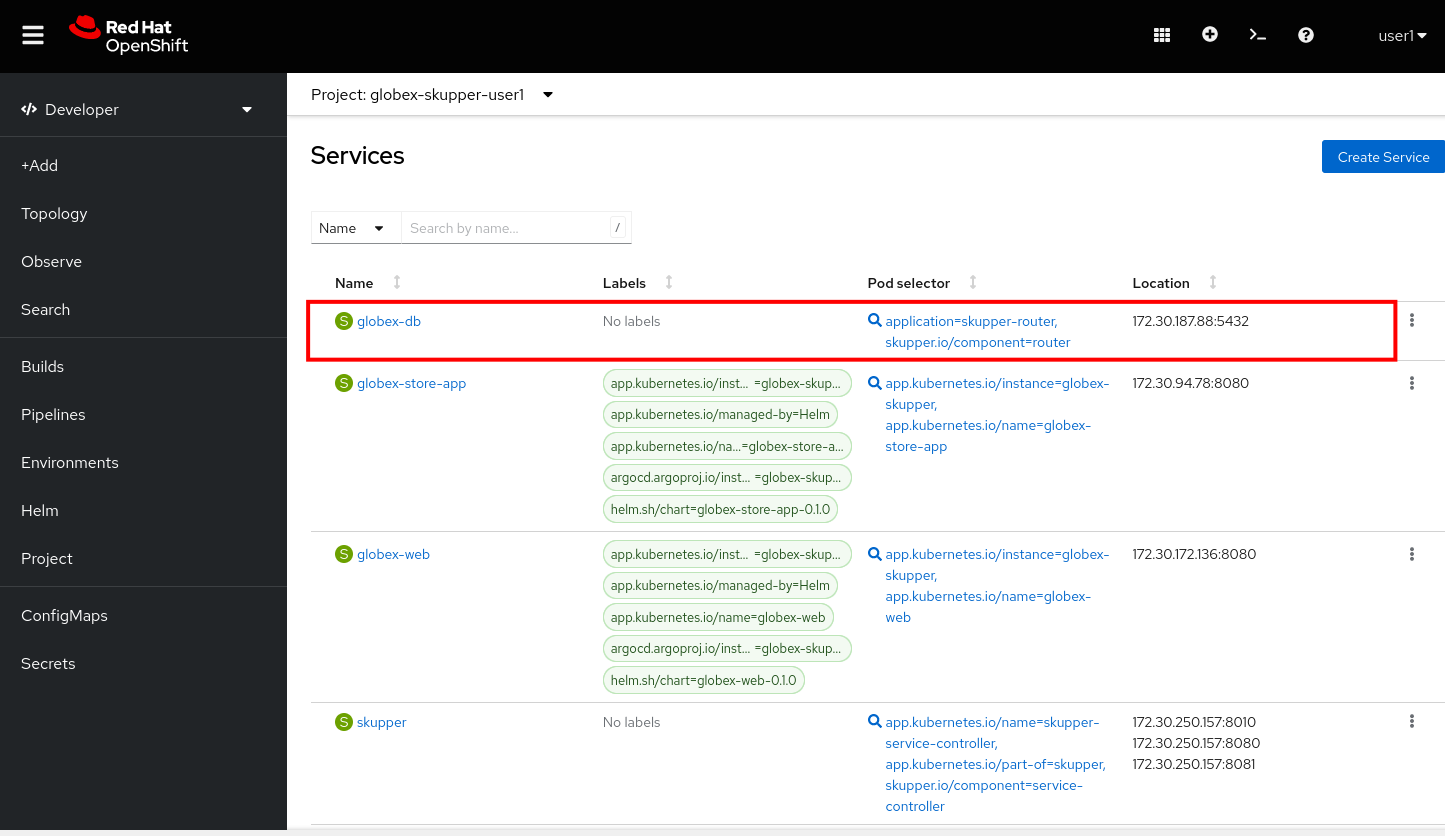
The Pod Selector indicates that this service is pointing to the Skupper router pod, which forwards the communication over the secure link to the real database service on the isolated namespace.
-
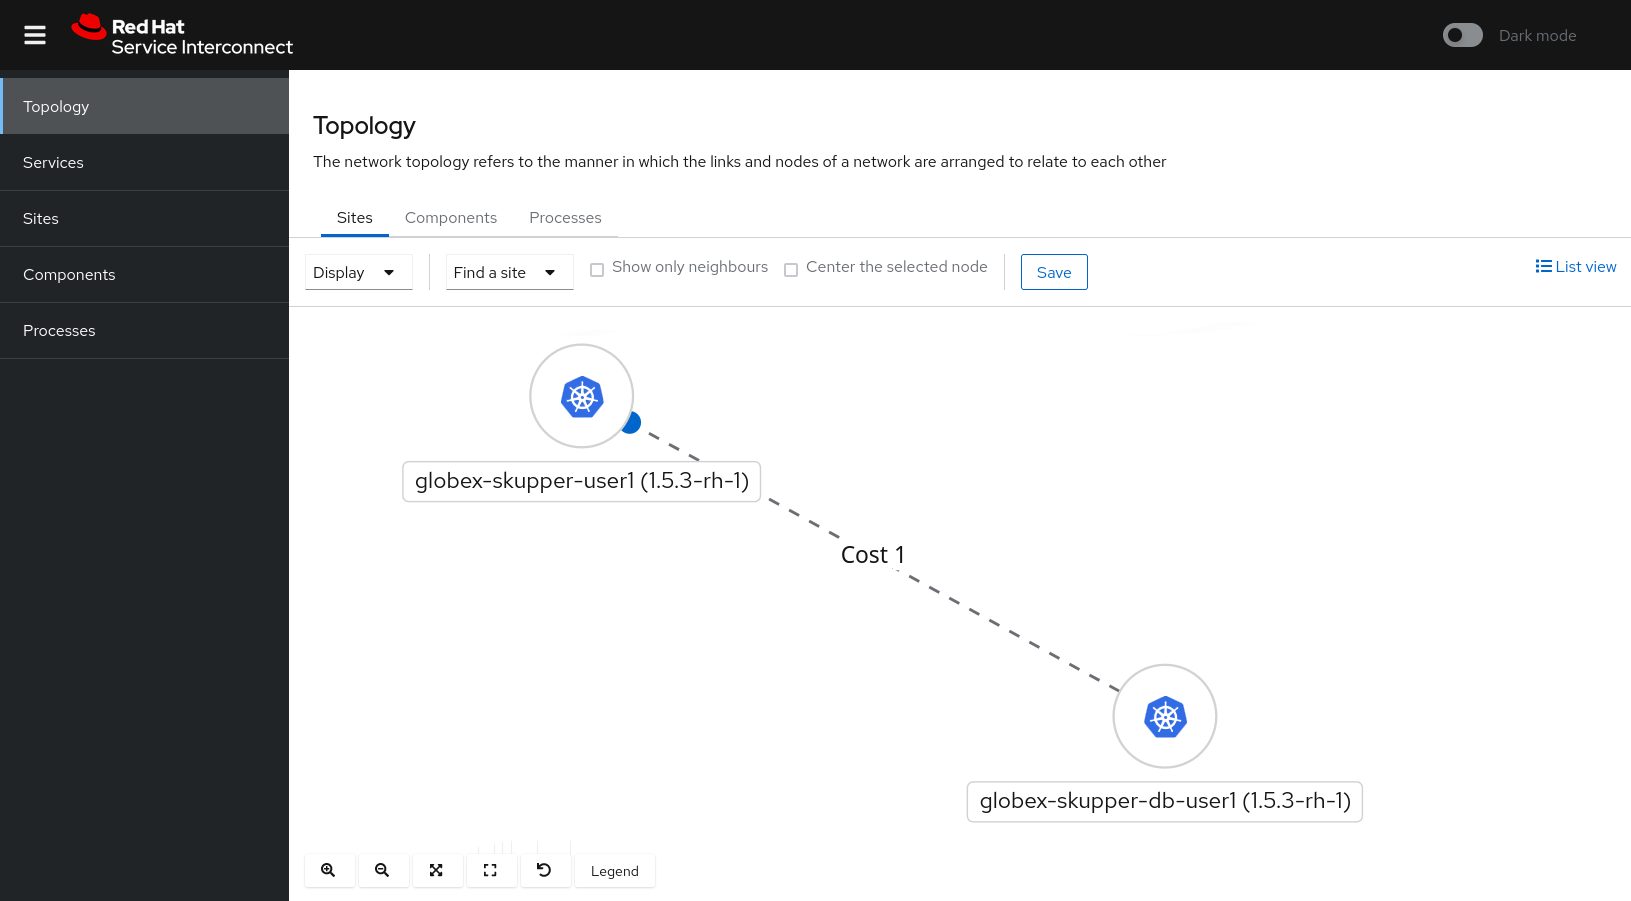
Finally, you can check the Service Interconnect Network Console. In the Topology section you’ll see a graphical representation of the Service InterConnect network.
The Sites tab shows the connected namespaces,globex-skupper-db-{user_name}andglobex-skupper-{user_name}.