Setup Service Interconnect on Globex Web App namespace
You can set up Virtual Application Networks with Red Hat Service Interconnect by either using the command line interface or the OpenShift operator. In this exercise, you will use the command line interface (CLI) to setup the secure connection. You could also use automation tools such as Ansible to automate the creation of the Virtual Application Network on both sides.
The skupper cli is available through the OpenShift Command Line terminal, so that you don’t have to install it locally on your workstation.
|
1. Explore the workshop environment
-
Navigate to the OpenShift Console at {openshift_cluster_console}[OpenShift console, window="console"]. Click on the
 icon on the top menu to open a terminal window.
Make sure to select the correct namespace from the drop-down box (globex-skupper-{user_name}) 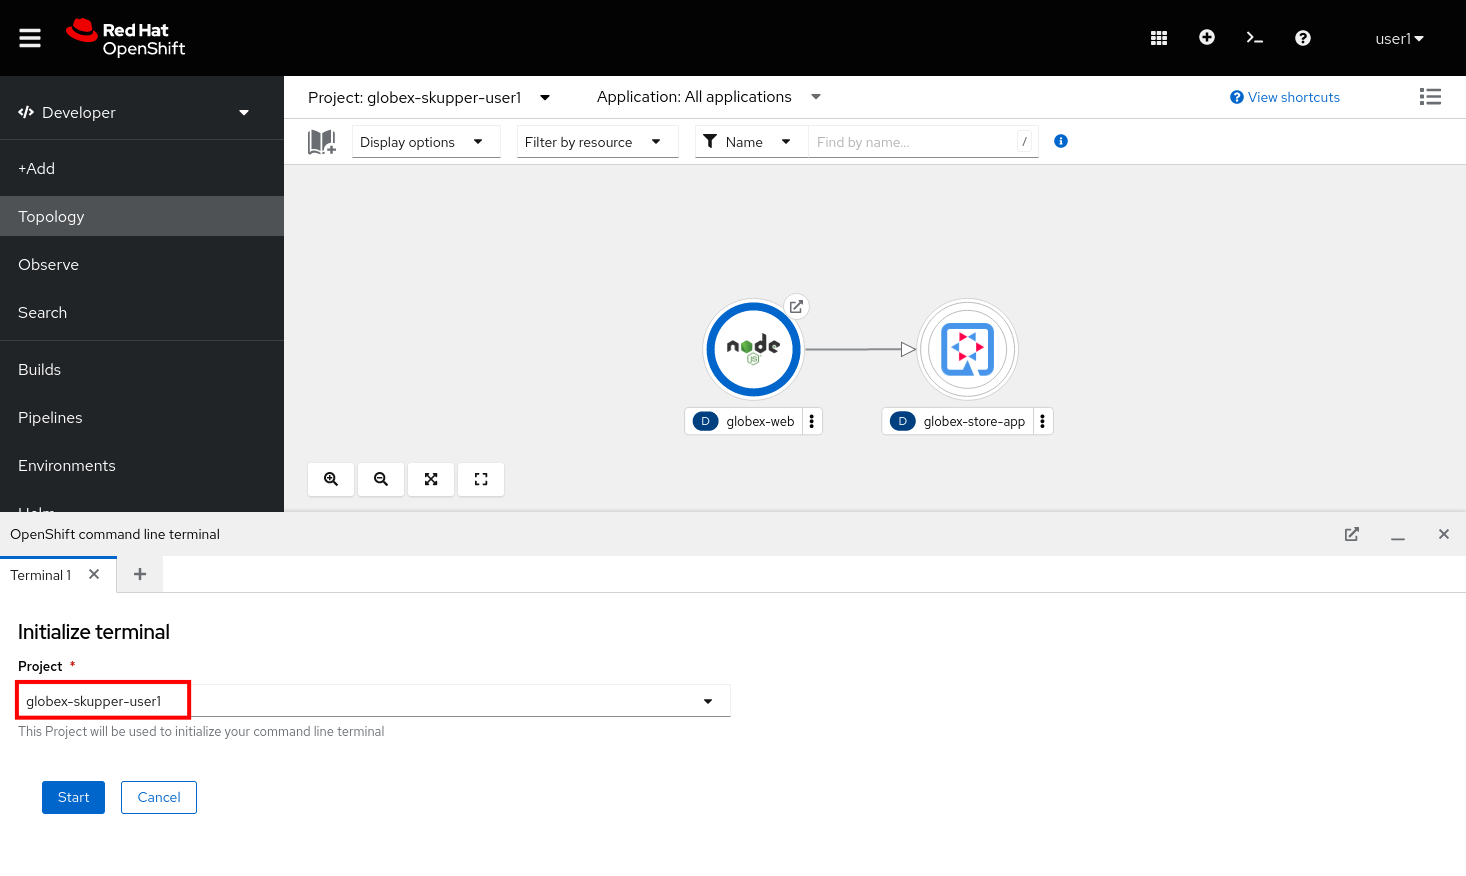
-
Click Start to start and open the terminal. (make sure to select the globex-skupper-{user_name} namespace in the project dropdown box).
-
After a couple of seconds, the terminal is up and running. Also note the terminal deployment in the topology view
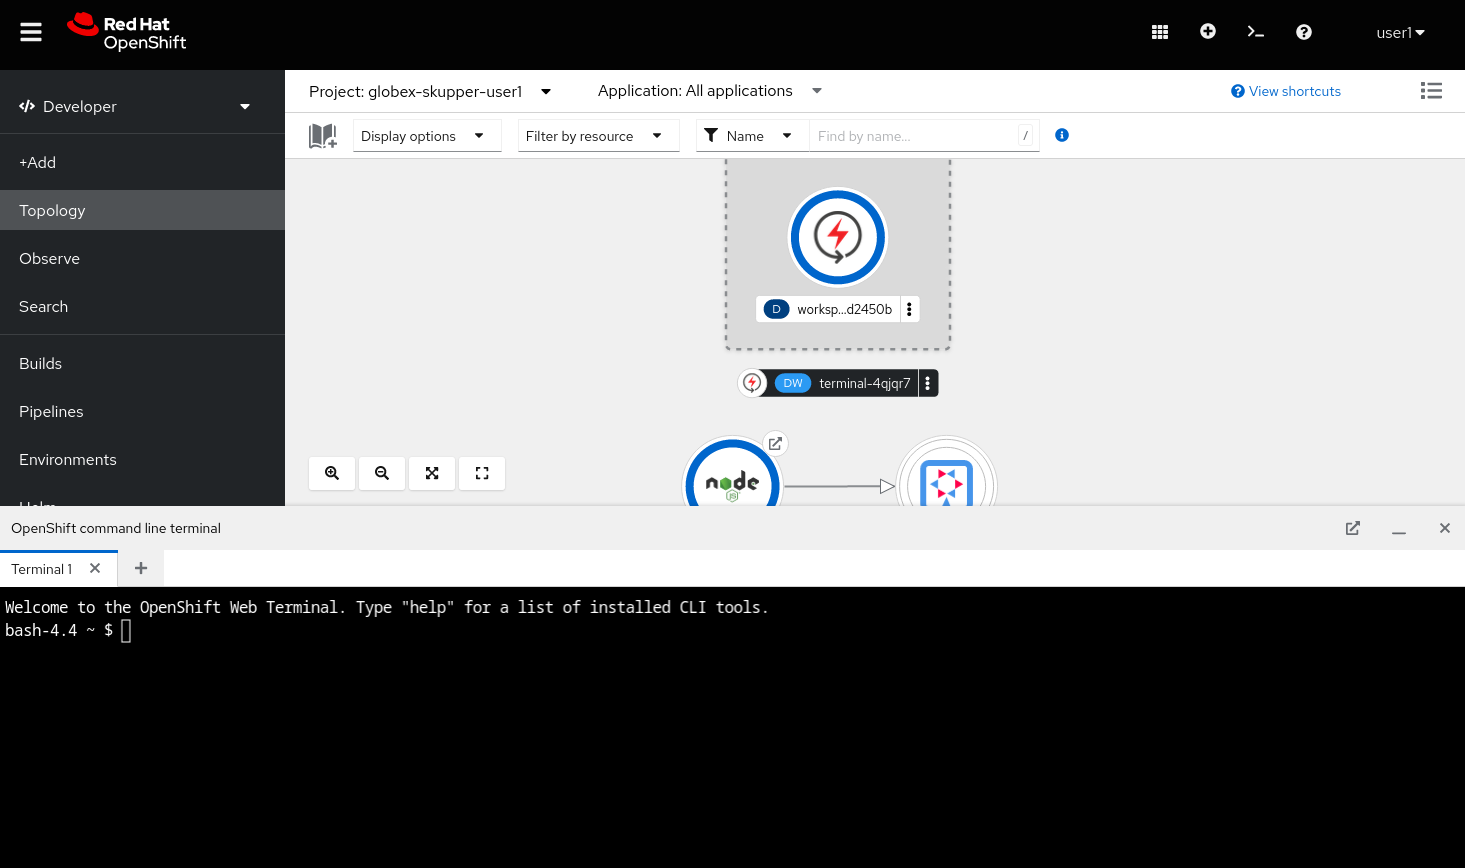
If you prefer, you can maximize the terminal in a new browser tab by clicking on the
 icon.
icon. -
In the terminal, check that you are logged in into the OpenShift cluster.
oc whoamiOutput{user_name} -
Check that the
skupperCLI is available in the terminal:skupper versionOutputCOMPONENT VERSION router 3.4.0 controller 2.1.1 network-observer 2.1.1 cli 2.1.1 prometheus v2.42.0 origin-oauth-proxy 4.14.0
2. Set up a Red Hat Service Interconnect Site
-
In the terminal, run the following command to create a site. This will create a new Service Interconnect site in the globex-skupper-{user_name} namespace.
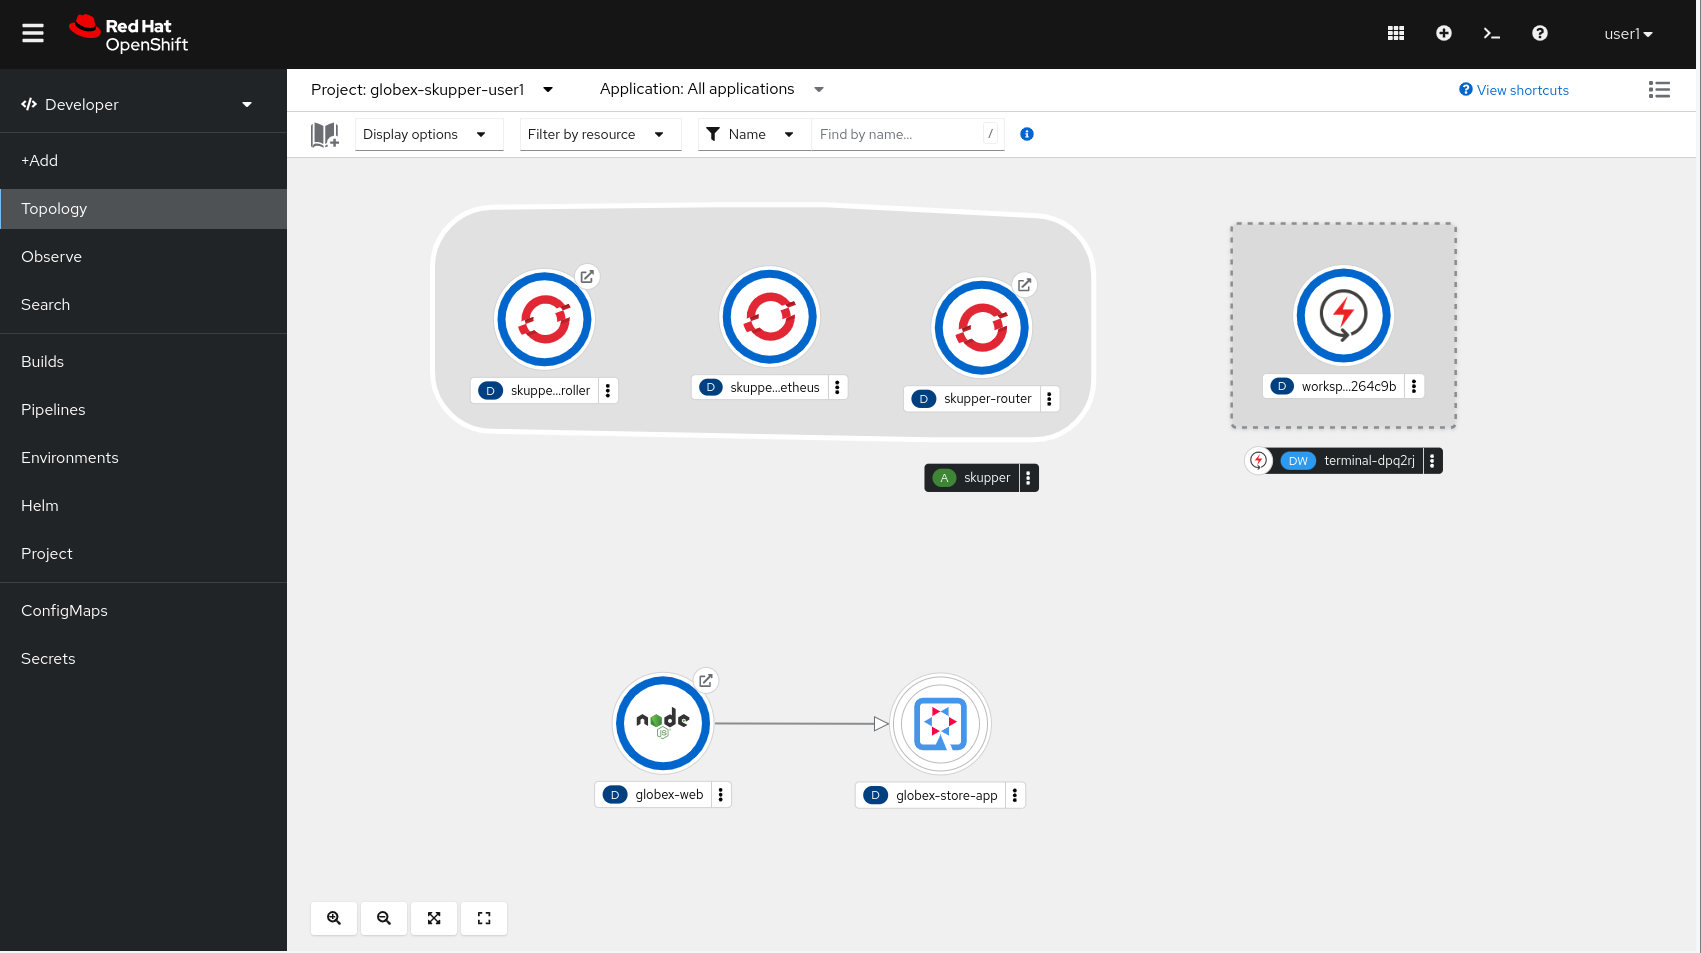
skupper site create globex-skupper-{user_name} -n globex-skupper-{user_name} --enable-link-accessThe --enable-link-accessoption allows the site to issue access tokens and allow other sites to link to it.OutputWaiting for status... Site "globex-skupper-{user_name}" is ready. -
This installs a skupper-router in the namespace, as you can see in the Topology view:
3. Set up a Red Hat Service Interconnect Listener
-
In the terminal, run the following command to create a listener.
skupper listener create globex-db 5432 -n globex-skupper-{user_name}OutputWaiting for create to complete... Listener "globex-db" is configured. -
Run the following command to check the status of the listener.
skupper listener status -n globex-skupper-{user_name}OutputNAME STATUS ROUTING-KEY HOST PORT MATCHING-CONNECTOR MESSAGE globex-db Pending globex-db globex-db 5432 false No matching connectorsThe listener is in Pending state because there are no connectors yet. You will create a connector on the other side of the service network in the next exercise.
4. Create a Red Hat Service Interconnect Access Token
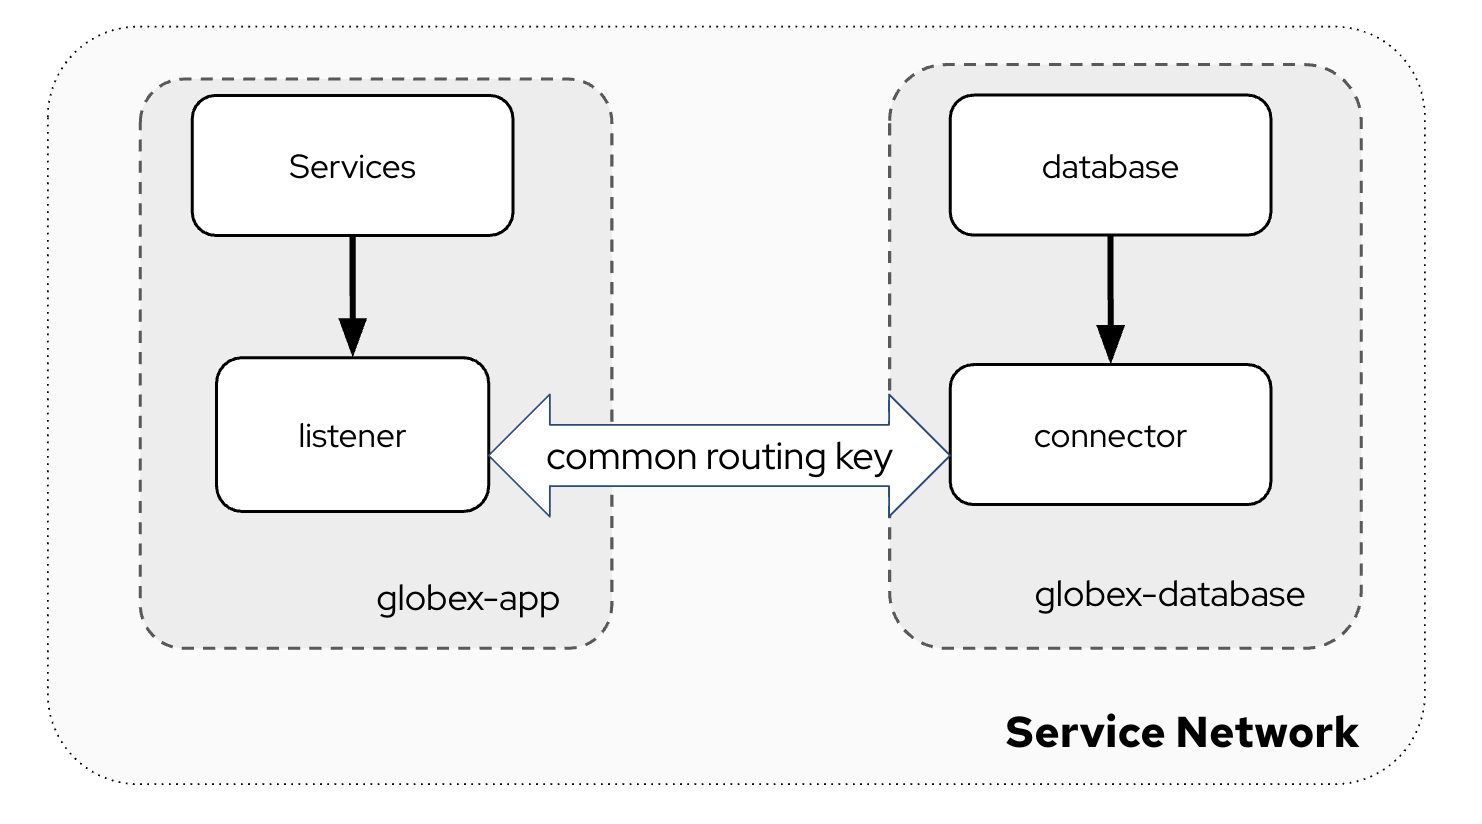
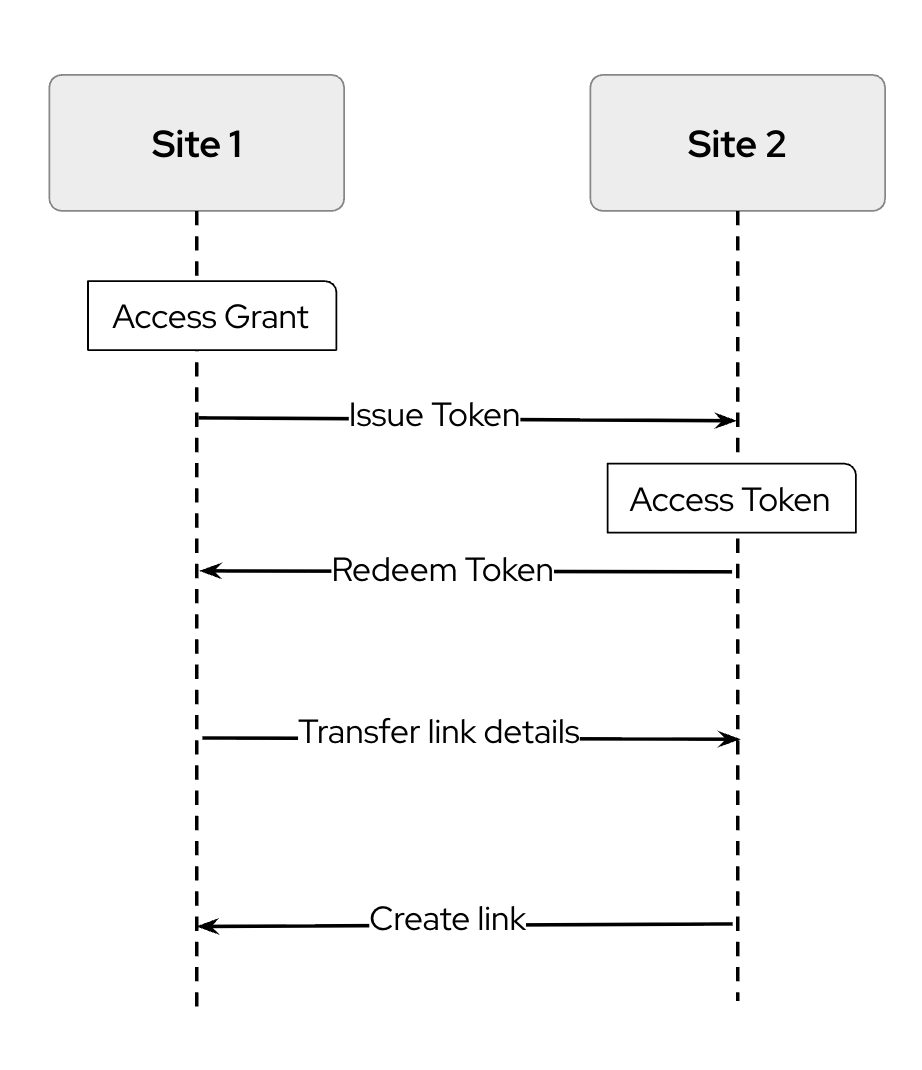
| An access token is a short-lived credential for creating a link between sites. |
| A site (Site 1) wishing to accept a link creates an access grant. It uses the access grant to issue an access token which is transferred to a remote site (site 2). Site 2 submits the access token back to Site 1 for redemption. If the token is valid, Site 1 sends the links details. Site 2 then creates a link to Site 1 - thereby linking the two sites. |
This image explains this concept in more detail.
-
In the terminal, run the following command to issue a token.
skupper token issue globex --expiration-window 60m -n globex-skupper-{user_name}OutputWaiting for token status ... Grant "globex-skupper-user2-d39eeacb-c480-4cdd-ba47-7b1fd40c97c9" is ready Token file globex created ...
5. Deploy the Red Hat Service Interconnect Network Console
-
From the terminal, run the following command to deploy the Red Hat Service Interconnect Network Console.
oc apply -f https://raw.githubusercontent.com/rh-cloud-architecture-workshop/skupper-network-observer/refs/heads/main/network_console_deploy.yaml -n globex-skupper-{user_name}-
You will use this console to visualize the network later. Since it takes a few seconds to initialize, go ahead and deploy it now. While it is getting deployed, proceed to the next steps to save time.
-